

Every time I slice into a piece of this Rich and Creamy Baked Espresso Coffee Cheesecake, it feels like a cozy morning spent at a chic café without ever leaving home. The base is a buttery graham cracker crust with just the right touch of crunch, holding a luxuriously smooth filling that marries the tang of cream cheese with a bold, invigorating shot of espresso. With every bite, you get that unmistakable coffee kick, perfectly balanced by the mellow sweetness of sugar and the gentle tang of sour cream. The flavors swirl together, like a well-rehearsed jazz trio riffing off one another, while subtle notes of vanilla and a whisper of coffee liqueur give it an almost boozy sophistication. If you’ve ever craved a dessert that feels both indulgent and refined, this cheesecake is your new best friend.
A few weekends ago, I decided to surprise my book club with something special. Between lively discussions of plot twists and character motivations, this cheesecake stole the scene. We watched as the edges turned a light golden brown in the oven, then anxiously checked the center for that perfect jiggle before cooling it down to set. Once it had chilled overnight, each of us took a slow, appreciating bite—eyes closed, murmurs of delight all around. That moment reminded me why I love baking: it’s about crafting memories over the simplest, most comforting pleasures. Whether you’re serving this at a celebration or indulging in a quiet slice for yourself, get ready for a dessert that brings warmth, depth, and a serious caffeine rush—all wrapped up in creamy, dreamy cheesecake.
KEY INGREDIENTS IN RICH AND CREAMY BAKED ESPRESSO COFFEE CHEESECAKE
Before diving into the kitchen, it’s important to gather quality ingredients that will elevate every layer of this espresso-infused masterpiece. Each element plays a vital role: from the sturdy crust that supports the filling to the little pinch of salt that makes all the flavors pop. Using the freshest cream cheese, real espresso powder, and top-notch dairy ensures your cheesecake bakes up with that silky texture and deep coffee aroma that everyone will rave about.
- Graham cracker crumbs: Forms a crisp, sweet foundation for the crust, providing texture that contrasts beautifully with the velvety filling.
- Unsalted butter: Binds the crumbs together and adds richness without overpowering sweetness, creating a sturdy and flavorful crust.
- Cream cheese: The star of the show, delivering that signature creamy, tangy base that makes every cheesecake unforgettable.
- Granulated sugar: Sweetens the filling evenly and helps achieve a smooth, luscious texture as it dissolves into the cream cheese.
- Sour cream: Adds a gentle tang and silkiness, lightening the overall mouthfeel and preventing the cheesecake from becoming too dense.
- Vanilla extract: Offers a warm, aromatic backdrop that enhances both the cream cheese and coffee notes.
- Eggs: Provide structure and stability as they bind the filling, ensuring it sets properly while remaining slightly jiggly in the center.
- Instant espresso powder: Delivers an intense, pure coffee flavor without extra liquid, giving the cheesecake its bold espresso punch.
- Hot water: Activates and dissolves the espresso powder, ensuring the coffee taste is fully incorporated into the batter.
- Heavy cream: Boosts richness and contributes to a smooth, decadent mouthfeel that feels luxurious on the palate.
- All-purpose flour: Adds just enough structure to keep the cheesecake stable and prevent cracks, while remaining virtually undetectable in flavor.
- Coffee liqueur: Optional but highly recommended for extra depth and subtle boozy warmth in every bite.
- Salt: Balances sweetness and intensifies flavors, coaxing out the best in both the coffee and cream cheese.
HOW TO MAKE RICH AND CREAMY BAKED ESPRESSO COFFEE CHEESECAKE
Now that your ingredients are laid out, let’s transform them into a stunning cheesecake that hits all the right notes—crispy crust, silky filling, and a perfect espresso boost. Follow these detailed steps for a foolproof bake.
1. Preheat your oven to 325°F (160°C). Grease a 9-inch springform pan or line the bottom with parchment paper to ensure a clean release after baking.
2. In a medium bowl, combine the graham cracker crumbs and melted butter. Press the mixture firmly into the bottom of the prepared pan to form the crust. Place the pan in the refrigerator to let the crust set while you prepare the filling.
3. In a large mixing bowl, beat the softened cream cheese and granulated sugar until smooth and free of lumps, using an electric hand mixer or stand mixer on medium speed.
4. Add the sour cream and vanilla extract, mixing on low until fully incorporated and the batter looks glossy.
5. Beat in the eggs one at a time, ensuring each egg is fully mixed in before adding the next, which helps maintain a uniform texture and prevents over-whipping.
6. In a small bowl, dissolve the instant espresso powder in the hot water. Pour this mixture into the cream cheese batter, then add the heavy cream, all-purpose flour, coffee liqueur (if using), and a pinch of salt. Mix gently until just combined, being careful not to introduce too much air.
7. Pour the rich espresso-infused filling over the chilled crust in the springform pan, smoothing the top with a spatula.
8. Bake in the preheated oven for 50–60 minutes, or until the center is set but still slightly jiggly. The edges should take on a light golden hue.
9. Turn off the oven, crack the door slightly, and let the cheesecake cool inside for about 1 hour to prevent sudden temperature changes that can cause cracks.
10. Remove the cheesecake from the oven and allow it to cool completely at room temperature. Then refrigerate for at least 4 hours—or overnight for the best results—to let the flavors meld and the texture fully set.
11. Before serving, carefully remove the sides of the springform pan. Garnish with chocolate shavings, a dusting of cocoa powder, or your favorite toppings for an extra touch of elegance.
SERVING SUGGESTIONS FOR RICH AND CREAMY BAKED ESPRESSO COFFEE CHEESECAKE
When it’s finally time to unveil your masterpiece, transforming each slice into an experience makes all the difference. Whether you’re aiming for a stunning presentation or a cozy coffee-and-dessert moment, these serving ideas will bring out the best in every bite.
- Serve chilled slices on elegant dessert plates, garnished with a swirl of whipped cream and a couple of coffee beans for a café-worthy look.
- Drizzle a homemade espresso reduction or a ribbon of salted caramel over the top to enhance the coffee flavor and add a sweet-salty surprise.
- Pair each slice with a small glass of cold brew or a steaming espresso shot to double down on that rich coffee experience—perfect for brunch or after-dinner indulgence.
- Arrange fresh berries (strawberries, raspberries, or blueberries) around the plate for a burst of color and bright acidity that cuts through the richness of the cheesecake.
HOW TO STORE RICH AND CREAMY BAKED ESPRESSO COFFEE CHEESECAKE
Proper storage is key to preserving the decadent texture and bold flavors of your espresso coffee cheesecake. Whether you need to keep it fresh for a few days or stash it away for a special occasion, following these guidelines will ensure every slice tastes just as amazing as the day you baked it.
- Wrap leftovers tightly with plastic wrap or aluminum foil to keep out moisture and prevent the cheesecake from absorbing any fridge odors. Store in the coldest part of your refrigerator for up to 5 days.
- Place slices in an airtight container, separating each layer with a piece of parchment paper to avoid sticking. This method maintains the perfect cheesecake consistency and simplifies grab-and-go dessert service.
- For longer storage, freeze the cheesecake: first, chill it completely, then wrap the whole cake (or individual slices) in two layers of plastic wrap, followed by a layer of foil. Freeze for up to 3 months. Thaw overnight in the refrigerator before serving.
- If you choose to use a water bath (bain-marie) when baking, carefully dry the cheesecake after removing it from the oven and cool completely. This extra step helps maintain a moist interior without sogginess, allowing leftovers to stay creamy.
CONCLUSION
I hope this journey through making the ultimate Rich and Creamy Baked Espresso Coffee Cheesecake has inspired you to put on your apron and get baking. From crafting that buttery graham cracker base to whisking in just the right amount of espresso for a bold coffee kick, each step is designed to deliver a dessert that feels both indulgent and approachable. The hints of sour cream, vanilla, and optional coffee liqueur elevate the flavor profile, while the careful cooling process ensures a perfectly smooth, crack-free finish. Whether you’re sharing this cheesecake at a family gathering, surprising your book club, or treating yourself to a midweek pick-me-up, the end result will be a slice of pure bliss that keeps everyone reaching for seconds.
Feel free to print out this article and save it for later so you can recreate this crowd-pleaser whenever the mood strikes. You’ll also find a FAQ section below to answer any lingering questions about ingredient swaps, troubleshooting tips, or variations you might want to explore. I’d love to hear how your cheesecake turns out—drop a comment if you have questions, share your favorite garnish, or let me know about any tweaks you’ve made to make this recipe your own. Happy baking!
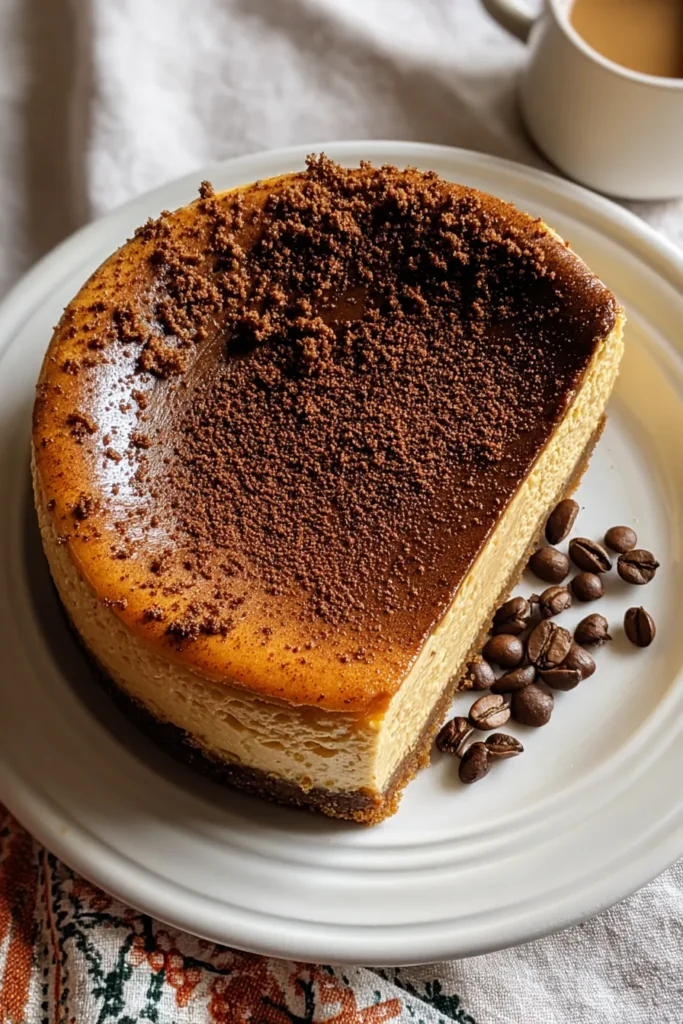

Rich and Creamy Baked Espresso Coffee Cheesecake
Description
This baked espresso coffee cheesecake combines the smoothness of cream cheese with a bold espresso punch, making it irresistibly rich and satisfying for coffee lovers.
Ingredients
Instructions
-
Preheat your oven to 325°F (160°C). Grease a 9-inch springform pan or line the bottom with parchment paper.
-
In a medium bowl, combine the graham cracker crumbs and melted butter. Press the mixture firmly into the bottom of the prepared pan to form the crust. Place in the refrigerator to set while preparing the filling.
-
In a large mixing bowl, beat the softened cream cheese and sugar until smooth, using an electric hand mixer or stand mixer.
-
Add in the sour cream and vanilla extract, mixing until fully incorporated.
-
Beat in the eggs one at a time, ensuring each egg is fully mixed in before adding the next.
-
In a small bowl, dissolve the instant espresso powder in the hot water. Add this mixture to the cream cheese batter along with the heavy cream, flour, coffee liqueur (if using), and a pinch of salt. Mix everything until well combined.
-
Pour the filling over the crust in the springform pan.
-
Bake in the preheated oven for 50-60 minutes, or until the center is set but still slightly jiggly. The edges should be lightly browned.
-
Turn off the oven, crack the door slightly, and let the cheesecake cool inside for about 1 hour. This helps prevent cracking.
-
Remove the cheesecake from the oven and let it cool completely at room temperature, then refrigerate for at least 4 hours or overnight for the best results.
-
Before serving, remove the sides of the springform pan. You may garnish with chocolate shavings or a dusting of cocoa powder if desired.
Note
- For a deeper coffee flavor, consider increasing the espresso powder slightly.
- Ensure all your ingredients are at room temperature for a smoother cheesecake texture.
- Cheesecake can be stored in the refrigerator for up to 5 days or frozen for up to 3 months.
- Using a water bath (bain-marie) can help provide an even bake and further prevent cracks in the cheesecake.

