

There’s nothing quite like the joy of pulling a tray of warm, golden-brown breadsticks out of the oven and knowing that each buttery, garlicky twist is ready to be devoured. Whip up these iconic Olive Garden breadsticks right at home for a warm, buttery treat that’s perfect for sharing! As a beginner-friendly recipe, it only takes about 20 minutes of active prep, 15 minutes of baking, and around an hour and twenty minutes of resting time, making it ideal for dinner parties, family meals, or a cozy solo treat. With approximately 120 calories per breadstick, you’ll feel good indulging in one (or two) with your favorite pasta, a fresh salad, or a steaming bowl of soup.
These soft and fluffy breadsticks, brushed with melted butter and a hint of garlic, offer irresistible flavors that pair perfectly with your favorite sauces. I remember the first time I tried making them at home—I was a bit intimidated by yeast, but seeing that foamy mixture bubble up after just a few minutes was pure magic. Now, I can’t imagine an Italian-inspired spread without these little golden sticks stealing the show. Whether you’re serving them as an appetizer, a lunchtime side, or as part of a hearty dinner, they bring a touch of restaurant-quality charm straight to your kitchen table.
KEY INGREDIENTS IN OLIVE GARDEN BREADSTICKS
Every mouthwatering Olive Garden breadstick starts with pantry staples that come together to create a tender, fluffy interior and a slightly crisp exterior. These ingredients work in harmony to develop the dough’s structure, flavor, and texture.
- Warm water
Provides the perfect environment to activate the yeast, ensuring a light and airy breadstick.
- Active dry yeast
The magical leavening agent that ferments the dough, creating those signature bubbles and gentle rise.
- All-purpose flour
Forms the foundation of the dough, giving it structure and chewiness while keeping the texture tender.
- Sugar
Feeds the yeast for a steady rise and adds a hint of sweetness to balance the savory notes.
- Salt
Enhances overall flavor and strengthens the gluten network for proper dough development.
- Unsalted butter, softened
Adds richness, moisture, and a slight tenderness to the crumb of each breadstick.
- Vegetable oil
Contributes to a softer crust and helps with dough elasticity, making kneading easier.
- Melted butter
Brushed on warm breadsticks to deliver that signature glossy sheen and buttery flavor.
- Salt (topping)
Sprinkled on top to give a delicate crunch and savory finish.
- Garlic powder (topping)
Lends a gentle garlic essence that makes each bite utterly irresistible.
HOW TO MAKE OLIVE GARDEN BREADSTICKS
Follow these detailed steps to transform simple ingredients into soft, fluffy breadsticks that taste just like the ones from your favorite Italian restaurant.
1. In a small bowl, combine the warm water, sugar, and yeast. Stir gently to combine the ingredients and allow it to sit for 5-10 minutes until foamy, indicating the yeast is fully activated.
2. In a large mixing bowl, combine the flour and salt. Create a well in the center and add the yeast mixture, softened butter, and vegetable oil, ensuring all ingredients come together for an even dough.
3. Mix the ingredients until a dough begins to form. Transfer to a lightly floured surface and knead the dough for about 7-10 minutes until it’s smooth and elastic, which helps develop the perfect texture.
4. Place the dough in a greased bowl, cover with a damp cloth, and let it rise in a warm place for about 1 hour or until it doubles in size, creating that light, airy structure.
5. Preheat your oven to 400°F (200°C) so it reaches the ideal temperature for baking by the time your dough is ready.
6. Punch down the risen dough, divide it into 12-14 equal pieces, and roll each piece into a cylinder approximately 7 inches in length to ensure uniform baking.
7. Place the breadsticks on a baking sheet lined with parchment paper, cover with a towel, and allow them to rise for another 15-20 minutes for a second lift.
8. Bake in the preheated oven for 12-15 minutes, or until the breadsticks are golden brown, signaling they’re perfectly baked through.
9. While the breadsticks are still warm, brush them with melted butter and sprinkle with a mixture of salt and garlic powder to achieve that classic Olive Garden finish.
10. Serve the breadsticks warm as a side or appetizer alongside marinara, Alfredo, or your favorite dipping sauce.
SERVING SUGGESTIONS FOR OLIVE GARDEN BREADSTICKS
These irresistible breadsticks are so versatile that they can elevate any meal, from a casual weeknight dinner to a festive gathering. With their soft interior and buttery, garlicky topping, they stand out on a buffet table, complement cozy soups, or get devoured as soon as they hit the plate. Whether you’re hosting friends, cooking for family, or enjoying a quiet solo feast, these breadsticks bring a warm, welcoming vibe to the table. I love setting out small bowls of various dips and sauces, encouraging a relaxed, interactive dining experience where everyone can customize their bites. The visual appeal of those golden sticks, brushed with glossy butter and sprinkled with just enough garlic salt, makes them practically disappear—so be prepared to bake extra batches!
- Classic marinara pairing
Place a bowl of warm, homemade or store-bought marinara sauce in the center of the table. The tangy tomato flavors cut through the richness of the butter, creating a harmonious bite every time.
- Creamy Alfredo dip
Whisk together heavy cream, Parmesan, and a hint of garlic for a luscious Alfredo sauce. Serve it chilled or warmed to add a silky, indulgent option for dipping.
- Herb-infused olive oil
Combine extra-virgin olive oil with dried Italian herbs like oregano, basil, and a pinch of red pepper flakes. This light, fragrant dip adds a Mediterranean twist to each breadstick.
- Cheesy garlic spread
Blend softened cream cheese with shredded mozzarella, minced garlic, and chopped parsley. The result is a rich, spreadable topping that turns each breadstick into a savory delight.
HOW TO STORE OLIVE GARDEN BREADSTICKS
Storing these homemade breadsticks properly ensures they stay soft, flavorful, and ready to enjoy at a moment’s notice. Whether you plan to eat them the next day or freeze them for later, following a few simple tips will keep that delicate texture intact. I often make a double batch and store half in the freezer so we always have fresh-tasting breadsticks on hand for impromptu gatherings or comforting weeknight meals. Proper wrapping and temperature control are key to preventing dryness and staleness, while a quick reheat restores that just-baked warmth and aroma.
- Room temperature in an airtight container
Allow breadsticks to cool completely, then store in a sealed container at room temperature. They’ll stay fresh for up to 2-3 days, ready for a quick snack.
- Refrigerator storage
Place cooled breadsticks in a zip-top bag or airtight container. Chill for up to 5 days, and reheat in a 350°F oven for 5-7 minutes to regain softness.
- Freezer storage
Wrap individual breadsticks in foil or plastic wrap, then place them in a freezer-safe bag. They can last up to 2 months. Thaw at room temperature or reheat directly in a 375°F oven for 10-12 minutes.
- Quick refresh method
For a fresh-from-the-oven taste, wrap breadsticks in a slightly damp paper towel and microwave for 15-20 seconds, or pop them in a hot oven for a couple of minutes.
CONCLUSION
We’ve journeyed from the simple joy of mixing flour, water, and yeast to the mouthwatering moment you brush on that final layer of melted butter and garlic salt. From the initial foamy yeast activation to the satisfying doubles-in-size rise, each step builds toward breadsticks that capture the essence of Olive Garden right in your own kitchen. As you serve them alongside marinara, Alfredo, or herb-infused oil, you’ll see how these golden delights become the star of any meal—whether it’s a casual lunch, an indulgent dinner, or a small gathering of friends. With just a few pantry staples and an hour and twenty minutes of rest, you’ve created an appetizer, a dinner side, and a lunch companion all in one recipe. Don’t forget that these breadsticks clock in at about 120 calories each, making them a guilt-free treat you can share without worry.
Feel free to print this article and save it for later use, so you’re always ready to bake a tray of warm, buttery goodness. You can also find a FAQ below to answer any extra questions you might have about ingredient swaps, rising times, or serving ideas. If you give this recipe a try, please drop a comment, question, or feedback—I’d love to hear how your Olive Garden breadsticks turned out or help troubleshoot any step along the way. Happy baking!
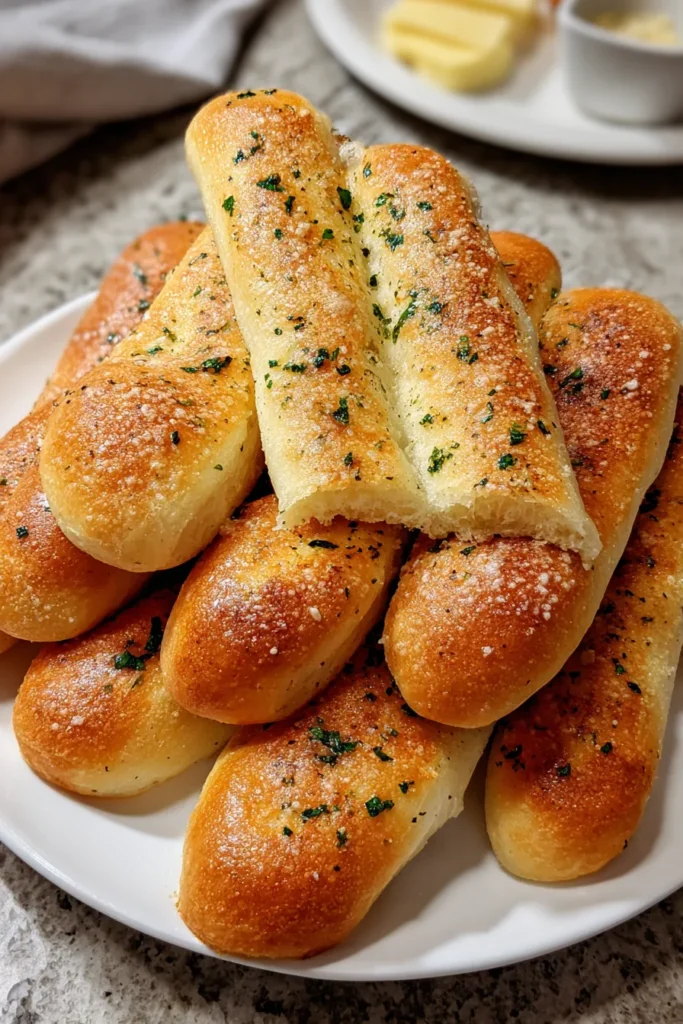

Olive Garden Breadsticks
Description
These soft and fluffy breadsticks, brushed with melted butter and a hint of garlic, offer irresistible flavors that pair perfectly with your favorite sauces.
Ingredients
Instructions
-
In a small bowl, combine the warm water, sugar, and yeast. Stir gently and allow it to sit for 5-10 minutes until foamy.
-
In a large mixing bowl, combine the flour and salt. Create a well in the center and add the yeast mixture, softened butter, and vegetable oil.
-
Mix the ingredients until a dough begins to form. Knead the dough on a lightly floured surface for about 7-10 minutes until smooth and elastic.
-
Place the dough in a greased bowl, cover with a damp cloth, and let it rise in a warm place for about 1 hour or until it doubles in size.
-
Preheat your oven to 400°F (200°C).
-
Punch down the risen dough, and divide it into 12-14 equal pieces. Roll each piece into a cylinder, approximately 7 inches in length.
-
Place the breadsticks on a baking sheet lined with parchment paper, cover with a towel, and allow them to rise for another 15-20 minutes.
-
Bake in the preheated oven for 12-15 minutes, or until the breadsticks are golden brown.
-
While the breadsticks are still warm, brush them with melted butter and sprinkle with a mixture of salt and garlic powder.
-
Serve the breadsticks warm as a side or appetizer.
Note
- For extra flavor, you can add Italian herbs to the garlic salt topping.
- These breadsticks pair perfectly with marinara sauce or Alfredo sauce for dipping.
- For a lighter texture, you can substitute some of the all-purpose flour with bread flour.
- If you prefer softer breadsticks, cover them with a kitchen towel as they cool.
- Leftovers can be stored in an airtight container at room temperature for 2-3 days.

