

There’s something incredibly comforting about pulling a tray of golden, buttery garlic bread rolls out of the oven after a busy day. These little orbs of warmth are not just a side dish—they’re a hug on a plate. As soon as you brush on rich, garlic-infused butter and watch it melt into soft dough, you know you’re in for a treat. Every bite combines a crisp, lightly browned crust with a pillowy, tender interior that practically melts in your mouth. From the moment you mix warm milk and yeast to create that delightful froth, to the final brush of garlic butter, you’re on a flavor journey that fills your kitchen with inviting scents and your home with eager taste-testers.
I remember the first time I made these rolls for a family dinner—my little cousin couldn’t stop popping them in her mouth, and my partner kept sneaking back for “just one more.” Whether you’re huddled around the table on a cozy night in or looking to impress friends at a casual gathering, these garlic bread rolls steal the show. They’re the perfect companion to pasta, soups, stews, or even just a bowl of warm marinara. Best of all, they’re beginner-friendly yet endlessly customizable. You can swirl cheese inside, swap herbs, or even freeze extras for a quick reheat later. With this step-by-step guide, you’ll bring that homemade bakery magic right into your own kitchen.
KEY INGREDIENTS IN GARLIC BREAD ROLLS
To create these warm and buttery garlic bread rolls, each ingredient plays a crucial role in texture, flavor, and structure. Here’s a breakdown of what you’ll need and why it matters:
- Warm milk: Provides the gentle heat needed to activate the yeast and infuses the dough with moisture for a soft, pillowy interior.
- Sugar: Feeds the yeast, ensuring a lively rise while also lending just a hint of sweetness to balance the savory garlic.
- Active dry yeast: The leavening powerhouse that makes the dough expand, creating airy, fluffy rolls that feel light on the palate.
- All-purpose flour: Forms the dough’s foundation, delivering structure and elasticity when combined with gluten development during kneading.
- Salt: Enhances overall flavor and helps regulate yeast activity to ensure a steady, controlled rise.
- Melted unsalted butter: Enriches the dough with creamy fat, contributing to tenderness and a subtle buttery taste throughout each roll.
- Egg: Binds ingredients together, promotes a richer crumb, and helps with golden coloring on the crust.
- Softened unsalted butter: The base for the garlic butter spread, offering a smooth, luscious coating that seeps into every roll.
- Minced garlic: Infuses the butter with robust, aromatic depth—garlic’s bold flavor is the heart of this recipe.
- Fresh parsley: Adds a bright, herbal note and a pop of color that balances the richness of the butter and garlic.
- Grated Parmesan cheese (optional): Sprinkled on top for a salty, nutty finish that creates an extra layer of savory indulgence.
HOW TO MAKE GARLIC BREAD ROLLS
Bringing these garlic bread rolls to life involves a few simple stages: activating the yeast, forming and kneading the dough, allowing it to rise, and then finishing with a luxurious garlic butter coating. Follow each step carefully, and you’ll end up with golden, aromatic rolls that beg to be shared.
1. In a small bowl, combine the warm milk and sugar. Sprinkle the active dry yeast over the surface and let it rest for about 5–10 minutes until it’s frothy and alive with bubbles. This ensures a lively rise later.
2. In a large mixing bowl, whisk together the all-purpose flour and salt, then create a shallow well in the center to hold wet ingredients.
3. Pour the melted butter, egg, and the frothy yeast mixture into the flour well. These wet components begin to bind the dough together.
4. Stir gently until a soft dough forms. Transfer it to a lightly floured work surface and knead for about 8–10 minutes until the dough is smooth, elastic, and springs back when pressed.
5. Place the kneaded dough into a lightly oiled bowl, turning it once to coat all sides. Cover with a damp cloth and let it rise in a warm spot for about 1 hour, or until it has doubled in size.
6. While the dough rests, prepare the garlic butter by combining softened butter, minced garlic, and chopped parsley in a small bowl. Set aside.
7. Once risen, punch down the dough to release excess air, then divide it into 12 equal portions. Roll each piece into a smooth ball for uniform baking.
8. Lightly grease a baking dish or line it with parchment paper. Arrange the dough balls with a little space between each to allow for a second rise.
9. Generously brush the tops of the rolls with the garlic butter mixture, reserving some for after baking to boost flavor and sheen.
10. Cover the rolls loosely with a clean cloth and let them rise again for 30–45 minutes, until they look puffy and have nearly doubled in height.
11. Preheat your oven to 375°F (190°C), ensuring it’s fully warmed before the rolls go in.
12. Bake for 15–18 minutes, watching for a golden brown crust that signals they’re perfectly done.
13. Remove the rolls from the oven and immediately brush with any remaining garlic butter. Sprinkle with grated Parmesan cheese, if desired, for an extra savory touch.
14. Allow the rolls to cool slightly—just enough so you don’t burn your fingers—then serve them warm, with melted butter pooling in the nooks between rolls.
SERVING SUGGESTIONS FOR GARLIC BREAD ROLLS
These garlic bread rolls are incredibly versatile, making them an essential addition to almost any meal. Whether you’re hosting a cozy family dinner or throwing together a quick lunch, the vibrant flavors and tender texture of these rolls will elevate your spread. They pair beautifully with sauces, soups, and salads, and can even be enjoyed on their own with a dash of extra butter and an extra dusting of herbs. Here are some creative ways to serve them so that every bite feels special:
- Classic Pasta Side: Serve the rolls alongside your favorite pasta dish—spaghetti with marinara, creamy fettuccine Alfredo, or zesty pesto. The rolls are perfect for mopping up every last drop of sauce.
- Hearty Soup Companion: Pair with a bowl of warm tomato basil soup, creamy potato leek, or chili. Tear the rolls apart and dip them for a comforting, filling meal that warms you from the inside out.
- Garlic Bread Sandwiches: Slice each roll horizontally and fill with deli meats, fresh greens, and a smear of pesto or aioli. The garlic flavor adds a gourmet twist to lunch classics.
- Party Platter Addition: Arrange the rolls on a platter with cheeses, cured meats, olives, and roasted vegetables for a crowd-pleasing appetizer board. Guests will love grabbing a center-roll for a savory bite.
HOW TO STORE GARLIC BREAD ROLLS
Keeping these garlic bread rolls fresh and flavorful for later enjoyment is simple with the right storage techniques. Whether you want to enjoy leftovers the next day or preserve extras for a future meal, proper storage will maintain their softness and garlic-infused aroma. Follow these methods to ensure each reheated roll is almost as good as fresh from the oven:
- Room-Temperature Storage: If you plan to eat the rolls within 24 hours, place them in an airtight container or sealable plastic bag once fully cooled. Keep them in a cool, dry spot away from direct sunlight. This preserves the soft crumb and prevents the crust from becoming too chewy.
- Refrigeration: For up to 3–4 days, store the rolls in the refrigerator. Wrap them tightly in plastic wrap or place them in a zip-top bag to keep moisture locked in. When ready to eat, reheat in a preheated oven at 350°F (175°C) for 5–7 minutes, or until warmed through.
- Freezing: To enjoy rolls at a later date, freeze them for up to 2 months. Place fully cooled rolls in a single layer on a baking sheet and freeze for about an hour, then transfer to a freezer-safe bag. This flash-freeze method prevents them from sticking together. Reheat from frozen at 350°F (175°C) for 15–18 minutes, brushing with extra garlic butter mid-warm for peak flavor.
- Garlic Butter Refresh: If you notice the flavor mellowing a bit over time, mix up a small batch of garlic butter (butter, garlic, parsley) and lightly brush the warmed rolls before serving. This quick refresh injects fresh aroma and richness, making even day-old rolls taste newly baked.
CONCLUSION
From the first moment you wake up the yeast with warm milk to the final brush of garlic butter on golden-brown rolls, this recipe takes you on a delightful kitchen adventure. You’ve learned how to balance ingredients, master kneading and proofing, and create that irresistible garlic butter finish. Whether you’re cooking for a weeknight family dinner, pre-making for a weekend gathering, or simply craving a taste of homemade comfort, these garlic bread rolls deliver every time. They’re beginner-friendly, yet sophisticated enough to impress any guest. Plus, the flexibility to add cheese, switch herbs, or store extras for later makes this recipe a kitchen staple. Don’t forget you can print this article or save it in your digital recipe collection, ready to revisit whenever the craving strikes.
Below, you’ll find a handy FAQ to troubleshoot common questions and ensure your rolls come out perfect every time. If you try this recipe, I’d love to hear how it turned out! Drop a comment to share your baking triumphs or any twists you added. Feel free to ask questions about proofing times, ingredient swaps, or reheating hacks—I’m here to help make your garlic bread roll experience as joyful and flavorful as possible.
I hope these golden, warming rolls become a beloved part of your cooking repertoire. Happy baking, and may every bite bring a cozy smile to your table!
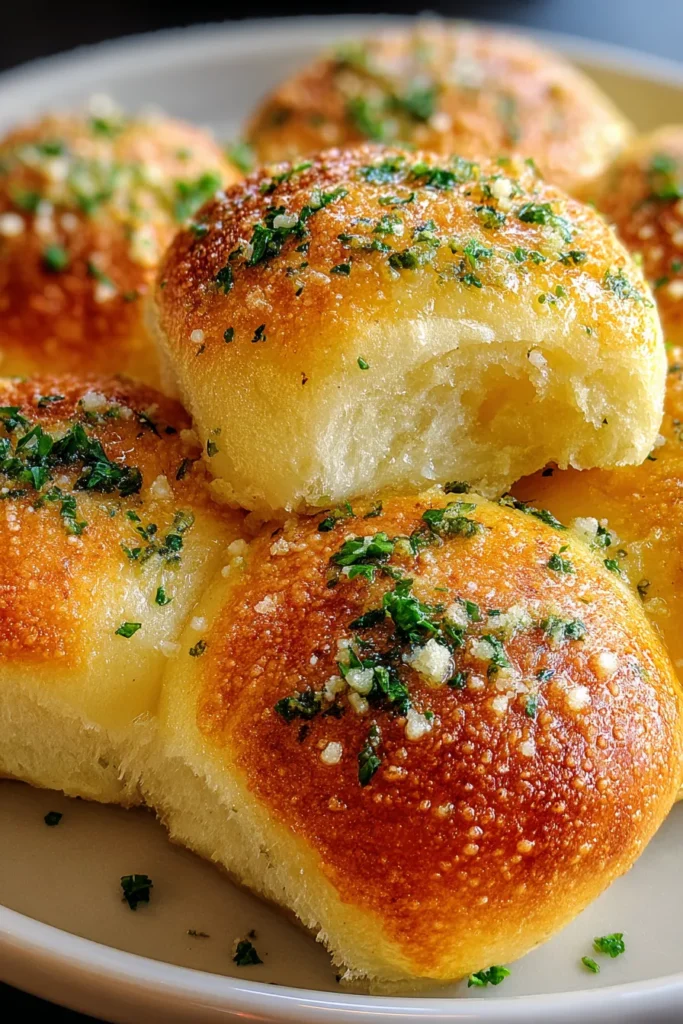

Garlic Bread Rolls
Description
These fluffy garlic bread rolls are bursting with flavor, topped with a rich garlic butter mixture. Perfectly golden brown and best served warm, they're a must-try for your next dinner!
Ingredients
Instructions
-
In a small bowl, combine the warm milk and sugar. Sprinkle the yeast over the milk and let it sit for about 5-10 minutes until it becomes frothy.
-
In a large mixing bowl, mix together the flour and salt. Create a well in the center.
-
Add the melted butter, egg, and the frothy yeast mixture into the well of dry ingredients.
-
Mix until a soft dough forms, then turn it onto a floured surface and knead for about 8-10 minutes until smooth and elastic.
-
Place the dough in a lightly oiled bowl, cover it with a damp cloth, and let it rise in a warm place for about 1 hour or until doubled in size.
-
In a small bowl, combine the softened butter, minced garlic, and chopped parsley for the garlic butter.
-
Punch down the dough and divide it into 12 equal portions. Roll each portion into a ball.
-
Lightly grease a baking dish or line it with parchment paper. Arrange the dough balls in the dish, leaving a little space between each.
-
Brush the tops of the rolls generously with the garlic butter mixture, reserving some for later.
-
Cover the rolls loosely and let them rise again for 30-45 minutes until they have risen once more.
-
Preheat your oven to 375°F (190°C).
-
Bake the rolls in the preheated oven for 15-18 minutes or until they are golden brown.
-
Once baked, remove from the oven and brush with the remaining garlic butter. Sprinkle with Parmesan cheese, if using.
-
Allow the rolls to cool slightly before serving warm.
Note
- These rolls are perfect for serving alongside pasta dishes or soups.
- Experiment with adding grated cheese inside the rolls before baking for an extra savory treat.
- You can substitute the fresh parsley with dried herbs like oregano or basil for a different flavor profile.
- Make sure your milk is not too hot, as it may kill the yeast and prevent your dough from rising.
- These rolls can be frozen after baking for quick reheating on another day.

