

This Halloween season, nothing hits the spooky spot quite like a batch of Cheesy Halloween Breadstick Bones. These playful, bone-shaped snacks bring out the inner child in all of us, stretching pizza dough into eerie little skeleton limbs that ooze with melty mozzarella and snappy Parmesan. The garlic-butter seasoning hugs every twist and knot of dough, delivering a flavor that’s both nostalgic and delightfully spooky. Whether you’re assembling a frightful charcuterie table or looking for a crowd-pleasing finger food that’s easy enough for beginners, these breadstick bones will steal the show (and maybe a few screams of delight).
As I rolled out my very first batch, the fun really began when I tied those dough strips into bone shapes—I couldn’t stop giggling at how creepy-cute they looked. My kitchen filled with warm, garlic-buttery notes as they baked, and the cheese bubbled into a golden crust that snapped just enough for that satisfying bite. With only a handful of ingredients and under half an hour from start to finish, these treats are approachable and adaptable. They’re the perfect companion to a rich marinara dip or a zesty ranch dressing for extra witchy flair. Trust me, once you taste that blend of crisp edges, tender dough, and gooey cheese, you’ll be making these year after year.
KEY INGREDIENTS IN CHEESY HALLOWEEN BREADSTICK BONES
Before you dive into baking, let’s get acquainted with the star players that turn simple dough into a spook-tacular appetizer. Each component adds a layer of flavor or texture, ensuring your breadstick bones are anything but ordinary.
- Refrigerated canned pizza dough
This pre-made dough saves prep time and guarantees a light, airy interior. Its pliability makes it perfect for twisting into bone shapes without tearing or shrinking as it bakes.
- Butter
Melted butter forms the base of the seasoning mixture. It helps the seasonings stick to every inch of the dough and gives a rich, golden finish that enhances crispiness.
- Parmesan cheese
Finely grated, Parmesan adds a salty, umami punch and a slightly crunchy, cheesy crust that contrasts beautifully with the soft dough interior.
- Garlic powder
A pantry staple, garlic powder infuses every bite with familiar, savory warmth. It dissolves easily in the butter mixture, ensuring an even coating.
- Dried Italian seasoning
A blend of herbs like oregano, basil, and thyme, this seasoning brings an aromatic, herby dimension that complements both the cheese and garlic.
- Shredded mozzarella cheese
The star of “cheesy” in these breadstick bones, mozzarella melts into gooey pools, stretching alluringly with each bite for that irresistible pizza-shop experience.
- Marinara or pizza sauce
Served on the side, this tangy dip balances the richness of the butter and cheese. It also gives a classic Italian-inspired finish, perfect for dunking.
HOW TO MAKE CHEESY HALLOWEEN BREADSTICK BONES
Creating these spooky snacks is a breeze when you break it down into simple steps. From shaping that dough to achieving a golden, bubbling cheese topping, you’ll feel like a kitchen magician as your oven works its hauntingly delicious magic.
1. Preheat your oven to 375°F (190°C) and line a baking sheet with parchment paper to prevent sticking and allow for easy cleanup.
2. Roll out the refrigerated pizza dough into a flat rectangle on a lightly floured surface, ensuring it’s evenly thick for consistent baking.
3. Slice the dough into strips approximately 10 inches long and 1 inch wide, using a sharp knife or pizza cutter for clean edges.
4. Tie a knot at each end of the dough strips to create the signature “bone” shape. Be gentle to keep the dough in one piece.
5. Place the shaped dough bones onto the prepared baking sheet, spacing them evenly to allow air circulation and crisping.
6. In a small bowl, mix the melted butter with garlic powder and dried Italian seasoning, whisking until fully combined.
7. Generously brush the shaped dough bones with the seasoned butter mixture, coating every crevice for maximum flavor.
8. Sprinkle the grated Parmesan cheese liberally over the dough bones, pressing lightly so it adheres and forms a savory crust.
9. Scatter the shredded mozzarella cheese over the dough bones, ensuring some strands nestle into the knots for extra cheesiness.
10. Bake in the preheated oven for 12–15 minutes or until the bones turn a glorious golden brown and the cheese is bubbling.
11. Remove from the oven and allow to cool slightly on a wire rack, which keeps the bottom crispy and prevents sogginess.
12. Serve the breadstick bones warm with marinara or pizza sauce for dipping, and watch them disappear!
SERVING SUGGESTIONS FOR CHEESY HALLOWEEN BREADSTICK BONES
Once your Cheesy Halloween Breadstick Bones are baked to perfection, it’s time to think about presentation and pairings that turn a simple snack into a hauntingly beautiful centerpiece. These bones are delightful on their own, but with a few creative touches, you can elevate the entire experience for party guests or family movie nights. Offering a variety of dips, garnishes, and fun serving styles ensures that everyone finds their favorite way to enjoy these cheesy, garlicky treats. Here are some ideas to set the scene for a spook-tacular snack display:
- Spooky Dip Station: Arrange small bowls of marinara, ranch dressing, garlic aioli, and even a vibrant pumpkin-spiced queso. Label each with mini chalkboards or Halloween tags for a festive touch.
- Bone Platter Presentation: Lay the breadstick bones on a large tray designed like a skeleton’s ribcage, using edible flower petals or black olives as “accent bones” around the perimeter for eerie flair.
- Garnish with Fresh Herbs: Sprinkle chopped parsley or chives over the hot breadsticks right before serving. The green herb adds a pop of color and a fresh aroma that contrasts beautifully with the rich cheese.
- Thematic Table Setup: Pair your bones with a cauldron of blood-red tomato soup or a creamy butternut squash bisque. Serve the soups in mini cauldrons or hollowed-out pumpkins to extend the Halloween vibe.
HOW TO STORE CHEESY HALLOWEEN BREADSTICK BONES
Whether you have leftovers from a big bash or you just want to prep ahead for another spooky snack session, proper storage is key to maintaining flavor and texture. Breadstick bones are best enjoyed fresh, but with the right techniques, you can keep them crispy, cheesy, and delicious for days. Below are some tried-and-true methods to store your baked treats, along with tips to revive their oven-fresh goodness:
- Room-Temperature Airtight Storage
Once completely cooled, place the breadstick bones in an airtight container or sealable bag. Store at room temperature for up to 24 hours. This keeps them crisp while preventing moisture buildup.
- Refrigeration for Short-Term Freshness
Transfer cooled bones to a refrigerator-safe container, layering parchment paper between pieces to avoid sticking. They’ll stay tasty for 2–3 days, though you may notice a slight softening.
- Freezing for Long-Term Enjoyment
Flash-freeze baked bones on a parchment-lined tray until solid (about 1 hour), then transfer to a freezer-safe bag. Freeze for up to 1 month. Thaw in the fridge before reheating.
- Reheating to Restore Crispness
To revive stored bones, preheat your oven to 350°F (175°C). Arrange on a baking sheet and heat for 5–7 minutes if refrigerated, or 10–12 minutes if thawed from frozen. This re-crispies the exterior and warms the cheese back to gooey perfection.
CONCLUSION
Baking Cheesy Halloween Breadstick Bones is more than just a recipe—it’s a festive tradition that brings out laughter, creativity, and that satisfying crunch of garlic-buttered dough. From the moment you tie your first dough strip into a bone shape to the final dip into rich marinara, each step is an opportunity to make memories in the kitchen. With easy-to-source ingredients like canned pizza dough, butter, and cheeses, even the most novice cooks can whip up a spooky snack that tastes like it came from a pizza parlor’s haunted annex.
I encourage you to print out this article and save it for your next Halloween gathering, or mark it in your digital recipe box for those cozy autumn movie nights. Below, you’ll find a handy FAQ section to answer any last-minute questions about variations, substitutions, or troubleshooting. If you try the recipe—or if you invent your own twisted take—please leave a comment with your feedback or any fun stories from your Halloween kitchen adventures. Your questions, tips, and delicious successes are always welcome here, and I can’t wait to hear how these cheesy, garlicky bones spook up your snack table!
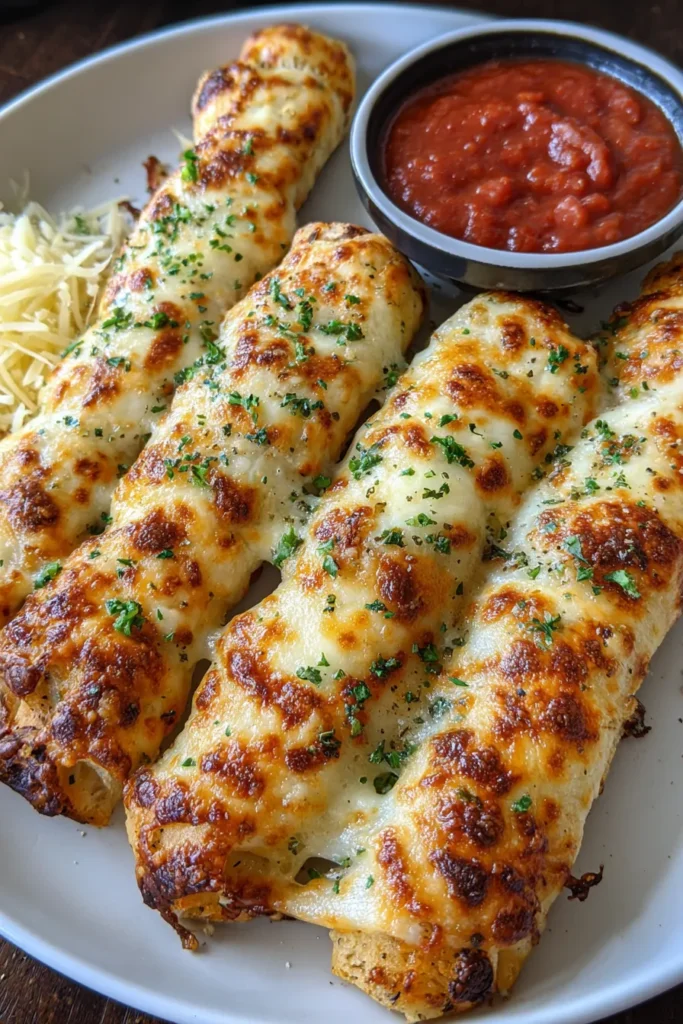

Cheesy Halloween Breadstick Bones
Description
These delightfully eerie breadstick bones are cheesy and garlicky, making them the perfect spooky treat for Halloween gatherings that everyone will love.
Ingredients
Instructions
-
Preheat your oven to 375°F (190°C) and line a baking sheet with parchment paper.
-
Roll out the refrigerated pizza dough into a flat rectangle on a lightly floured surface.
-
Slice the dough into strips approximately 10 inches long and 1 inch wide.
-
Tie a knot at each end of the dough strips to create the "bone" shape.
-
Place the dough bones onto the prepared baking sheet.
-
In a small bowl, mix the melted butter with garlic powder and Italian seasoning.
-
Brush the shaped dough bones with the seasoned butter mixture generously.
-
Sprinkle the grated Parmesan cheese liberally over the dough bones for added flavor and a cheesy crust.
-
Scatter the shredded mozzarella cheese over the dough bones, ensuring some gets into the crevices of the knots.
-
Bake in the preheated oven for 12-15 minutes or until the bones are golden and the cheese is bubbling.
-
Remove from oven and allow to cool slightly on a wire rack.
-
Serve the breadstick bones warm with marinara or pizza sauce for dipping.
Note
- This recipe makes a fun and spooky addition to any Halloween party.
- Experiment with different cheese varieties for added flavor—sharp cheddar or Asiago work great too.
- Consider serving with a variety of dips such as garlic aioli or ranch dressing for more dipping options.
- For a spicier kick, add a sprinkle of red pepper flakes to the butter mixture.

