

Brighten your day with these zesty raspberry lemon bars – a perfect blend of tartness and sweetness! From the very first bite, you’ll be greeted by a buttery crust that crumbles just right, giving way to a silky lemon filling studded with juicy fresh raspberries. I still remember the first time I whipped up this tangy treat for my book club: the moment they sank their teeth into that vibrant filling, conversation paused and eyes widened in delight. That kind of reaction is simply priceless, and it’s exactly why I fell in love with this recipe.
These bars are more than just a dessert—they’re a celebration of bright flavors and simple pleasures. Whether you’re hosting a summer picnic, bringing a dish to a potluck, or indulging in a weekday pick-me-up, these lemon bars deliver an irresistible combination of sweet, tart, and fruity notes. They’re beginner-friendly, taking just 15 minutes of prep and about 40 minutes of baking time, plus a restful hour in the fridge. When you finally serve them, you’ll see the delicate dusting of powdered sugar glimmering like a fresh layer of frost, inviting you to savor every bite. Get ready to fall head over heels for this easy, refreshing raspberry dessert that promises to brighten any baking day!
KEY INGREDIENTS IN TANGY RASPBERRY LEMON BARS
Before we dive into the step-by-step instructions, let’s talk about the magic behind these raspberry lemon bars. Each ingredient plays its part, coming together to create layers of flavor and texture that dance on your palate. From the foundation of a crumbly crust to the vibrant filling flecked with red raspberries, here’s what you need to know about each component.
- All-purpose flour
This versatile pantry staple is the backbone of both our crust and filling. In the crust, it provides structure and that satisfyingly tender crumble. When added to the lemon mixture, it helps thicken the filling so it sets up perfectly.
- Unsalted butter
Softened for easy mixing, unsalted butter brings a rich, creamy flavor to the crust. Because it’s unseasoned, you control the salt level in the recipe, ensuring the perfect balance of sweet and tangy.
- Powdered sugar
Added to the crust, this finely milled sugar blends smoothly with butter and flour, creating a delicate texture. A bit extra on top adds a pretty finish and a hint of sweetness.
- Granulated sugar
Essential for the lemon filling, granulated sugar sweetens and brightens the tart lemon juice and zest. It dissolves into a creamy base, giving the bars their signature snap.
- Large eggs
Whisked into the filling, eggs add body and help the bars set firmly. They create a custardy texture that’s rich without being overly heavy.
- Freshly squeezed lemon juice
This is the star of the show, lending a vibrant, tangy zing that wakes up your taste buds. Fresh juice is a must—it brings clarity and brightness that bottled just can’t match.
- Lemon zest
Tiny ribbons of zest intensify the citrus flavor, infusing the filling with fragrant oils that elevate every bite.
- Baking powder
A small amount of baking powder ensures the filling rises just enough, giving it a light, airy lift.
- Salt
A pinch of salt sharpens the lemon flavor and rounds out the sweetness, bringing all the components into harmony.
- Fresh raspberries
Bursting with color and juiciness, raspberries add a fruity counterpoint to the tart lemon filling and a delightful texture contrast.
- Powdered sugar for dusting (optional)
A final dusting creates a picture-perfect presentation, adding a snowy finish that’s as pretty as it is delicious.
HOW TO MAKE TANGY RASPBERRY LEMON BARS
Now that we’ve covered our ingredients, let’s get into the heart of the process. Follow these steps carefully, and you’ll end up with bars that are crisp, creamy, and bursting with fruity tang.
1. Preheat your oven to 350°F (175°C). Grease an 8×8 inch square baking dish with butter or nonstick spray, then set it aside. This step ensures your bars release cleanly after baking.
2. In a mixing bowl, combine all-purpose flour, softened butter, and powdered sugar. Use a pastry cutter or your fingers to mix until you achieve a crumbly dough texture, with small pea-sized bits throughout. This crumbly dough is the key to a tender, melt-in-your-mouth crust.
3. Press the dough firmly into the bottom of the prepared baking dish, forming an even layer. An offset spatula or the bottom of a measuring cup works wonders for getting a smooth, uniform surface.
4. Bake the crust in the preheated oven for 15–18 minutes, or until it’s lightly golden brown around the edges. Remove from the oven and let it cool slightly—this helps prevent the filling from seeping into the hot crust.
5. While the crust is baking, prepare the filling. In a separate bowl, whisk together granulated sugar, eggs, 2 tablespoons of all-purpose flour, lemon juice, lemon zest, baking powder, and salt until the mixture is smooth and creamy, with no lumps in sight.
6. Gently fold the fresh raspberries into the lemon mixture, taking care not to crush them completely. You want those bright pops of red throughout your bars.
7. Pour the raspberry lemon mixture over the slightly cooled crust, spreading it out into an even layer using a spatula.
8. Return the dish to the oven and bake for an additional 20–25 minutes, or until the filling is set and firm to the touch—it shouldn’t jiggle when you gently shake the pan.
9. Remove from the oven and allow the bars to cool completely at room temperature. For easier slicing, refrigerate for at least 1 hour before serving.
10. Once chilled, dust the top with powdered sugar if desired, then cut into squares and serve these delightful tangy treats!
SERVING SUGGESTIONS FOR TANGY RASPBERRY LEMON BARS
There’s something truly special about the moment you bring out a tray of fresh raspberry lemon bars. The contrast of the bright yellow filling and ruby-red raspberries is simply irresistible, and these bars pair beautifully with a variety of accompaniments. Whether you’re serving them at a brunch, afternoon tea, or an evening gathering, here are some fun ideas to make your presentation shine:
- Fresh Berries Garnish
Top each bar with a few extra fresh raspberries and a tiny mint leaf. The cool green of the herb adds a refreshing aroma and visually complements the pink-tinted filling.
- Vanilla Ice Cream Duo
Serve a square alongside a scoop of vanilla ice cream. The creaminess of the ice cream balances the tart lemon, creating a perfect sweet-tart harmony that’s impossible to resist.
- Lemon Drizzle Glaze
Whisk together a simple lemon glaze (powdered sugar and lemon juice) and drizzle it over warm bars right out of the oven. The glaze soaks into the filling slightly, intensifying the citrus punch.
- Tea Time Treat
Plate with a pot of Earl Grey or herbal chamomile tea. The floral notes in the tea complement the lemon flavor, making for a sophisticated afternoon spread.
HOW TO STORE TANGY RASPBERRY LEMON BARS
One of the best things about these bars is how well they hold up, making them a perfect make-ahead dessert. Whether you’re planning for a party or just want a batch ready for snack attacks, proper storage will keep them fresh and flavorful.
- Refrigerator (Up to 5 Days)
Place cooled bars in an airtight container, separating layers with parchment paper to prevent sticking. Refrigeration keeps the crust crisp and the filling firm.
- Freezer (Up to 1 Month)
For longer storage, freeze individual bars on a baking sheet until solid, then transfer to a zip-lock bag or freezer-safe container with parchment between layers. Thaw in the fridge overnight before serving.
- Room Temperature (1–2 Days)
If you plan to enjoy them quickly, you can store the bars at room temperature in an airtight container for up to two days—just be sure to keep them in a cool spot away from direct sunlight.
- Avoid Moisture
Always ensure your storage container is completely dry before adding the bars. Moisture can lead to a soggy crust and dilute that tangy lemon flavor you love.
CONCLUSION
There you have it—your complete guide to baking the most delightful Tangy Raspberry Lemon Bars. From the buttery, crumbly crust to the vibrant lemon filling and pops of fresh raspberry, this recipe brings joy to any gathering. It’s an easy recipe perfect for beginners, yet it looks and tastes like something you’d get at a fancy bakery. If you’ve followed along and tasted the first heavenly bite, you know exactly why these bars have become a summer dessert staple and a go-to raspberry dessert for every season.
Feel free to print this article and save it in your cooking binder, or bookmark it on your device for quick reference. You’ll also find an FAQ below to answer any lingering questions about ingredients, variations, or troubleshooting. I’d love to hear how your bars turn out—please leave a comment, share your feedback, or ask any questions if you need help. Happy baking, and here’s to many more sweet and tangy moments shared around the table!
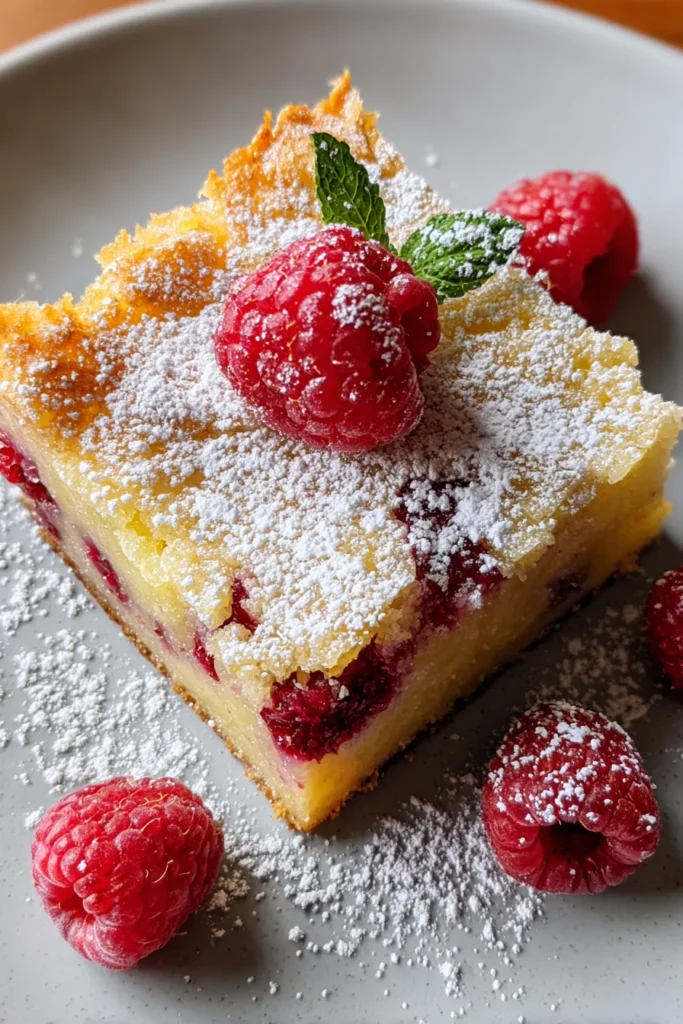

Tangy Raspberry Lemon Bars
Description
These tangy raspberry lemon bars feature a buttery crust with a bright and creamy lemon filling, bursting with fresh raspberries. An irresistible treat!
Ingredients
Instructions
-
Preheat your oven to 350°F (175°C). Grease an 8x8 inch square baking dish and set aside.
-
In a mixing bowl, combine 1 cup flour, softened butter, and powdered sugar. Mix until you achieve a crumbly dough texture.
-
Press the dough firmly into the bottom of the prepared baking dish to form the crust.
-
Bake the crust in the preheated oven for 15-18 minutes or until it is lightly golden brown. Remove from oven and let it cool slightly.
-
While the crust is baking, prepare the filling. In a separate bowl, whisk together granulated sugar, eggs, 2 tablespoons flour, lemon juice, lemon zest, baking powder, and salt until smooth and creamy.
-
Gently fold the fresh raspberries into the lemon mixture.
-
Pour the raspberry lemon mixture over the slightly cooled crust, spreading it evenly.
-
Return the dish to the oven and bake for an additional 20-25 minutes, or until the filling is set and firm to the touch.
-
Remove from the oven and allow the bars to cool completely at room temperature. For easier slicing, refrigerate for at least 1 hour before serving.
-
Once chilled, dust the top with powdered sugar if desired, then cut into squares and serve.
Note
- For an extra burst of flavor, add a pinch of vanilla extract to the lemon filling.
- These bars can be stored in the refrigerator for up to 5 days in an airtight container.
- For a creative twist, try substituting raspberries with blueberries or blackberries.
- Garnishing with a thin lemon slice or a few fresh mint leaves can add a lovely presentation touch.
- Enjoy as a refreshing dessert or pair with a scoop of vanilla ice cream for an even richer treat.

