

Combining the sweet nostalgia of a classic sugar cookie with the indulgent creaminess of a cheesecake, this Sugar Cookie Cheesecake is a dessert that truly feels like a hug in every bite. It starts with a buttery sugar cookie crust that crumbles with just the right amount of sweetness, while the cheesecake filling is luxuriously smooth and velvety. Each forkful delivers the perfect balance between a soft, tender cookie base and a rich, tangy cheesecake center. Whether you’re baking for a special celebration or simply indulging on a cozy night in, this treat will transport you to a place where dessert cravings vanish, replaced by pure, mouthwatering satisfaction.
Over the years, I’ve experimented with countless flavor combinations, but there’s something inherently joyful about the marriage of sugar cookie and cheesecake. Friends and family often ask if this was inspired by holiday cookie swaps or Sunday baking sessions, and honestly, it’s a little bit of both. The buttery aroma (without saying “the aroma” at first!) fills the kitchen as the crust bakes, and while it cools, I whip up the cheesecake filling, reminiscing about childhood cookie decorating with sprinkles everywhere. Once it finally emerges from the oven—slightly jiggly in the center—it transforms into a showstopper after slow cooling and a chill in the fridge. Top it with fluffy whipped cream and colorful sprinkles, and you’ll have a dessert that’s as delightful to look at as it is to devour.
KEY INGREDIENTS IN SUGAR COOKIE CHEESECAKE
Every standout dessert relies on a handful of high-quality ingredients that carry both flavor and structure. In this Sugar Cookie Cheesecake, each component plays an essential role: building the base, creating a silky filling, and adding that final decorative flourish.
- All-purpose flour
Provides the structure for the sugar cookie crust, delivering that tender yet sturdy base that holds the cheesecake together.
- Baking soda
Acts as a gentle leavening agent in the cookie crust, giving it just enough lift so the crust isn’t too dense.
- Salt
Balances the sweetness and enhances the flavor complexity in the crust, ensuring every bite tastes perfectly seasoned.
- Unsalted butter
Softens and creaming with sugar to create a rich, smooth dough; its fat content adds moisture and that irresistible, melt-in-your-mouth quality.
- Granulated sugar
Sweetens both the crust and the cheesecake filling, while also helping to achieve that light, fluffy texture in the crust when creamed with butter.
- Egg
Binds the cookie dough ingredients and adds richness, which helps the crust maintain its shape during baking.
- Vanilla extract
Infuses a warm, aromatic sweetness into both the cookie crust and the cheesecake filling, rounding out the flavor profile.
- Cream cheese
The star of the cheesecake filling, delivering the signature creamy texture and tanginess that defines any cheesecake.
- Sour cream
Adds moisture and a subtle tang to the filling, resulting in a smoother, silkier cheesecake.
- Eggs
Provide structure and stability to the filling as it bakes, ensuring the cheesecake sets properly without cracking.
- Whipped cream
Light and airy, it tops the cheesecake with a cloud-like finish that contrasts beautifully with the denser base and filling.
- Sprinkles
Offer a playful pop of color and a bit of extra sweetness, making each slice feel festive and fun.
HOW TO MAKE SUGAR COOKIE CHEESECAKE
This recipe is broken down into two main stages—creating the sugar cookie crust and whipping up the luscious cheesecake filling—followed by a chill-and-decorate finale. By approaching each step with care, you’ll ensure a flawless, crowd-pleasing dessert.
1. Preheat your oven to 350°F (175°C) and lightly grease a 9-inch springform pan to prevent sticking.
2. In a medium bowl, whisk together the flour, baking soda, and salt until evenly combined. Set this dry mixture aside.
3. In a large mixing bowl, use a hand mixer to beat the softened butter and granulated sugar together until the mixture is light and fluffy, about 2–3 minutes.
4. Add the egg and vanilla extract into the butter-sugar mixture and mix until the ingredients are fully incorporated.
5. Gradually add the reserved flour mixture to the butter mixture, stirring gently until just combined. Be careful not to overmix, or your crust could become tough.
6. Press the sugar cookie dough evenly into the bottom of the prepared springform pan, creating a compact and smooth crust. Bake for 10–12 minutes, or until the edges are lightly golden. Remove from the oven and allow it to cool while you prepare the filling.
7. In another large bowl, beat the softened cream cheese and granulated sugar together with a mixer until smooth and creamy, scraping down the sides as needed.
8. Add the sour cream and vanilla extract, then mix on low speed until the batter is well combined and silky.
9. Add the eggs one at a time, mixing gently after each addition to maintain a smooth texture. Finally, sprinkle in the tablespoon of flour and mix just until incorporated.
10. Pour the cheesecake filling over the cooled cookie crust, using a spatula to smooth the top for an even finish.
11. Bake for 50–60 minutes, or until the cheesecake is set but still slightly jiggly in the center. Turn off the oven, crack the door open, and allow it to cool slowly for 1 hour.
12. After the slow cool, remove the cheesecake from the oven and place it in the refrigerator for at least 4 hours or overnight to achieve the ideal firmness.
13. Before serving, spread whipped cream over the top of the cheesecake and decorate with sprinkles if desired for a colorful, celebratory look.
SERVING SUGGESTIONS FOR SUGAR COOKIE CHEESECAKE
Bringing this dessert to the table is always an event. The luscious blend of creamy filling and classic sugar cookie crust pairs beautifully with a variety of accompaniments. Whether you’re serving a crowd or just indulging yourself, these suggestions will elevate every slice and make sure it looks as good as it tastes.
- Garnish each slice with fresh berries, such as raspberries or blueberries, to add a pop of color and a bright, tangy contrast to the sweet, velvety cheesecake. Make sure to serve the berries at room temperature to avoid chilling the slice too much.
- Drizzle a simple fruit coulis—strawberry or raspberry—over the top right before serving. Use a small spoon to create artistic swirls, then dust lightly with powdered sugar for an elegant finish.
- For a festive look, add a dollop of whipped cream piped around the edges of each slice and top with sprinkles that match the party’s color theme. The whipped cream’s lightness balances the rich filling beautifully.
- Serve alongside a small scoop of vanilla bean ice cream or a flavored gelato for an extra dose of creamy indulgence. Place the ice cream beside the cheesecake on a chilled plate to maintain its texture.
HOW TO STORE SUGAR COOKIE CHEESECAKE
Proper storage is key to maintaining the dreamy texture of this Sugar Cookie Cheesecake. Since cheesecake can absorb odors and lose moisture if not stored correctly, following these tips will ensure your dessert stays as fresh and delicious as the moment it left the fridge.
- Refrigerate in the springform pan by covering the cheesecake tightly with plastic wrap or aluminum foil. Make sure the wrap is snug against the sides to prevent air exposure and freezer burn, then store it upright in the coldest part of your fridge.
- Slice and wrap individual servings in plastic wrap before refrigerating, which makes grab-and-go portioning a breeze. Place the wrapped slices in an airtight container or zip-top bag to keep them from absorbing any fridge odors.
- Freeze the whole cheesecake by first securing it in its pan and then wrapping it in two layers: plastic wrap followed by heavy-duty aluminum foil. Label with the date and freeze for up to 2 months. Thaw overnight in the refrigerator before serving.
- Freeze single slices for quick treats—wrap each piece in plastic wrap, place them in a freezer-safe bag, and store for up to 1 month. Thaw at room temperature or in the refrigerator, then refresh with a quick pipe of whipped cream if desired.
CONCLUSION
This Sugar Cookie Cheesecake brings together two timeless treats into one unforgettable dessert experience. From the buttery, soft sugar cookie crust to the luxuriously smooth cheesecake filling, every layer complements the next in perfect harmony. Whether you’re celebrating a birthday, hosting a dinner party, or simply craving a sweet pick-me-up, this recipe offers a delightful contrast of textures and flavors that will leave everyone asking for seconds. And let’s not forget those fun sprinkles and fluffy whipped cream topping—they add not just color, but a playful spirit to each slice, making it perfect for both casual gatherings and festive occasions. With a total preparation time of around 20 minutes and a cooking time of about an hour (plus resting), you’ll find that the effort truly pays off with a dessert that tastes like a special occasion in every mouthful.
Feel free to print this article and save it for later reference—you can even jot down tips or variations in the margins to make it your own signature recipe. Below, you’ll find a FAQ section to address any lingering questions, from ingredient substitutions to troubleshooting tips. If you try this recipe, I’d love to hear how it turns out! Leave a comment, share your feedback, or send over any questions you have as you bake. Whether you need help perfecting the crust or want ideas for flavored whipped cream, I’m here to chat. Happy baking, and may every slice bring you as much joy as it has brought me in my kitchen!
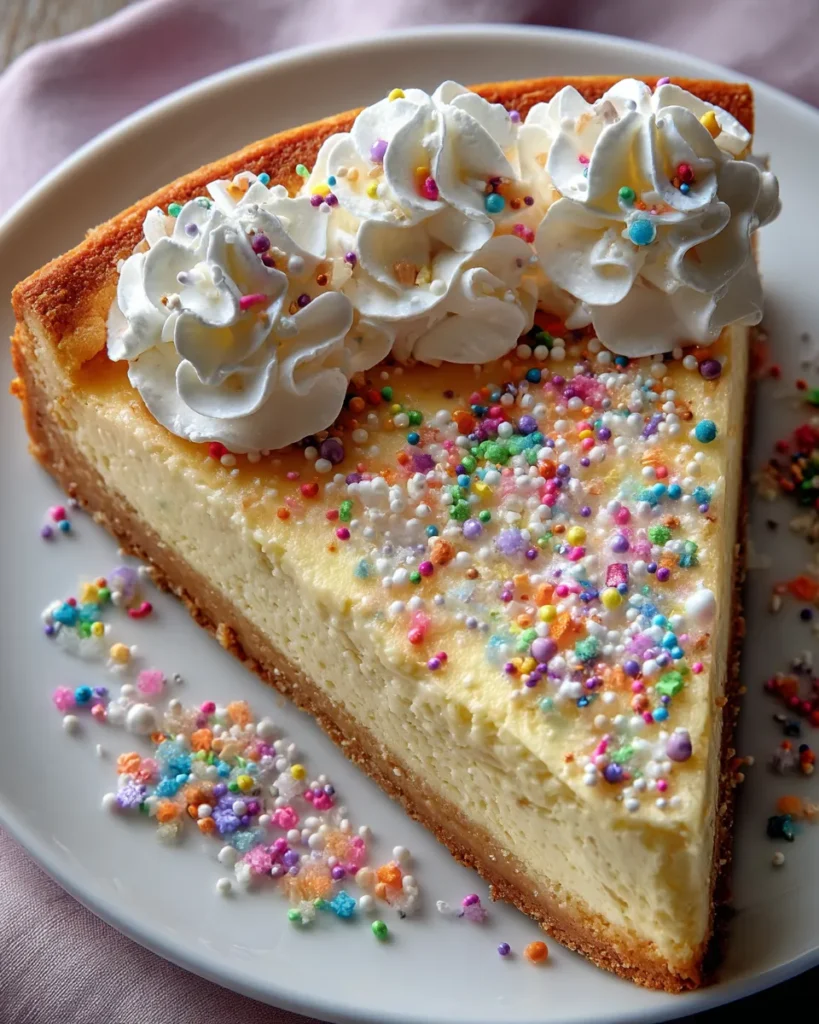

Sugar Cookie Cheesecake
Description
This Sugar Cookie Cheesecake offers a delightful contrast of creamy filling and sweet, buttery crust. Topped with whipped cream and sprinkles, it's a treat that brings joy to every bite.
Ingredients
Instructions
-
Preheat your oven to 350°F (175°C). Lightly grease a 9-inch springform pan.
-
In a medium bowl, whisk together the flour, baking soda, and salt. Set aside.
-
In a large mixing bowl, using a hand mixer, beat the softened butter and granulated sugar together until light and fluffy, about 2-3 minutes.
-
Add the egg and vanilla extract into the butter mixture and mix until well combined.
-
Gradually add the flour mixture to the butter mixture, mixing until just combined. Do not overmix.
-
Press the sugar cookie dough evenly into the bottom of the prepared springform pan to form the crust. Bake for 10-12 minutes, or until lightly golden around the edges. Remove from the oven and let it cool while preparing the filling.
-
In another large bowl, beat the softened cream cheese and granulated sugar together until smooth and creamy.
-
Add the sour cream and vanilla extract, mixing until well combined.
-
Add the eggs one at a time, mixing gently after each addition. Finally, add the tablespoon of flour and mix just until incorporated.
-
Pour the cream cheese filling over the cooled crust in the springform pan, smoothing the top with a spatula.
-
Bake for 50-60 minutes, or until the cheesecake is set but slightly jiggly in the center. Turn off the oven and crack the oven door open, allowing the cheesecake to cool slowly for 1 hour.
-
After cooling, remove the cheesecake from the oven and refrigerate for at least 4 hours or overnight.
-
Before serving, spread whipped cream over the top of the cheesecake and decorate with sprinkles if desired.
Note
- This recipe can be customized by adding food coloring to the whipped cream for a festive touch.
- For an added flavor twist, consider adding lemon or almond extract as a substitute for vanilla in the cheesecake filling.
- You can serve the cheesecake plain or with fresh fruit toppings like berries for a delightful contrast.
- This cheesecake can be frozen! Just wrap it tightly and store for up to 2 months. Thaw it in the refrigerator before serving.

