

There’s something absolutely magical about a dessert that dances between the realms of sweet and salty, and this Salted Caramel Dessert does just that with effortless elegance. First, you’ll notice the deep amber hue of the homemade caramel, shimmering like liquid gold as it fills your kitchen with an irresistible warmth. Every swirl of sugar and butter melds into a silky, velvety sauce that tastes like a dream come true. Then, when you press that luscious caramel over a tender, flaky pastry base, it transforms into a multi-layered indulgence that’s simply impossible to resist. As the caramel cools, it sets just enough to give you that perfect bite—soft and creamy, with a gentle pull that releases the most harmonious blend of flavors in your mouth.
Now picture unwrapping a slice of this treasure, topping it off with a generous dollop of freshly whipped cream and a delicate drizzle of extra caramel sauce. Each mouthful offers a satisfying crunch from the pastry crust, followed by a cushion of dreamy caramel and the lightest whisper of sea salt to balance everything out. This dessert isn’t just about one note—it’s a symphony of textures and tastes that lull you into dessert nirvana. Whether you’re serving this at a casual family gathering, a special dinner party, or simply indulging in a solo moment of bliss, this Salted Caramel Dessert promises to become your new go-to treat. Don’t be surprised if your friends and family start looking at you with hopeful eyes, ready for just one more decadent bite.
KEY INGREDIENTS IN SALTED CARAMEL DESSERT
Every great dessert begins with quality ingredients, and this Salted Caramel Dessert is no exception. From the rich sweetness of the sugar to the flaky tenderness of the pastry base, each component plays a starring role. Here’s a closer look at the essentials that come together to create this sweet-and-salty masterpiece:
- Granulated sugar
The foundation of our caramel, it melts down to form that signature amber color. Pure and straightforward, it’s what gives the caramel its glossy sheen and deep flavor.
- Unsalted butter
Creamy and rich, butter adds both body and flavor. Used first in the caramel to create a smooth, luscious sauce and again chilled in the pastry to ensure a perfectly flaky crust.
- Heavy cream
This is the key to silkiness. When poured into the hot sugar-butter mixture, it transforms the caramel into a luxurious, creamy sauce that coats the palate.
- Sea salt
Just a touch of this crystalline treasure enhances the sweetness and brings out the deeper notes in the caramel, creating that irresistible sweet-and-salty contrast.
- All-purpose flour
The backbone of our pastry base, it combines with powdered sugar and butter to deliver a crisp, tender crust that supports the caramel without overpowering it.
- Powdered sugar
Finely milled for a smooth texture, it blends with flour to add a hint of sweetness and helps the pastry achieve that delicate, melt-in-your-mouth quality.
- Cold water
A little hydration goes a long way. Cold water binds the pastry dough without melting the butter, ensuring a light and flaky finish.
- Vanilla extract
A splash of pure vanilla elevates the flavor profile, adding warmth and complexity to both the dough and the caramel.
- Heavy whipping cream
Whipped to fluffy perfection, this cream crowns the dessert with airy clouds of sweetness, rounding out every bite.
- Caramel sauce
Reserved for a final decorative drizzle, it enhances the presentation and adds an extra layer of sweet indulgence.
HOW TO MAKE SALTED CARAMEL DESSERT
Creating this indulgent treat is a delightful journey through sweet and salty textures. You’ll start by mastering the smooth caramel, then build a tender pastry base before uniting them in perfect harmony. Follow each step closely, and you’ll end up with a dessert that looks like it belongs in a patisserie window.
1. In a medium saucepan, heat the granulated sugar over medium heat, stirring constantly with a heatproof spatula or wooden spoon until it melts evenly and develops a rich amber color.
2. Carefully add the cubed unsalted butter, one piece at a time, stirring vigorously until fully melted. Watch for bubbling and steam, and keep a safe distance to avoid any splatters.
3. Slowly pour in the heavy cream while continuing to stir. The mixture will foam up—this is normal. Let it boil gently for 1 minute to thicken before removing the pan from heat.
4. Stir in the sea salt, blending thoroughly until you achieve a smooth, velvety caramel. Transfer it to a heatproof bowl and let it cool completely at room temperature.
5. In a large mixing bowl, whisk together the all-purpose flour and powdered sugar until evenly combined.
6. Add the chilled, cubed butter to the dry ingredients. Use a pastry cutter or your fingertips to work the butter into the flour mixture until it resembles coarse crumbs.
7. Drizzle in the cold water and vanilla extract, then gently knead just until a dough forms. Shape it into a ball, wrap in plastic wrap, and refrigerate for 30 minutes.
8. Preheat your oven to 350°F (175°C). On a lightly floured surface, roll out the chilled dough into an even layer and press it into a tart pan, trimming any excess edges.
9. Bake for 15–20 minutes, or until the crust turns a light golden shade. Remove from the oven and allow it to cool completely.
10. Once the base is cool, pour the cooled salted caramel over the crust, using an offset spatula to spread it into an even layer.
11. Gently top the caramel with the whipped heavy cream, smoothing it out to create a fluffy cloud above the golden filling.
12. Drizzle the additional caramel sauce over the whipped cream in a decorative pattern, adding a final touch of sweetness.
13. Refrigerate the dessert for at least 1 hour to let all the layers set, then slice and serve at your leisure.
SERVING SUGGESTIONS FOR SALTED CARAMEL DESSERT
When it comes to serving this luscious Salted Caramel Dessert, presentation and pairing can elevate it from wonderful to unforgettable. Whether you’re hosting a cozy dinner or treating yourself after a long day, these tips will help you showcase each slice in all its indulgent glory.
- Garnish with fresh berries and mint leaves
Add a pop of color and refreshing contrast. The bright tartness of berries like raspberries or blackberries highlights the richness of the caramel, while mint leaves provide a cool, herbal finish.
- Serve alongside vanilla ice cream
A smooth scoop of classic vanilla bean ice cream creates the ultimate sweet-and-salty duo. Place a small quenelle or scoop on the side of each plate to let guests dip or spread as they wish.
- Create a mini dessert platter
Cut the tart into small squares and arrange them on a slate or wooden board. Pair with bite-sized chocolates, salted nuts, or brownie bites for a party-ready dessert spread.
- Add a brûlée finish
For an adventurous touch, lightly sprinkle sugar over the caramel top and use a kitchen blowtorch to caramelize it, forming a delicate, crackling crust. Serve immediately to preserve the contrast between hot and cold.
HOW TO STORE SALTED CARAMEL DESSERT
Proper storage ensures you can savor every last morsel of this Salted Caramel Dessert without sacrificing texture or flavor. Whether you plan to keep it for a day or up to two weeks, these methods will maintain its creamy layers and flaky crust.
Refrigeration is your best friend for this dessert. After slicing, cover the tart with plastic wrap or transfer pieces to an airtight container. This will keep the whipped cream from absorbing other fridge odors and protect the pastry base from becoming soggy. Stored this way, your dessert will stay fresh for up to 4–5 days.
- Airtight container storage
Place individual slices in a shallow airtight container, layering with parchment paper to prevent sticking. Store in the refrigerator for up to 5 days, then allow a few minutes at room temperature before serving for the best texture.
- Whole tart covered
If you haven’t cut into it yet, cover the entire tart with plastic wrap or a cake dome. This keeps the top from drying out and preserves the delicate whipped cream layer for up to 3 days in the fridge.
- Freezer method
To extend longevity, you can freeze uncut or sliced pieces. Wrap each slice tightly in plastic wrap and then in aluminum foil. Freeze for up to 2 weeks. Thaw in the refrigerator overnight before serving, then bring to room temperature for 15–20 minutes.
- Separate component storage
For ultimate freshness, store the pastry base separately from the caramel sauce and whipped cream. Keep the base in an airtight container at room temperature for 2 days, and refrigerate the caramel and whipped cream individually. Assemble just before serving to enjoy each element at its peak.
CONCLUSION
This Salted Caramel Dessert has everything you need to make an ordinary gathering feel extraordinary. From the glossy, golden caramel to the flaky, buttery crust and the light-as-air whipped cream, every element works in harmony to deliver a taste sensation that lingers long after the last bite. You’ve learned how to craft the perfect salted caramel from scratch, build a resilient yet tender pastry shell, and assemble everything into an elegant dessert that’s sure to impress. Don’t forget that the balance of sweet and salty is what sets this treat apart—so take your time with each step, savor the process, and embrace the joy of creating something truly special in your own kitchen.
Feel free to print and save this article for future reference, and remember you can find a FAQ below to help troubleshoot common baking questions. If you try this recipe at home, I’d love to hear how it turned out! Leave a comment with your experiences, questions, or any tweaks you made to personalize it. Whether you have feedback on achieving the perfect caramel consistency or ideas for exciting flavor variations, your insights help fellow home cooks transform their kitchens into cozy dessert havens. Happy baking!
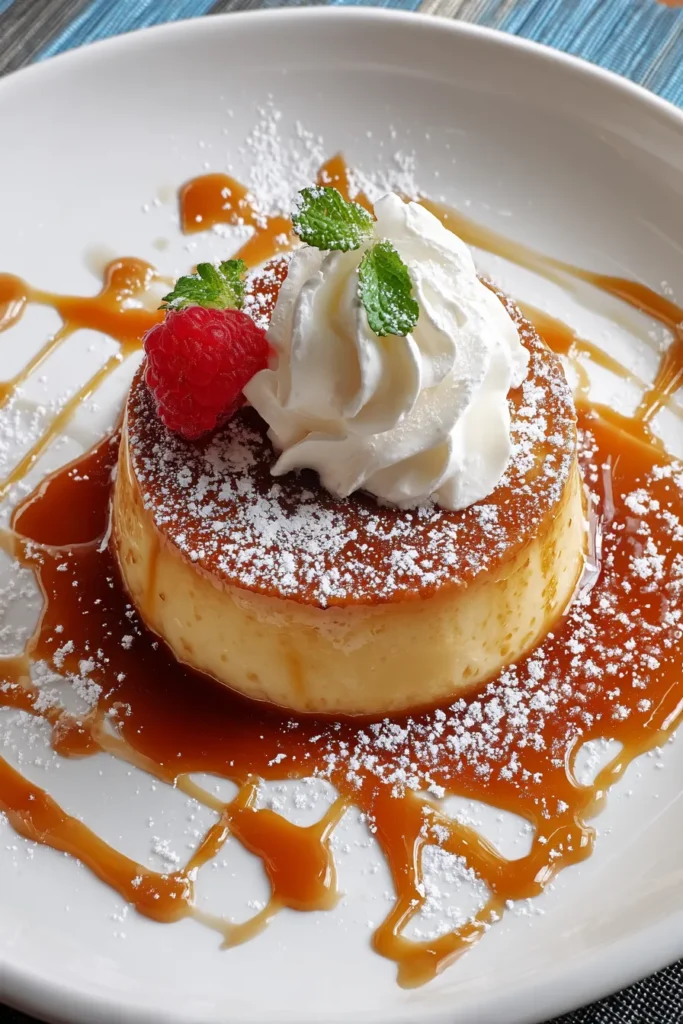

Salted Caramel Dessert
Description
Experience the perfect balance of sweet and salty with this luxurious dessert. The creamy salted caramel layered over a flaky pastry base creates a heavenly treat you can't resist.
Ingredients
Instructions
-
First, prepare the salted caramel. In a medium saucepan, heat the granulated sugar over medium heat, stirring constantly until it melts into an amber color.
-
Carefully add the cubed butter, stirring until melted completely. It may bubble up, so be cautious.
-
Slowly pour in the heavy cream while stirring continuously. Let it boil for 1 minute, then remove from heat.
-
Stir in the sea salt. Allow the salted caramel to cool completely before using it in the dessert.
-
Next, prepare the pastry base. In a mixing bowl, combine all-purpose flour and powdered sugar.
-
Add chilled cubed butter into the dry ingredients, and use a pastry cutter or your fingers to mix until crumbly.
-
Drizzle the cold water and vanilla extract, then form the dough into a ball. Wrap in plastic and refrigerate for 30 minutes.
-
Preheat the oven to 350°F (175°C). Roll out the dough on a lightly floured surface and press into a tart pan.
-
Bake in the preheated oven for 15-20 minutes until lightly golden. Cool completely.
-
Once your base is cool, pour the salted caramel over the base, spreading evenly.
-
Top with whipped cream, spreading gently.
-
Drizzle the additional caramel sauce over the top for garnish.
-
Refrigerate the dessert for at least an hour before serving for the best texture.
Note
- The salted caramel can be stored in the refrigerator for up to two weeks.
- Use a blowtorch carefully for a slight brûlée effect on the caramel topping, if desired.
- Pair the dessert with a scoop of vanilla ice cream for an extra indulgent treat.
- Experiment with adding nuts or chocolate shavings on top for a festive touch.

