

There’s something truly magical about a dessert that feels both light and indulgent, and this Ricotta and Cream Cheese Tart with Lemon hits that sweet spot beautifully. With its velvety filling, bright citrus notes, and buttery crust, it’s like sunshine on a plate. Whenever I whip up this tart, I’m transported back to a lazy spring afternoon in my little kitchen, windows thrown open to let in the gentle breeze. The moment I stir lemon zest into the creamy mixture, that zingy aroma fills the air and makes me smile. It’s simple enough for beginner bakers, yet impressive enough to steal the show at any gathering.
Over the years, I’ve learned that the secret to a perfect tart lies in balancing textures and flavors. The ricotta adds a whisper-light fluffiness while the cream cheese brings a rich, silky depth. When you fold in fresh lemon juice and zest, every bite becomes a delightful dance of tang and cream. Whether you’re hosting a backyard brunch, celebrating a birthday, or just craving a little pick-me-up after dinner, this tart is your new best friend. Trust me, the first time your guests taste that refreshing lemon twist against the smooth cheese filling, they’ll be asking for seconds—and the recipe, of course.
KEY INGREDIENTS IN RICOTTA AND CREAM CHEESE TART WITH LEMON
Before diving into the kitchen, let’s take a quick tour of the stars of this tart. Each ingredient plays its part, creating a harmonious blend of creamy textures and bright citrus notes. Knowing their roles will help you appreciate every step of the process—and maybe inspire a few creative tweaks of your own!
- Ricotta cheese
Adds a light, airy texture to the filling, preventing it from feeling too heavy. Its mild flavor blends seamlessly with the lemon for a perfectly balanced bite.
- Cream cheese
Brings a luscious, velvety richness that supports the tangy notes of lemon, creating that signature smooth and creamy mouthfeel.
- Granulated sugar
Sweetens the filling without overpowering the citrus. It helps stabilize the cheese mixture and ensures a tender crumb.
- Eggs
Act as natural binders, giving structure to the tart while keeping the filling delicate and slightly wobbly at the center.
- Lemon zest
Delivers concentrated citrus oils for an intense burst of flavor and fragrance in every forkful.
- Lemon juice
Infuses the filling with fresh brightness, cutting through the richness of the cheeses for a refreshing finish.
- Vanilla extract
Adds a hint of warmth and rounds out the tangy flavors, elevating the overall taste profile.
- Salt
Enhances all the other flavors, making the sweetness sweeter and the citrus more zesty.
- Pre-baked tart crust
Provides a sturdy, buttery base that holds the creamy filling. You can use a store-bought crust or make your own for extra homemade charm.
- Powdered sugar
Dusts the top of the chilled tart with a delicate, sweet finish and an elegant touch.
- Fresh berries
Offer a pop of color and a juicy contrast to the smooth filling, making each slice picture-perfect and delightful.
HOW TO MAKE RICOTTA AND CREAM CHEESE TART WITH LEMON
Now that our ingredients are prepped and waiting, it’s time to whip up that dreamy filling and bake our way to citrusy bliss. Follow these detailed steps to ensure every stage is smooth and on point.
1. Preheat the oven to 350°F (175°C). This ensures a consistent baking environment so the filling sets evenly without overbrowning the crust.
2. In a large mixing bowl, combine the ricotta cheese and softened cream cheese. Use an electric mixer on medium speed to beat until perfectly smooth and well blended, scraping down the sides as needed.
3. Add the granulated sugar and continue to mix until the sugar is fully incorporated and the mixture looks glossy and even.
4. Crack in the eggs one at a time, beating well after each addition. This gradual approach helps maintain a smooth, lump-free batter.
5. Stir in the lemon zest, fresh lemon juice, vanilla extract, and salt. Mix on low speed until all ingredients are well combined and no streaks remain.
6. Pour the cheese mixture into your pre-baked tart crust, using a spatula to spread it evenly and smooth the top.
7. Place the tart on the middle rack of the oven. Bake for 30–35 minutes, or until the filling is set around the edges but still slightly wobbly in the center.
8. Remove from the oven and let the tart cool to room temperature on a wire rack. This gradual cooldown prevents cracks in the filling.
9. Once cooled, refrigerate the tart for at least 2 hours, allowing it to chill fully and firm up for clean slicing.
10. Before serving, dust the top with a light layer of powdered sugar and garnish with fresh berries if desired.
11. Slice into wedges and serve chilled for the best texture and flavor experience.
SERVING SUGGESTIONS FOR RICOTTA AND CREAM CHEESE TART WITH LEMON
Serving this tart is half the fun—playing with colors, textures, and accompaniments can turn a simple slice into a centerpiece dessert. Whether you’re setting a casual tea party or a fancier dinner, these ideas elevate every bite.
- Fresh berry medley
Arrange a mix of strawberries, blueberries, and raspberries around each slice. Their vibrant colors and juicy bite contrast beautifully with the creamy filling.
- Whipped cream cloud
Top with a dollop of lightly sweetened whipped cream seasoned with a dash of lemon zest. The airy cream adds an extra layer of indulgence.
- Herb-infused garnish
Sprinkle a few torn mint leaves or basil petals over the tart. The herbs introduce a surprising fresh note that pairs wonderfully with the citrus.
- Tea or coffee pairing
Serve alongside a pot of Earl Grey tea (with its own citrus undertones) or a rich espresso. The warm beverage highlights the tart’s bright flavors and creamy texture.
HOW TO STORE RICOTTA AND CREAM CHEESE TART WITH LEMON
Proper storage ensures your tart retains its delightful texture and refreshing flavors, whether you’re saving leftovers or planning ahead for a gathering. Follow these tips to keep each slice tasting just-baked fresh.
- Refrigerate in an airtight container
After chilling and cutting, place slices in a sealed container. This prevents the tart from absorbing other fridge odors and preserves its creamy consistency.
- Cover with plastic wrap
If you prefer to store the whole tart, cover it tightly with plastic wrap. This shields the surface from drying out and keeps the powdered sugar dusting intact.
- Make-ahead chilling
Prepare the tart a day in advance and let it chill overnight. The extra resting time deepens the lemon flavor and firms up the filling for cleaner cuts.
- Freeze for longer storage
For extended preservation, wrap individual slices in plastic wrap and place in a freezer-safe bag. Thaw in the refrigerator before serving to maintain that perfect creamy texture.
CONCLUSION
I hope this deep dive into the world of Ricotta and Cream Cheese Tart with Lemon has inspired your next baking adventure. From the first creamy spoonful laced with bright lemon zest to the buttery crunch of the pre-baked crust, each element works in harmony to create a dessert that’s both elegant and approachable. You can print this article and save it for later, keeping the recipe right at your fingertips whenever the craving strikes. Don’t forget—you’ll find a handy FAQ below to answer any lingering questions about techniques, substitutions, or troubleshooting.
When you try this tart, I’d love to hear how it turned out! Leave a comment, ask questions, or share any twists you made to the recipe. Whether you’re a seasoned home cook or a baking novice, your feedback and stories bring this recipe to life. Happy baking, and may each bite be as bright and blissful as a sunny spring day!
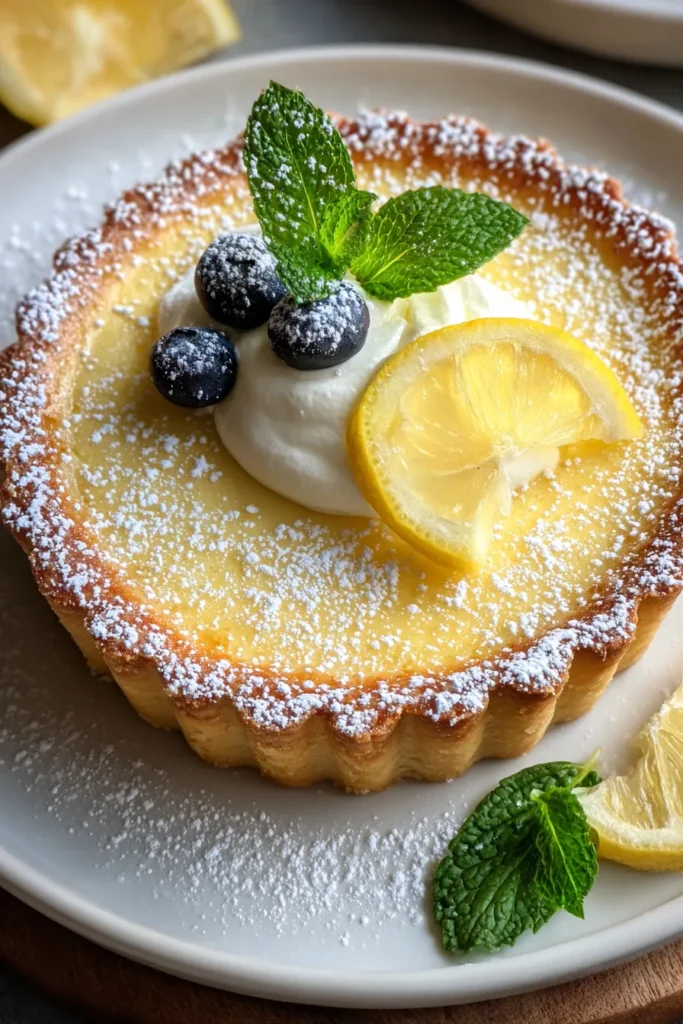

Ricotta and Cream Cheese Tart with Lemon
Description
This Ricotta and Cream Cheese Tart with Lemon combines fluffy ricotta, creamy cream cheese, and a burst of lemon zest for a wonderfully light and refreshing dessert experience.
Ingredients
Instructions
-
Preheat your oven to 350°F (175°C).
-
In a large mixing bowl, combine the ricotta cheese and softened cream cheese. Beat until smooth and well blended using an electric mixer.
-
Add the granulated sugar and mix until fully incorporated.
-
One at a time, add the eggs, beating well after each addition to ensure a smooth mixture.
-
Stir in the lemon zest, lemon juice, vanilla extract, and salt. Mix until all ingredients are well combined.
-
Pour the cheese mixture into the pre-baked tart crust, spreading evenly with a spatula.
-
Place the tart on the middle rack of the oven and bake for 30-35 minutes, or until the filling is set but still slightly wobbly in the center.
-
Remove the tart from the oven and let it cool to room temperature on a wire rack.
-
Once cooled, refrigerate the tart for at least 2 hours, or until completely chilled and firm.
-
Before serving, dust the tart with powdered sugar and garnish with fresh berries if desired.
-
Slice into wedges and serve chilled.
Note
- Ricotta cheese provides a light and fluffy texture.
- Lemon zest and juice add a refreshing citrus flavor that complements the creaminess.
- The tart can be made a day ahead and stored in the refrigerator, enhancing flavors.
- Fresh berries add a colorful and flavorful garnish, though they are optional.
- This dessert is perfect for spring and summer gatherings or as a light, refreshing end to any meal.

