

I still remember the first time I created this marble masterpiece in my cozy kitchen. As I stirred together the velvety butter and sugar, the bowl began to glow almost as brightly as my excitement. The moment I poured in the silky whole milk, my batter transformed into a luxuriously smooth canvas just waiting for its chocolatey twist. With a careful swirl of rich cocoa-infused batter into the classic vanilla base, it felt like two old friends dancing together in perfect harmony. Creating that iconic marble effect is both art and science—a delightful reminder that desserts can be both visually stunning and deeply comforting at the same time.
This cake isn’t just a treat for the eyes; every forkful offers a moist crumb that practically melts on your tongue, highlighted by the exquisite balance of buttery vanilla and deep chocolate. I love how the tang of a hint of buttermilk or the kick from a teaspoon of espresso powder can elevate the cocoa layer to new heights—tricks I’ve picked up through many joyful kitchen experiments. After an hour in the oven, the rich scent of baked batter fills the house, signaling that a truly special dessert is almost ready. By the time you slice into it, you’ll be greeted by a swirl of light and dark cake ribbons inviting you to take that first, unforgettable bite.
KEY INGREDIENTS IN RICH MOIST CHOCOLATE MARBLE CAKE
Before we get swept away in the baking process, let’s talk about the hero ingredients that make this cake so irresistible. Each one brings its own magic: the butter lends richness, the eggs give structure, and the cocoa powder adds that irresistible chocolate depth. Grab your apron, and let’s explore what you’ll need to create this decadent homemade cake.
- Unsalted butter
Softened to room temperature, it provides the cake’s tender crumb and rich flavor without adding extra salt. Creaming butter with sugar also helps trap air, giving the cake its signature lightness.
- Sugar
This not only sweetens the batter but also helps create a moist cake by interacting with butter to hold onto moisture. It ensures a golden crust and tender bite.
- Eggs
Acting as natural binders, eggs give structure and stability to the cake. They enrich the batter, contributing to a moist, fine crumb and enhancing overall flavor.
- Vanilla extract
A splash of pure vanilla extract heightens the overall profile of the cake, amplifying both the buttery vanilla side and rounding out the chocolate notes.
- All-purpose flour
The backbone of the cake, it provides the necessary gluten structure. When mixed properly, it yields a soft but sturdy crumb that supports the swirling pattern.
- Baking powder
This leavening agent ensures your cake rises evenly, creating a light and tender texture. It works in harmony with the creamed butter and eggs.
- Salt
Just a pinch balances the sweetness, enhancing both the vanilla and chocolate flavors for a more rounded, satisfying taste.
- Whole milk
The fat in whole milk delivers richness and moisture, ensuring the cake stays soft. Alternately, buttermilk can add a pleasant tang.
- Unsweetened cocoa powder
The star for the chocolate portion, it gives depth of flavor and beautiful color. Mixing it with hot water helps it bloom, intensifying the chocolate notes.
- Hot water
Helps dissolve and activate the cocoa powder, creating a smooth, lump-free chocolate batter that swirls seamlessly into the vanilla portion.
HOW TO MAKE RICH MOIST CHOCOLATE MARBLE CAKE
Get ready for an easy-to-follow, step-by-step journey from pantry staples to a show-stopping marble cake. These instructions will guide you through every stage, from mixing to swirling and baking, so you can enjoy a picture-perfect dessert that’s as delicious as it looks.
1. Preheat your oven to 350°F (175°C). Grease the inside of a 10-inch (25cm) bundt pan (or a similar sized cake pan) with butter, then flour it lightly to prevent sticking.
2. In a large mixing bowl, cream the softened butter and sugar together using an electric mixer until the mixture is light, pale, and fluffy, about 3–5 minutes.
3. Add the eggs one at a time, beating well after each addition to ensure even incorporation. Stir in the vanilla extract until it’s fully combined.
4. In another bowl, whisk together the all-purpose flour, baking powder, and salt. This ensures the leavening agent is evenly distributed.
5. Combine the flour mixture with the creamed butter mixture alternately with the milk—beginning and ending with the flour mixture. Use a spatula to mix just until combined, being careful not to overwork the batter.
6. Divide the batter evenly into two separate bowls. This sets the stage for your marble effect.
7. In a small bowl, mix the unsweetened cocoa powder with the hot water until you have a smooth, pourable chocolate mixture. Stir this into one of the batter bowls to create the chocolate portion.
8. Spoon dollops of plain batter and chocolate batter alternately into the prepared pan. Use a knife or skewer to gently swirl through the layers, creating the signature marbled pattern without over-mixing.
9. Bake in the preheated oven for 50–60 minutes, or until a toothpick inserted into the cake’s center comes out clean. The top should be lightly golden.
10. Allow the cake to cool in the pan for about 10 minutes, then gently invert it onto a wire rack to cool completely before slicing and serving.
SERVING SUGGESTIONS FOR RICH MOIST CHOCOLATE MARBLE CAKE
When it comes to presenting this beauty, the possibilities are endless—and utterly delightful. Whether you’re elevating a simple afternoon tea or finishing off a celebratory dinner, serving your marble cake with the right accompaniments adds an extra layer of charm and flavor. I love experimenting with textures and contrasts—think creamy, crunchy, tart, and sweet—all coming together in one heavenly slice.
- Serve slices dusted with powdered sugar for a delicate finish that looks effortlessly elegant and adds just a whisper of sweetness. Use a fine-mesh sieve to achieve an even snow-like layer.
- Drizzle a warm chocolate ganache over each slice for an indulgent twist. Melt equal parts chocolate and heavy cream, then pour slowly to create glossy ribbons that harden into a silky shell.
- Pair individual wedges with a generous dollop of whipped cream and a handful of fresh berries. The tang of raspberries or strawberries cuts through the richness and adds a burst of vibrant color.
- Offer a side of vanilla ice cream or espresso for contrasting temperatures and flavors. A scoop of cold creaminess or a bold shot of coffee enhances every swirl of chocolate and vanilla in the cake.
HOW TO STORE RICH MOIST CHOCOLATE MARBLE CAKE
Understanding how to preserve the freshness and flavor of your homemade marble cake is just as important as baking it perfectly. Whether you’re saving slices for later indulgence or prepping ahead for a gathering, these storage methods will keep your cake moist, delicious, and ready to serve.
- Store at room temperature in an airtight container for up to 3 days. Make sure the cake is completely cooled, then wrap it lightly in plastic wrap before placing it in the container to prevent it from drying out.
- For longer storage, refrigerate covered slices in an airtight box for up to 5 days. Chilling helps maintain the structure but can slightly firm up the crumb—allow it to come to room temperature before serving for the best texture.
- To freeze individual slices, wrap each piece tightly in plastic wrap, then place them in a sealed freezer bag. Frozen slices can last up to 2 months. Thaw overnight in the refrigerator or at room temperature for a couple of hours.
- If you’ve glazed or frosted the cake, refrigerate it in a cake dome or sealed container. Let it sit at room temperature for about 20–30 minutes before serving to allow the frosting or glaze to soften to the perfect consistency.
CONCLUSION
Baking this Rich Moist Chocolate Marble Cake transports you straight into the heart of dessert heaven, where each swirl is a testament to the beautiful balance of buttery vanilla and decadent chocolate. We’ve covered everything from selecting top-notch ingredients—like unsalted butter and pure vanilla extract—to mastering the art of the final swirl that makes your cake look straight out of a bakery display. Armed with your mixing bowls, a trusty bundt pan, and the step-by-step instructions, you’re all set to achieve intermediary-level magic in around 30 minutes of prep time, an hour of baking, and just a 10-minute rest period. And with approximately 450 calories per serving, you’ll know exactly how to plan your indulgence!
Feel free to print this article and save it for later use—perhaps tucking it into your favorite recipe binder or pinning it on the fridge for easy reference. You’ll also find a FAQ section below that answers common queries, from troubleshooting a dense crumb to customizing flavor variations. If you dive into this recipe and have questions, feedback, or just want to share how your cake turned out, drop a comment or question. I love hearing your baking stories, tips, and any tweaks you’ve made to personalize your homemade cake adventure! Happy baking!
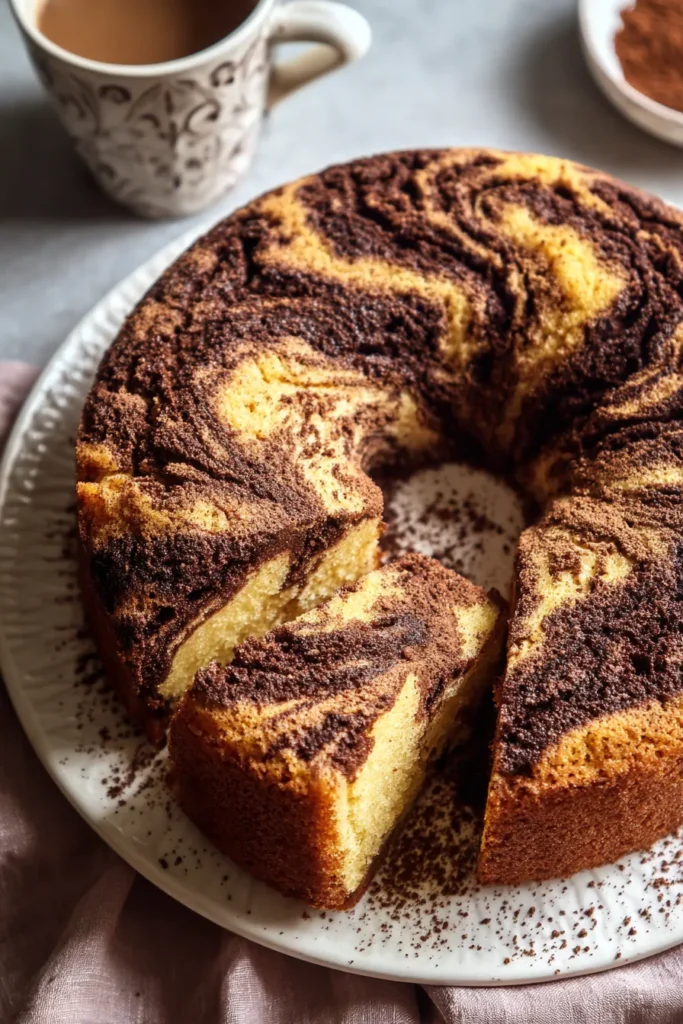

Rich Moist Chocolate Marble Cake
Description
Experience the luxurious harmony of rich chocolate and buttery vanilla in every slice of this moist marble cake—perfect for any celebration or cozy gathering!
Ingredients
Instructions
-
Preheat your oven to 350°F (175°C). Grease and flour a 10-inch (25cm) bundt pan or a similar sized cake pan.
-
In a large mixing bowl, cream the softened butter and sugar together until light and fluffy.
-
Add the eggs one at a time, beating well after each addition. Stir in the vanilla extract.
-
In another bowl, whisk together the flour, baking powder, and salt.
-
Add the dry ingredients to the creamed mixture alternately with the milk, starting and ending with the flour mixture. Mix just until combined.
-
Divide the batter into two separate bowls.
-
In a small bowl, mix the cocoa powder with the hot water until smooth. Stir this cocoa mixture into one of the batter bowls until fully incorporated to create the chocolate batter.
-
Spoon the plain batter and chocolate batter alternately into the prepared pan. Use a knife or skewer to gently swirl through the cake batters to create a marbled effect.
-
Bake in the preheated oven for 50-60 minutes, or until a toothpick inserted into the center comes out clean.
-
Allow the cake to cool in the pan for about 10 minutes, then turn it out onto a wire rack to cool completely.
Note
- Make sure your butter is at room temperature for easier creaming with sugar.
- For a more intense chocolate flavor, consider adding a teaspoon of instant espresso powder to the cocoa mixture.
- You can substitute half of the whole milk with buttermilk for a tangy flavor variation.
- This cake pairs wonderfully with a simple glaze or dusting of powdered sugar before serving.
- Store any leftovers in an airtight container for up to 3 days at room temperature.

