

There’s something undeniably uplifting about a cookie that combines rich, buttery dough with a refreshing minty kick. These Peppermint Swirl Cookies are like holiday cheer baked into a perfect little round, with a bright swirl of red and white that promises both sweetness and a cool, clean finish. Each bite delivers a soft, tender center and lightly crisped edges, melting gently on your tongue as the peppermint candies add a delightful crunch. Beyond the flavors, the visual appeal of those whimsical spirals adds a charming touch to any festive spread, instantly brightening the dessert table and drawing smiles from both kids and adults alike.
As you gather ingredients and preheat the oven, there’s a cozy warmth that takes over the kitchen—mixing butter and sugars, the dough comes together in a cloud of velvety texture, just waiting for its peppermint makeover. Whether you’re rolling it out with little helpers or sneaking a piece of broken swirl for a quick taste test, these cookies have a way of making the holidays feel extra special. With straightforward steps and beginner-friendly techniques, you’ll find yourself reaching for this recipe year after year, turning it into a sweet family tradition that fills your home with laughter, good memories, and, of course, delicious minty goodness.
KEY INGREDIENTS IN PEPPERMINT SWIRL COOKIES
Every element in this recipe plays its part in creating the perfect balance of texture, flavor, and festive flair. From the foundation of a rich, buttery dough to the pops of peppermint crunch, these ingredients come together seamlessly to deliver that signature swirl cookie experience.
- Unsalted Butter: The backbone of a tender, melt-in-your-mouth cookie. Softened butter adds moisture, richness, and a subtle creaminess that elevates the overall flavor without adding extra salt.
- Granulated Sugar: Provides sweetness and helps create a slight crispness around the edges. When creamed with butter, it introduces air into the dough for a lighter texture.
- Brown Sugar: Brings a hint of caramel depth and chewy texture. Its molasses content contributes moisture and a warm undertone that complements the mint.
- Eggs: Act as binding agents while contributing structure and lift. They help the dough hold together and create a soft, cakey crumb.
- Vanilla Extract: Infuses a sweet, aromatic note that rounds out the flavors and enhances both the butter and mint without overpowering them.
- Peppermint Extract: The star of the show, delivering a refreshing, cooling sensation that contrasts beautifully with the buttery dough.
- All-Purpose Flour: The structural foundation of the cookies. Its gluten content provides just enough elasticity for shaping without making them tough.
- Baking Soda: Offers gentle lift and helps achieve that perfect, slightly domed cookie shape.
- Salt: Balances the sweetness and intensifies the overall flavor profile, ensuring the mint isn’t cloying.
- Crushed Peppermint Candies: Impart crunchy bursts of mint throughout each bite, adding visual interest and textural contrast.
- Red Food Coloring (optional): A festive touch to tint half of the dough for that signature swirl. Use sparingly for vibrant, holiday-ready hues.
HOW TO MAKE PEPPERMINT SWIRL COOKIES
Let’s dive into the step-by-step process that transforms simple pantry staples into these eye-catching, minty delights. Follow these instructions carefully to ensure your cookies turn out picture-perfect every time.
1. Preheat the Oven
Preheat your oven to 350°F (175°C) and line two baking sheets with parchment paper. This sets the stage for even baking and makes cleanup a breeze.
2. Cream the Butter and Sugars
In a large mixing bowl, use an electric mixer to cream together the softened butter, granulated sugar, and brown sugar until the mixture becomes light and fluffy, about 3–4 minutes. This process incorporates air, giving your cookies a tender lift.
3. Incorporate the Eggs and Extracts
Add the eggs one at a time, beating well after each addition to ensure full incorporation. Then stir in the vanilla extract and peppermint extract until the dough is smooth and uniformly flavored.
4. Combine Dry Ingredients
In a separate bowl, whisk together the all-purpose flour, baking soda, and salt. Gradually add these dry ingredients to the wet mixture, mixing just until incorporated—overmixing can lead to tougher cookies.
5. Divide and Color the Dough
Split the dough in half. To one portion, fold in the crushed peppermint candies for flecks of minty crunch. To the other half, add a few drops of red food coloring if desired, mixing until the color is evenly distributed.
6. Form the Swirls
Take a small portion from each half of the dough and roll them into two logs, each about 6 inches long and 1 inch thick. Place the logs side by side, then gently twist or curl them together to create the signature swirl.
7. Slice and Arrange
Using a sharp knife, slice the twisted dough into 1/4-inch thick rounds. Place the rounds on the prepared baking sheets, leaving about 2 inches between cookies to allow for slight spreading.
8. Bake to Perfection
Bake in the preheated oven for 9–11 minutes, or until the edges turn a light golden brown. Keep an eye on them to prevent overbaking—these cookies are best when they remain slightly soft in the center.
9. Cool and Enjoy
Remove the cookies from the oven and let them cool on the baking sheet for 5 minutes before transferring them to a wire rack to cool completely. This brief rest helps them set without breaking.
SERVING SUGGESTIONS FOR PEPPERMINT SWIRL COOKIES
Once you have a batch of these festive treats cooled and ready, the possibilities for serving are endless! Whether you’re planning a holiday party, preparing a cozy evening snack, or gifting homemade goodies, here are a few ideas to showcase your peppermint swirls in style:
- With a steaming mug of hot chocolate
Arrange a few cookies on a small plate alongside a frothy cup of hot cocoa topped with whipped cream. The creamy chocolate warms you up, while the cookies add a cool mint finish—perfect for chilly nights.
- On a festive dessert platter
Combine your peppermint swirls with other holiday cookies—like gingerbread or thumbprints—on a tiered serving tray. Garnish with fresh holly leaves or a sprinkle of edible glitter for that extra holiday sparkle.
- Packaged as homemade gifts
Layer the cookies in decorative tins or clear cellophane bags tied with a ribbon. Slip in a handwritten note with a few storage tips, and you’ve got a heartfelt gift that friends and family will adore.
- As part of a peppermint ice cream sandwich
Take two cooled cookies and sandwich a scoop of vanilla or peppermint ice cream between them. Roll the edges in extra crushed peppermint for a show-stopping dessert that’s as fun to make as it is to eat.
HOW TO STORE PEPPERMINT SWIRL COOKIES
Keeping these cookies fresh and minty is key to enjoying them over several days—or even longer if you’re planning ahead. Proper storage preserves their texture, prevents them from going stale, and maintains that beautiful swirl shape. Here are a few tried-and-true methods:
- Room Temperature in an Airtight Container
Place completely cooled cookies in a single layer inside an airtight container. If stacking is necessary, separate layers with parchment paper. Stored this way, your cookies will stay soft and flavorful for up to one week.
- Refrigeration for Extended Freshness
For a firmer texture and longer shelf life, store the airtight container in the refrigerator. Well-sealed cookies can last up to two weeks cold, with the chill preserving the minty crunch of the peppermint candies.
- Freezing for Long-Term Storage
Arrange cookies in a single layer on a baking sheet and freeze until solid. Then transfer them to a freezer-safe bag or container with parchment between layers. They’ll keep for up to three months—just thaw at room temperature before serving.
- Decorative Gift Boxes
If you’re packaging as gifts, line metal or decorative boxes with tissue paper and place the cookies inside, separated by parchment. Encourage recipients to keep the box closed between helpings to lock in freshness.
CONCLUSION
From the very first swirl of red and white dough to the moment these cookies cool on the rack, Peppermint Swirl Cookies bring a touch of festive magic to any kitchen. We’ve walked through every step, from creaming butter and sugars to twisting the dough into those charming spiral shapes. Key ingredients like peppermint extract and crushed candies ensure each bite offers a delightful burst of minty crunch, while the buttery base remains soft and tender. Beginner-friendly techniques make this recipe accessible to every home cook, so whether you’re baking solo or enlisting the help of family and friends, the experience is as joyful as the result.
Feel free to print out this article and tuck it into your holiday recipe binder, or save it digitally for whenever you need a quick and delicious treat. You’ll also find a handy FAQ below to clear up any questions before you get started. If you give these Peppermint Swirl Cookies a try, I’d love to hear how they turned out! Leave your comments, questions, or feedback, and share any fun twists you added. Happy baking and may your kitchen be filled with sweet memories!
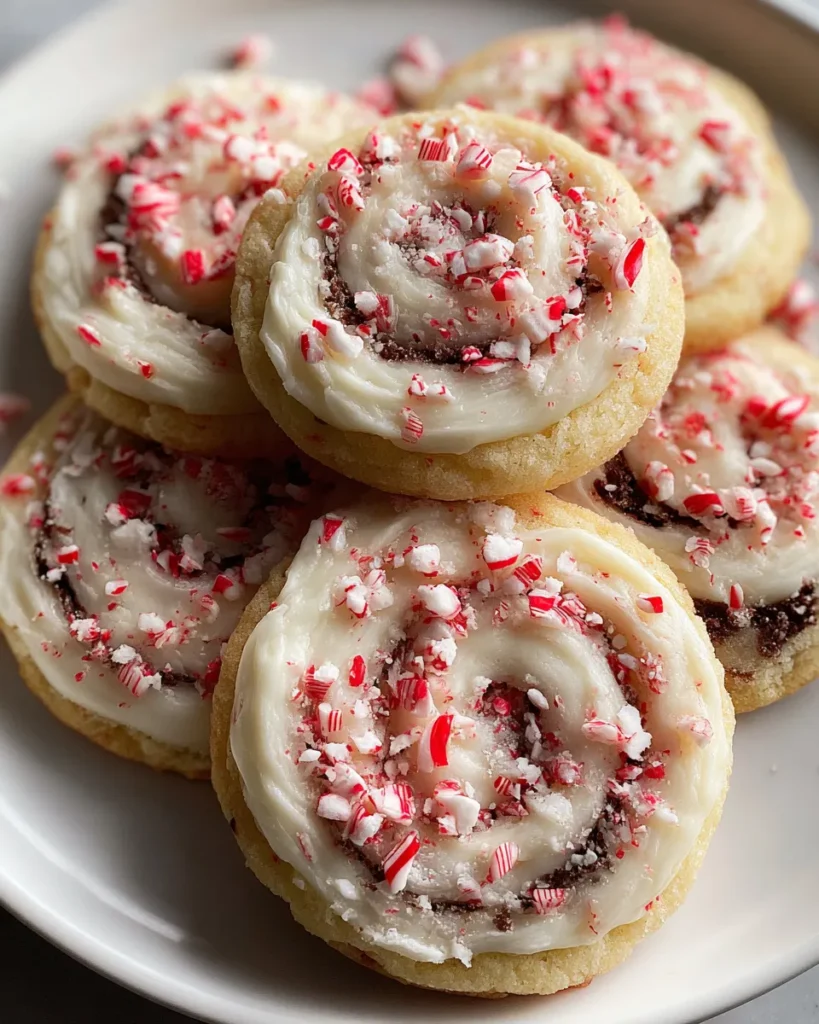

Peppermint Swirl Cookies
Description
These vibrant peppermint swirl cookies are a delightful combination of sweet, buttery goodness and refreshing mint flavor, perfect for sharing during the holidays.
Ingredients
Instructions
-
Preheat your oven to 350°F (175°C) and line two baking sheets with parchment paper.
-
In a large mixing bowl, cream together the softened butter, granulated sugar, and brown sugar until the mixture is light and fluffy, about 3-4 minutes.
-
Add the eggs one at a time, mixing well after each addition. Then, mix in the vanilla extract and peppermint extract until fully combined.
-
In a separate bowl, whisk together the all-purpose flour, baking soda, and salt. Gradually add these dry ingredients to the wet mixture, mixing just until incorporated.
-
Divide the dough in half. In one half, mix in the crushed peppermint candies. In the other half, if desired, add a few drops of red food coloring to create a pink color, mixing until the color is even throughout.
-
Take a small portion from each half of the dough and roll them into a log shape, about 6 inches long and 1 inch thick. Curl the two logs together, then twist gently to create a swirl effect.
-
Slice the twisted dough into 1/4-inch thick rounds and place them on the prepared baking sheets, spacing them about 2 inches apart.
-
Bake in the preheated oven for 9-11 minutes or until the edges are lightly golden.
-
Remove from the oven and let the cookies cool on the baking sheet for 5 minutes before transferring them to a wire rack to cool completely.
Note
- These cookies can be stored in an airtight container for up to a week.
- For an extra festive touch, sprinkle additional crushed peppermint on top of the cookies before baking.
- Feel free to substitute the peppermint extract for another flavor extract, such as almond or vanilla, for a different twist.
- This recipe is perfect for holiday gatherings and is sure to be a hit with both kids and adults.

