

There's something inherently comforting about biting into a soft, chewy cookie that’s just the right balance of sweet peanut butter and decadent chocolate. With every warm batch fresh out of the oven, you get that perfect contrast of a lightly golden edge giving way to a tender center, crowned with a glossy chocolate kiss that oozes richness and nostalgia. These Classic Peanut Butter Blossoms melt in your mouth, and you’ll swear each bite transports you back to carefree afternoons spent sneaking one (or two) right off the cooling rack. The way the sugar coating sparkles in the light, catching just a hint of your anticipation, only adds to the excitement before you even take that first heavenly mouthful.
When you gather friends or family around a tray of these beauties, you’re not just serving cookies—you’re serving memories. Each blossom feels like a little celebration, perfect for holidays, cookie exchanges, or simply surprising someone with a homemade treat. The marriage of creamy peanut butter and that inviting chocolate kiss topping brings smiles and happy chatter, opening the door to stories about who first taught you to bake or that funny moment when your dough stuck to the spoon. Trust me, once you experience the sweet, nutty aroma mingling through your kitchen and taste that delightful combination, you’ll be hooked for life.
KEY INGREDIENTS IN PEANUT BUTTER BLOSSOMS
Before you dive into mixing and baking, let’s get to know the stars of our show. Each ingredient plays a vital role—from building sturdy dough to delivering the classic flavor profile that makes these blossoms irresistible.
- Creamy peanut butter
Provides a rich, nutty backbone and tender texture, ensuring each cookie stays soft yet holds its shape.
- Granulated sugar
Sweetens the dough and contributes to crisp edges, plus it doubles as a sparkling coating for extra crunch.
- Brown sugar
Adds depth with its molasses notes, enhancing moisture and giving cookies a slight chewiness.
- Vanilla extract
Lifts flavors and rounds out sweetness, adding aromatic warmth that complements the peanut butter.
- Large eggs
Bind ingredients together, create structure in the dough, and help achieve that light, airy interior.
- Baking soda
Acts as a leavening agent, causing the dough to spread and crack perfectly under the chocolate kiss.
- All-purpose flour
The building block of the cookie, providing structure and the right chew without weighing down the dough.
- Salt
Balances sweetness and accentuates the peanut butter’s savory notes, making the overall flavor pop.
- Chocolate kisses
The signature topping that adds a rich, melty chocolate center and visual charm to each blossom.
- Granulated sugar (for rolling)
Creates a sweet, crackly exterior that gives these cookies their signature sparkle and slight crunch.
HOW TO MAKE PEANUT BUTTER BLOSSOMS
Ready to bake? Grab your mixing bowls and let’s transform those simple ingredients into show-stopping treats. These step-by-step instructions will guide you through each technique to ensure perfect results.
1. Preheat your oven to 350°F (175°C) and line two baking sheets with parchment paper or silicone baking mats to prevent sticking and ensure even baking.
2. In a large mixing bowl, combine the creamy peanut butter, 1 cup of granulated sugar, packed brown sugar, and vanilla extract. Mix until the mixture is creamy and smooth, scraping down the sides to incorporate all ingredients.
3. Add the eggs one at a time, blending well after each addition to guarantee they are fully incorporated and the batter remains silky.
4. In a separate bowl, whisk together the baking soda, all-purpose flour, and salt. Gradually fold this dry mixture into the peanut butter batter until just combined, being careful not to overmix.
5. Using a cookie scoop or your hands, form small balls of dough about 1 inch in diameter. Roll each ball in the reserved ½ cup of granulated sugar, creating a sweet, sparkly crust.
6. Place the sugar-coated dough balls on the prepared baking sheets, spacing them about 2 inches apart to allow for spreading.
7. Bake for 10 to 12 minutes, or until the edges are lightly golden and the centers are set but still soft.
8. Immediately after removing the cookies from the oven, press one unwrapped chocolate kiss into the center of each cookie, making sure the edges crack and embrace the chocolate.
9. Allow the cookies to cool on the baking sheets for 5 minutes so they set, then transfer them to wire racks to cool completely and achieve that ideal chew.
SERVING SUGGESTIONS FOR PEANUT BUTTER BLOSSOMS
These delightful cookies aren’t just delicious—they’re versatile. Whether you’re hosting a holiday gathering, packing a school lunch, or simply indulging yourself, there’s a perfect way to present Peanut Butter Blossoms to wow your audience and make each serving feel special.
- Festive Platter Display
Arrange cookies on a tiered dessert stand or a colorful platter, alternating blossoms with other holiday favorites. Add fresh mint sprigs or edible glitter for a pop of color.
- Gift Box Treats
Layer cookies between sheets of parchment paper in a decorative box. Tie with a ribbon and tuck in a handwritten note—perfect for spreading sweet cheer during cookie exchanges.
- Milk Pairing Station
Set up small glasses of cold milk or holiday-themed milkshakes alongside the blossoms. Encourage guests to dunk and discover their favorite dunk-to-bite ratio.
- Cookie Sandwiches
Spread a thin layer of chocolate ganache or marshmallow fluff between two cooled blossoms to create an indulgent sandwich. Dust with powdered sugar for an elegant finish.
HOW TO STORE PEANUT BUTTER BLOSSOMS
After baking a big batch, you’ll want to keep these cookies fresh and chewy for days to come. Proper storage ensures they hold onto that irresistible taste and texture, whether you’re nibbling at home or packing them up for a road trip.
- Airtight Container at Room Temperature
Place completely cooled cookies in a single layer inside an airtight container. Separate layers with parchment paper to prevent sticking. Store in a cool, dry place for up to one week.
- Refrigeration for Longer Freshness
If your kitchen is warm or you need extra shelf life, refrigerate blossoms in an airtight container for up to two weeks. Allow them to come to room temperature before serving.
- Freezer Storage
For up to three months, freeze unwrapped cookies on a baking sheet until firm, then transfer to a freezer-safe bag or container. Thaw at room temperature or warm briefly in the oven for that just-baked feel.
- Avoid Humidity and Heat
Keep your cookies away from direct sunlight or heat sources. High humidity can soften the sugar coating and melt the chocolate into a sticky mess.
CONCLUSION
Throughout this article, you’ve discovered how simple pantry staples—creamy peanut butter, sugars, flour, and a handful of chocolate kisses—come together to create the ultimate holiday or everyday treat: Peanut Butter Blossoms. We’ve explored each ingredient’s special role, walked through detailed baking instructions, and shared creative serving ideas to impress guests, from a festive platter to indulgent sandwich cookies. You also learned smart storage solutions to maintain that perfect chew and fresh flavor long after baking day. Now, you’re equipped with everything you need to whip up nearly fifty cookies, each boasting about 150 calories per serving, in under half an hour of active prep time. It’s the kind of beginner-friendly, crowd-pleasing recipe that becomes a cherished staple in your baking repertoire.
Feel free to print out this article and save it for later reference—tuck it into your cookbook, pin it on the fridge, or keep it in your favorite recipe folder. Below, you’ll find a handy FAQ section to troubleshoot common questions, from adjusting sweetness levels to adapting for allergies. If you try this recipe or need any help along the way, please leave your comments, questions, or feedback. Sharing your baking stories, tips, and even those adorable mishaps adds so much to our cooking community. Happy baking, and may your kitchen always smell of warm cookies and sweet memories!
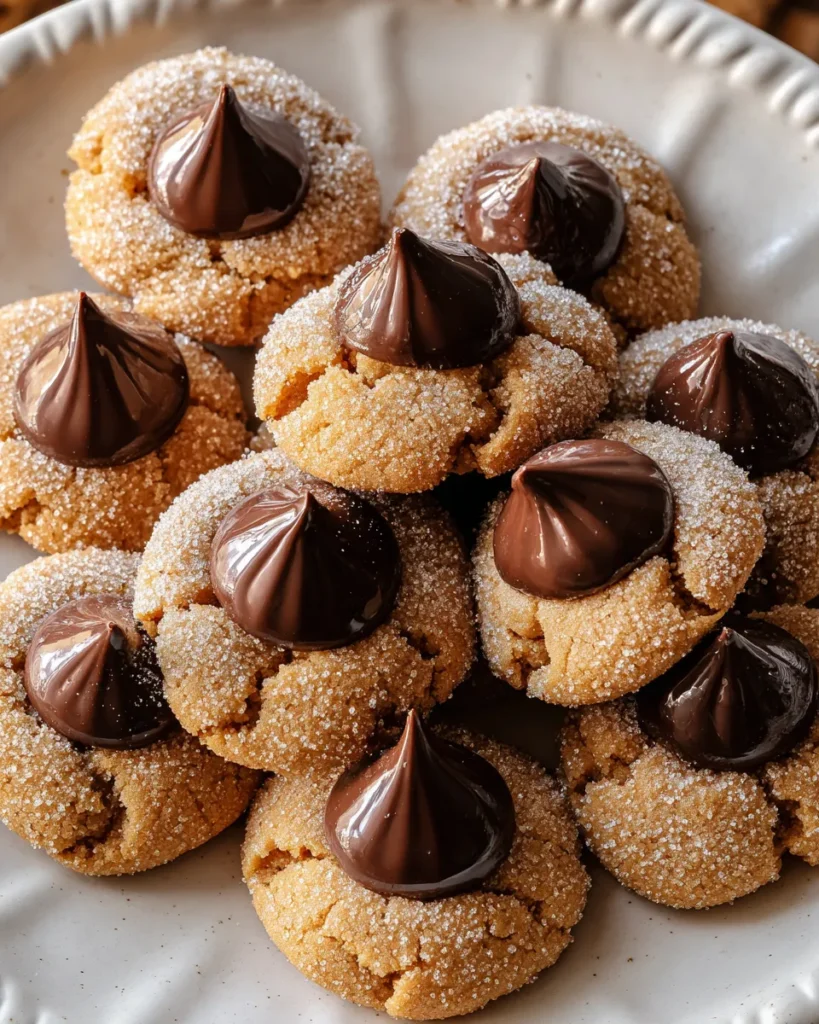

Peanut Butter Blossoms
Description
These soft, chewy cookies combine the rich flavor of peanut butter with a sweet chocolate kiss on top. Perfectly baked, they're a treat everyone loves!
Ingredients
Instructions
-
Preheat your oven to 350°F (175°C). Line two baking sheets with parchment paper or silicone baking mats.
-
In a large mixing bowl, combine the creamy peanut butter, 1 cup of granulated sugar, brown sugar, and vanilla extract. Mix well until creamy and smooth.
-
Add the eggs, one at a time, mixing well after each addition to ensure they are fully incorporated.
-
In a separate bowl, whisk together the baking soda, flour, and salt. Gradually add this dry mixture to the peanut butter mixture, blending until just combined.
-
Using a cookie scoop or your hands, form small balls of dough, about 1 inch in diameter. Roll each ball in the extra 1/2 cup of granulated sugar to coat.
-
Place the sugar-coated dough balls on the prepared baking sheets, spacing them about 2 inches apart.
-
Bake in the preheated oven for 10 to 12 minutes, or until the edges of the cookies are lightly golden.
-
Remove the cookies from the oven and immediately press one chocolate kiss into the center of each cookie, ensuring the cookie cracks around the edges.
-
Allow the cookies to cool on the baking sheets for about 5 minutes before transferring them to wire racks to cool completely.
Note
- For a twist, try using different flavors of chocolate kisses such as caramel or almond.
- These cookies can be stored in an airtight container for up to one week.
- Consider adding chopped peanuts or other nuts for extra texture and flavor.
- This recipe yields approximately 48 cookies, perfect for sharing at gatherings.

