

Summer’s bounty shines in every flaky layer of this rustic Peach and Blackberry Galette. As the golden crust bakes to a perfect crisp, the sweet peaches melt into tender ribbons, while their tart blackberry companions burst with vibrant juice. This dessert isn’t just a slice of summer—it’s a celebration of seasonality, simplicity, and that warm, homey feeling you get when something comes out of your oven looking too good to slice. From the gentle hum of kitchen chatter to the confidence boost you feel when you nail that buttery crust, this galette brings all the best parts of baking right to your countertop.
I still remember the first time I pulled one of these beauties from the oven. The edges were golden and sugar-speckled, the fruit bubbling at the seams like an invitation to dive right in. My kids couldn’t wait, practically drooling over the juicy filling. We topped ours with a big scoop of vanilla ice cream and watched it melt into sweet cream, mingling with every blackberry-tinted dribble. It’s that kind of recipe—effortless enough for a weeknight treat, yet showstopping enough for a casual dinner party. Whether you’re a seasoned baker or just dipping your toes into homemade pastry, this galette invites you to roll up your sleeves, embrace the imperfections, and enjoy every delicious, rustic bite.
KEY INGREDIENTS IN PEACH AND BLACKBERRY GALETTE
Before you dive into rolling and folding, let’s talk about what makes this galette truly shine. Each ingredient plays an important role: from building that flaky crust to balancing sweet and tart flavors in the filling. Here’s what you’ll need to gather from your pantry and fridge.
- All-purpose flour: The backbone of your pastry, it provides structure and lightness when properly chilled and handled.
- Granulated sugar: Adds a hint of sweetness to the dough and helps create that delicate crust color when baked.
- Salt: Enhances all the flavors and balances sweetness in both crust and filling.
- Unsalted butter: When chilled and diced, it creates pockets of steam as it melts, leading to a flaky, tender crust.
- Ice water: Helps bind the dough without warming the butter, keeping it cold for optimal flakiness.
- Ripe peaches: Their juicy sweetness forms the heart of your filling; choose firm yet fragrant peaches for the best texture.
- Fresh blackberries: Tart and juicy, they add a bright counterpoint to the peaches and create a jewel-like filling.
- Granulated sugar (filling): Sweetens the fruit and helps draw out natural juices for a saucy consistency.
- Cornstarch: Thickens the fruit juices so your galette isn’t too runny, giving you a perfect slice every time.
- Vanilla extract: Adds warm complexity and amplifies the fruit’s natural flavors.
- Lemon juice: Brightens and prevents the peaches from turning brown, adding just the right tang.
- Milk or cream: Brushed on the crust for a golden, perfectly browned finish.
- Coarse sugar: Sprinkled on top for an extra sparkle and subtle crunch.
HOW TO MAKE PEACH AND BLACKBERRY GALETTE
Now that you have all your ingredients ready, let’s walk through each step to create this delightful dessert. From crafting a tender dough to folding that rustic crust, every phase is straightforward, with a few friendly tips to ensure success.
1. In a medium bowl, combine flour, sugar, and salt. Cut in the chilled butter using a pastry cutter or fork until the mixture resembles coarse crumbs, ensuring small butter bits remain for flakiness.
2. Stir in the ice water, a tablespoon at a time, until a dough ball forms. Don’t overwork; you want just enough moisture to bring it together. Wrap the dough in plastic wrap and refrigerate for at least 30 minutes to firm up the butter.
3. Preheat the oven to 400°F (200°C). Line a baking sheet with parchment paper to prevent sticking and catch any drips.
4. In another bowl, gently toss the sliced peaches and blackberries with sugar, cornstarch, vanilla extract, and lemon juice until every piece is coated. This mix will thicken and sweeten as it bakes.
5. On a lightly floured surface, roll out the chilled dough into a 12-inch circle, maintaining an even thickness. Transfer the rolled dough to the prepared baking sheet.
6. Spoon the fruit mixture onto the center of the dough, leaving a 2-inch border. Carefully fold the edges of the dough over the fruit, creating pleats to secure the filling and give your galette that classic rustic look.
7. Brush the dough edges with milk or cream for a rich color and then sprinkle coarse sugar over the crust for sparkle and crunch.
8. Bake for 35–40 minutes, or until the crust is golden brown and the fruit is bubbly and tender.
9. Allow the galette to cool on the baking sheet for 15 minutes before slicing and serving to let the filling set slightly.
SERVING SUGGESTIONS FOR PEACH AND BLACKBERRY GALETTE
Serving this galette is all about enhancing the harmony of sweet peaches and tart berries while adding delightful contrasts in texture and temperature. Whether it’s a lazy brunch or an al fresco dinner, these ideas will help you present your creation in the most mouthwatering way.
- Scoop of vanilla ice cream: Place a generous dollop on each warm slice so the melting ice cream seeps into the fruit juices, creating a creamy counterpoint to the crispy crust.
- Fresh mint sprigs: Garnish each plate with bright green leaves for a refreshing aroma that cuts through the sweetness and adds an elegant pop of color.
- Drizzle of honey: Warm a spoonful of honey until runny and lightly drizzle over the top to boost sweetness and introduce floral undertones that complement the berries.
- Dusting of powdered sugar: Use a fine-mesh sieve to gently dust the entire galette for a delicate, snow-kissed finish that beckons you to take that first bite.
HOW TO STORE PEACH AND BLACKBERRY GALETTE
Once the last slice has been served, storing any leftovers properly will help you savor the flavors for days. The combination of tender fruit and flaky pastry needs gentle care to stay at its best. Follow these tips to maintain texture and taste:
- Room-temperature storage: Cover the cooled galette loosely with plastic wrap or a clean kitchen towel. It will stay fresh for up to 24 hours, preserving that crisp crust.
- Refrigeration: Pop the galette into an airtight container or cover it well with plastic wrap. Store in the fridge for up to 3 days. Let it come to room temperature or gently rewarm before serving.
- Freezing individual slices: Wrap each slice tightly in plastic wrap, then place them in a freezer-safe bag. They’ll keep for up to 2 months. Thaw overnight in the fridge and reheat in a 350°F oven for 10–15 minutes.
- Refreshing the crust: If the pastry loses its crispness, place slices on a baking sheet and bake at 350°F for 5–8 minutes. The heat will revive the flakiness without overcooking the fruit filling.
CONCLUSION
From the first moment you pull that golden-brown galette from the oven to the last lingering bite, this Peach and Blackberry Galette captures the essence of summer in every tender slice. We’ve covered everything from choosing the ripest fruits and crafting a homemade pastry to assembling and baking a dessert that’s effortlessly rustic and endlessly impressive. You now have a complete roadmap—ingredients, step-by-step instructions, serving tips, and storage advice—to enjoy this delightful treat again and again. Feel free to print this article or save it for later reference whenever you crave a slice of seasonal magic at home.
Whether you’re feeding family, entertaining friends, or simply indulging in a quiet afternoon with a cup of tea, this galette is a flexible star. I’d love to hear how it turns out for you: do you top it with ice cream or a drizzle of honey? Did your crust achieve that perfect flake? Share your questions, comments, or feedback below, especially if you need troubleshooting tips or creative twists. Your kitchen adventures make every recipe more special, and I can’t wait to chat about how your Peach and Blackberry Galette journey unfolds. Happy baking!
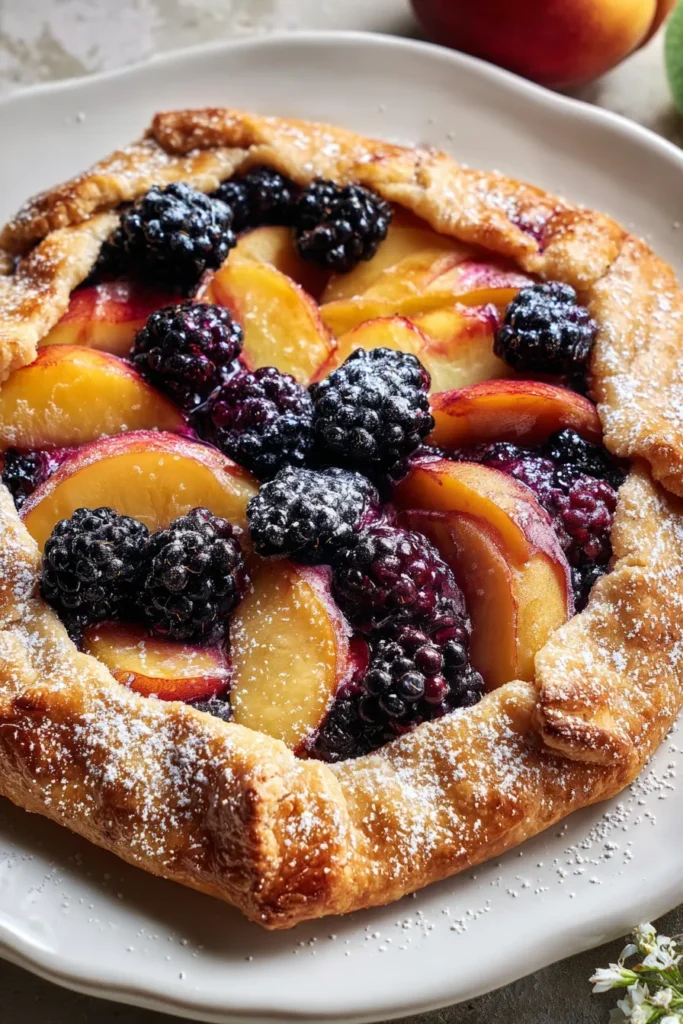

Peach and Blackberry Galette
Description
This rustic galette showcases the vibrant flavors of juicy peaches and tart blackberries, all enveloped in a flaky homemade crust. It's the perfect balance of sweetness and tang!
Ingredients
Instructions
-
In a medium bowl, combine flour, sugar, and salt. Cut in the chilled butter using a pastry cutter or fork until the mixture resembles coarse crumbs.
-
Stir in the ice water, a tablespoon at a time, until a dough ball forms. Wrap the dough in plastic wrap and refrigerate for at least 30 minutes.
-
Preheat the oven to 400°F (200°C). Line a baking sheet with parchment paper.
-
In another bowl, gently toss the sliced peaches and blackberries with 1/4 cup of sugar, cornstarch, vanilla extract, and lemon juice.
-
On a lightly floured surface, roll out the chilled dough into a 12-inch circle. Transfer the rolled dough to the prepared baking sheet.
-
Spoon the fruit mixture onto the center of the dough, leaving a 2-inch border. Fold the edges of the dough over the fruit, pleating as you go.
-
Brush the dough edges with milk or cream and sprinkle the coarse sugar over the crust.
-
Bake for 35-40 minutes, or until the crust is golden brown and the fruit is bubbly and tender.
-
Allow the galette to cool on the baking sheet for 15 minutes before slicing and serving.
Note
- This galette pairs beautifully with a scoop of vanilla ice cream.
- Use firm, ripe peaches to avoid excessive juice during baking.
- If fresh blackberries are unavailable, frozen ones can be used but thaw and drain them well.
- The dough can be made a day ahead and refrigerated until ready to use.

