

Craving a stack that’s crisp-edged yet pillowy-soft inside? Old Fashioned Fluffy Pancakes deliver on every breakfast dream, puffing up on a hot griddle until golden-brown perfection. These light batter rounds come out tender, with a hint of vanilla, ready for a generous drizzle of maple syrup or your favorite topping. They’re simple to whip up—even for beginner cooks—and will quickly become your new favorite weekend ritual.
Key Ingredients
Gathering quality staples is the key to pancake glory. Each ingredient plays a vital role in building that classic fluffy texture and delightful flavor you love.
- 1 1/2 cups all-purpose flour: Provides the structure and body for each pancake.
- 1 tablespoon granulated sugar: Adds subtle sweetness and helps with browning.
- 3 1/2 teaspoons baking powder: Leavens the batter for extra fluffiness.
- 1/2 teaspoon salt: Balances flavors and enhances the sweetness.
- 1 1/4 cups milk: Creates a smooth, pourable batter and hydrates dry ingredients.
- 1 large egg: Binds ingredients together and contributes to a tender crumb.
- 3 tablespoons melted unsalted butter: Infuses rich flavor and prevents sticking.
- 1 teaspoon vanilla extract: Lends a fragrant, sweet aroma.
How To Make Old Fashioned Fluffy Pancakes
You’ll love how effortlessly these pancakes come together. By whisking dry and wet ingredients separately, then combining them with minimal stirring, you ensure an airy texture and avoid overworking the flour. A properly heated griddle and quick timing between flips deliver those signature crisp edges and soft centers, making each bite pure breakfast bliss.
1. In a large bowl whisk together flour, sugar, baking powder, and salt until combined. This step ensures any lumps are broken up and the leavening agent is evenly distributed for consistent rise.
2. In another bowl whisk milk, egg, melted butter, and vanilla extract until smooth. Combining wet ingredients separately helps achieve a uniform batter without overworking the flour.
3. Pour the wet ingredients into the dry ingredients and stir gently until just combined, leaving some small lumps. Avoid overmixing to keep pancakes light and tender.
4. Heat a nonstick griddle or skillet over medium heat and lightly grease with butter or oil. A properly heated surface gives pancakes those coveted crisp edges.
5. Pour about 1/4 cup of batter for each pancake onto the griddle and cook until bubbles form on the surface and edges look set, about 2 minutes. This is your cue that it’s time to flip.
6. Flip the pancakes and cook until golden brown, about 1 to 2 more minutes, then transfer to a plate. If making a large batch, keep them warm in a low oven until all are cooked.
Serving Suggestions
Serving Old Fashioned Fluffy Pancakes is all about striking the perfect balance between sweet and savory, textural contrast, and eye-catching color. Whether you’re craving a classic maple-syrup-slicked stack, a fruit-topped masterpiece, or a brunch board that wows friends, these pancakes adapt beautifully. The light texture provides a canvas for endless flavors, so feel free to mix and match toppings, syrups, and side dishes to suit your mood. Dive into these four tempting serving suggestions and take your pancake game to the next level.
- Classic Maple & Butter: Stack warm pancakes, add a pat of cold butter on top, and let maple syrup cascade over the edges for that timeless breakfast indulgence.
- Berry Compote: Simmer mixed berries with a touch of sugar until they burst, then spoon the vibrant compote over your stack for a fruity, tangy kick.
- Nutty Spread & Bananas: Spread creamy peanut or almond butter between layers, top with sliced bananas, and dust with powdered sugar for a protein-packed twist.
- Savory Twist: Serve alongside crispy bacon or sausage and drizzle with a dollop of Greek yogurt for a satisfying sweet-and-salty combo at brunch.
Tips For Perfect Old Fashioned Fluffy Pancakes
Getting these Old Fashioned Fluffy Pancakes just right is all about patience and technique. A few simple tweaks can turn a good batch into an extraordinary one. From patiently resting the batter to mastering the stir-to-lumps method, these insider tips ensure a cloud-like interior with golden, crisp edges every time. Adjusting your griddle temperature and managing the batter with a light touch prevent overworking the gluten. Plus, keeping cooked pancakes warm in the oven maintains their soft texture while you finish cooking. Embrace these friendly pointers to elevate your pancake game and impress everyone at the breakfast table.
- For extra fluffiness let the batter rest for 10 minutes before cooking to allow the baking powder to activate fully.
- Gentle mixing is key: stir the batter just until dry ingredients disappear, leaving small lumps to avoid dense pancakes.
- Keep warm: place cooked pancakes on a baking sheet in a low oven (around 200°F) to maintain heat without drying out.
- Flavor swap: substitute milk with buttermilk for a slightly tangy lift and deeper rise.
How To Store It
Once you’ve enjoyed a stack of these Old Fashioned Fluffy Pancakes, you might find yourself with leftovers—or want to prep ahead for an easy weekday breakfast. Proper storage preserves their tender texture, beautiful rise, and delicious flavor, so you can savor them long after that first golden batch. From stashing extra batter to freezing finished cakes, these simple strategies keep your pancakes tasting as if they’re fresh off the griddle. Read on for practical ways to store both batter and cooked pancakes, ensuring no bite goes to waste.
- Refrigerate leftover cooked pancakes in an airtight container for up to 3 days, placing a piece of parchment between layers to prevent sticking.
- Freeze individual pancakes on a baking sheet, then transfer to a freezer-safe bag for up to 1 month; simply reheat in a toaster or oven.
- Store batter: cover the pancake batter and let it rest at room temperature for up to 30 minutes before cooking, but avoid longer storage as leavening power fades.
- Reheat gently using a low oven (200°F) or toaster to warm pancakes evenly without drying out the centers.
Frequently Asked Questions
Let’s tackle some common queries to make your pancake experience foolproof.
- Q: How long does it take to prepare and cook these old fashioned fluffy pancakes?
A: It takes about 10 minutes to prepare the batter (including measuring ingredients and whisking), plus approximately 12 to 15 minutes to cook a full batch. Each pancake takes about 2 minutes on the first side and 1–2 minutes after flipping.
- Q: Why shouldn’t I overmix the pancake batter?
A: Overmixing develops gluten in the flour, leading to tough, dense pancakes. By stirring gently until just combined—with a few small lumps—you keep the pancakes light and tender.
- Q: Can I use buttermilk instead of regular milk?
A: Yes. Substituting buttermilk for the milk adds a tangy flavor and can make the pancakes even fluffier. Because buttermilk is slightly acidic, it reacts more with the baking powder, boosting lift.
- Q: What’s the best way to keep cooked pancakes warm before serving?
A: Preheat your oven to 200°F (93°C) and place cooked pancakes in a single layer on a baking sheet. The low heat keeps them warm and prevents sogginess until you finish cooking the rest and are ready to serve.
- Q: Can I make the batter ahead of time or store leftovers?
A: You can prepare the batter up to 30 minutes in advance; cover it and let it rest at room temperature for up to half an hour. Avoid storing batter longer, as the leavening power diminishes. Cooked pancakes can be refrigerated in an airtight container for up to 3 days or frozen for up to 1 month.
- Q: How do I adjust cooking if my pancakes are burning on the outside but raw inside?
A: Lower the heat slightly; medium to medium-low ensures pancakes cook through without burning. Also, use just enough butter or oil to coat the pan lightly, as excess fat can cause dark spots.
- Q: Can I add mix-ins like blueberries or chocolate chips?
A: Yes. Sprinkle about 1 tablespoon of blueberries or chips onto each pancake right after pouring the batter on the griddle. Gently press them into the surface so they adhere and cook evenly.
- Q: What substitutions can I make for all-purpose flour?
A: You can substitute up to half of the all-purpose flour with whole wheat flour for a nuttier flavor, but expect slightly denser pancakes. If using gluten-free flour, choose a 1:1 blend that contains xanthan gum for the best texture.
What Makes This Special
These Old Fashioned Fluffy Pancakes strike that delightful balance between simplicity and spectacular taste—no fancy gadgets required, just trusty pantry staples that transform into a dreamy stack of pillows on your plate. With effortlessly crisp edges giving way to tender, vanilla-kissed centers, it’s easy to see why this recipe becomes a breakfast legend. Go ahead, print out this article and tuck it into your recipe binder or bookmark it for those mornings when you need a little pancake pick-me-up. If you try them, let me know how they turned out or drop any questions below—I’m all ears for your pancake triumphs and tweaks!
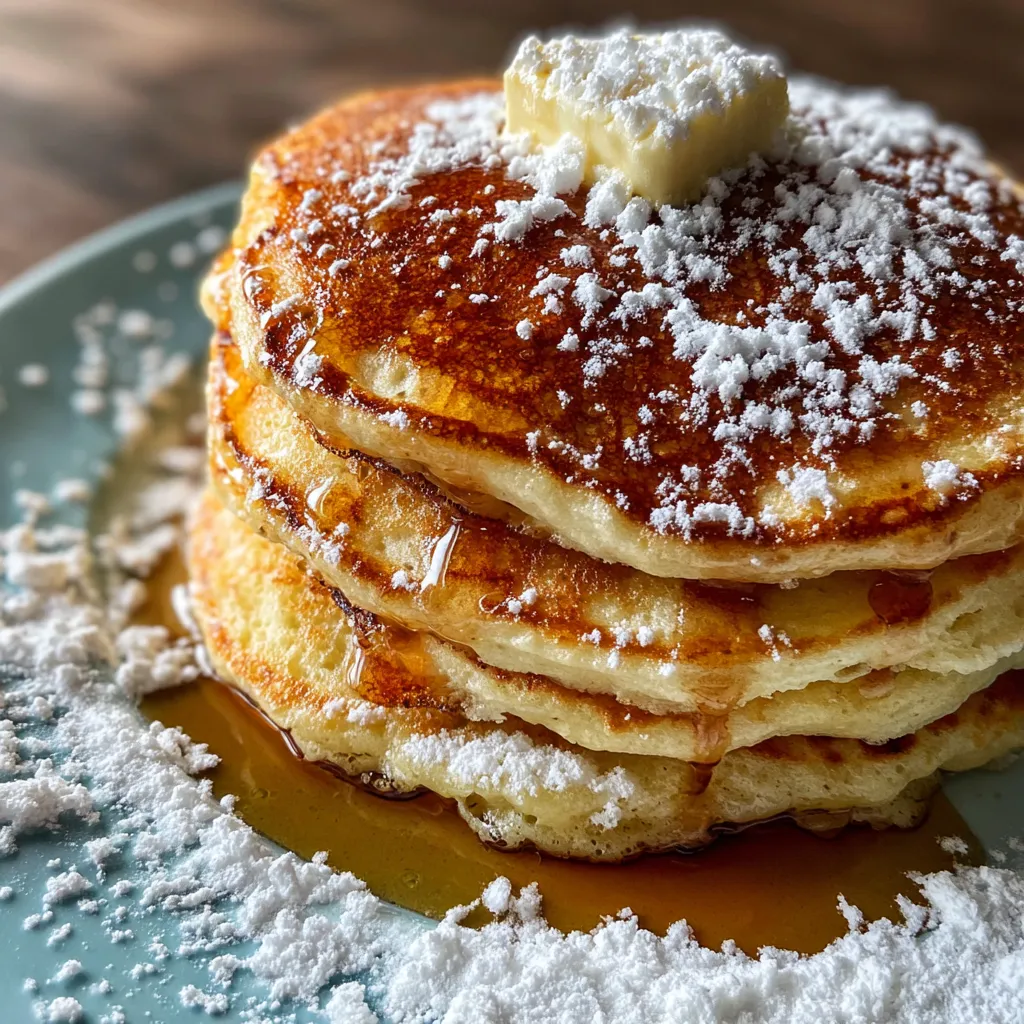

Old Fashioned Fluffy Pancakes
Description
Light, fluffy pancakes puff up on a hot griddle, edges crisping to soft golden brown. Resting the batter gives extra lift, and once bubbles form you flip to reveal tender centers ready for butter and syrup.
Ingredients
Instructions
-
In a large bowl whisk together flour, sugar, baking powder, and salt until combined.
-
In another bowl whisk milk, egg, melted butter, and vanilla extract until smooth.
-
Pour the wet ingredients into the dry ingredients and stir gently until just combined, leaving some small lumps.
-
Heat a nonstick griddle or skillet over medium heat and lightly grease with butter or oil.
-
Pour about 1/4 cup of batter for each pancake onto the griddle and cook until bubbles form on the surface and edges look set, about 2 minutes.
-
Flip the pancakes and cook until golden brown, about 1 to 2 more minutes, then transfer to a plate.
Note
- For extra fluffiness let the batter rest for 10 minutes before cooking
- Do not overmix the batter to keep pancakes tender
- Keep cooked pancakes warm on a baking sheet in a low oven until ready to serve
- Substitute milk with buttermilk for a slightly tangy flavor

