

Welcome to your new favorite fall treat zone! These No Bake Pumpkin Cheesecake Balls are the little bites of autumn bliss you’ve been dreaming of. They combine creamy, dreamy cheesecake with the warm, spicy hug of pumpkin pie spice, all wrapped up in a velvety shell of white chocolate. With just 15 minutes of hands-on prep time and no oven required, these pumpkin balls are perfect whether you’re whipping up a spontaneous snack or planning a dessert spread for holiday gatherings. As a beginner-friendly recipe, it’s ideal for anyone who wants to taste the fall without fuss. Each of these bite-sized wonders clocks in at about 120 calories, making them a guilt-free treat that’s hard to resist!
Not only are these cheesecake balls beginner level and super quick to assemble, but they also boast a 1 hour 30 minute total rest time that gives you time to mingle, sip a hot latte, or decorate your space for the season. The silky cream cheese base blends flawlessly with pumpkin puree, while a sprinkle of pumpkin pie spice and a dash of vanilla extract turn every bite into a cozy memory. Whether you’re serving these at a Thanksgiving table, packing them into little cellophane bags for neighbors, or just sneaking a few at home while curled up in a blanket, they’re sure to delight. This no bake dessert transforms simple pantry ingredients into show-stopping fall treats that taste like crisp leaves and hearthside chats.
KEY INGREDIENTS IN NO BAKE PUMPKIN CHEESECAKE BALLS
Before you dive into making these irresistible pumpkin cheesecake balls, let’s chat about why each ingredient is so important. Understanding the role of every component will help you appreciate the balance of flavors and textures in this easy no bake dessert.
- cream cheese: Provides the rich, tangy base that mimics classic cheesecake. Its smooth texture gives the balls their creamy consistency.
- pumpkin puree: Brings that deep, earthy sweetness and signature fall flavor. Perfectly blends with cream cheese to create a moist, flavorful filling.
- graham cracker crumbs: Add a subtle crunch and a hint of honeyed sweetness. They help bind the mixture into a workable dough-like consistency.
- confectioners’ sugar: Sweetens and stabilizes the filling without graininess. It ensures every bite is silky smooth.
- pumpkin pie spice: A fragrant blend of cinnamon, nutmeg, ginger, and cloves. It delivers those warm, cozy notes that scream fall.
- vanilla extract: Enhances the overall flavor profile with its sweet, floral undertones. A little goes a long way in rounding out the taste.
- salt: Balances sweetness and amplifies other flavors. Just a pinch makes everything pop.
- white chocolate chips: Create the glossy, sweet coating that encases each ball. Their creamy melt adds another layer of indulgence.
- coconut oil: Optional for thinning the melted chocolate. It helps achieve a smooth, even dip without altering flavor.
HOW TO MAKE NO BAKE PUMPKIN CHEESECAKE BALLS
Let’s walk through the simple steps to transform these humble ingredients into spectacular fall treats. Follow these instructions closely, and you’ll have perfectly shaped, chocolate-coated pumpkin cheesecake balls in no time.
1. In a mixing bowl, combine the softened cream cheese and pumpkin puree. Use a sturdy spatula or an electric mixer on low speed to mix until the blend is completely smooth and homogenous, scraping down the sides of the bowl to eliminate lumps.
2. Add the graham cracker crumbs, confectioners’ sugar, pumpkin pie spice, vanilla extract, and a pinch of salt into the cream cheese mixture. Stir with a wooden spoon or rubber spatula until everything is fully incorporated, forming a soft, dough-like consistency that holds together when pressed.
3. Using a small cookie scoop or your hands, gently roll the mixture into uniform 1-inch balls. Place each ball on a parchment-lined cookie sheet, spacing them slightly apart to prevent sticking.
4. Freeze the pumpkin cheesecake balls for about 30 minutes or until they’re firm. This step is key for easy dipping and clean edges.
5. In a microwave-safe bowl, melt the white chocolate chips in 30-second intervals, stirring between each burst, until completely smooth. If the melted chocolate is too thick for dipping, stir in the coconut oil to achieve a thinner, glossy coating.
6. Using a fork, dip each pumpkin cheesecake ball into the melted white chocolate until it’s fully coated. Allow any excess chocolate to drip off before relocating the ball back onto the parchment-lined sheet.
7. Once all the balls are coated, refrigerate them on the tray for at least 1 hour so the white chocolate can fully set.
8. Serve chilled and indulge in the creamy pumpkin cheesecake flavor packed into every bite-sized treat!
SERVING SUGGESTIONS FOR NO BAKE PUMPKIN CHEESECAKE BALLS
When it comes to presenting these pumpkin cheesecake balls, creativity is your best friend! Whether you’re hosting a cozy gathering or simply looking for a festive snack, here are some playful serving suggestions to elevate your dessert table and delight your guests.
- Autumn Platter: Arrange the balls on a wooden board or decorative platter, interspersed with fresh apple slices, toasted pecans, and sprigs of rosemary. The rustic assembly highlights the fall theme and adds color contrast.
- Nutty Roll: Before the chocolate sets, gently roll each coated ball in chopped walnuts, pecans, or toasted almonds. The extra crunch and nutty flavor create a pleasing textural contrast against the creamy interior.
- Festive Drizzle: Using leftover melted white chocolate (or a contrasting dark chocolate), create artistic swirls or zigzags over the set balls. Place them in mini cupcake liners for an elegant touch at holiday gatherings.
- Spiced Garnish: Dust each ball lightly with an additional sprinkle of pumpkin pie spice or cinnamon right before serving. This aromatic accent not only looks beautiful but also intensifies the seasonal spice notes.
HOW TO STORE NO BAKE PUMPKIN CHEESECAKE BALLS
Proper storage ensures your pumpkin cheesecake balls stay fresh, flavorful, and maintain that perfect creamy texture. Because they’re a no bake dessert, refrigeration is key to preserving their structure and taste.
Storing these cheesecake bites is simple, and with the right approach, they’ll stay delicious for days:
- Refrigerator: Place the set balls in an airtight container, layering parchment paper between rows to prevent sticking. Store in the fridge for up to one week. This keeps them perfectly chilled and firm.
- Freezer: For longer-term storage, flash-freeze the plain (uncoated) balls on a parchment-lined tray. Once frozen solid, transfer them to a freezer-safe bag or container. Freeze for up to one month. When you’re ready to enjoy, thaw in the fridge before dipping or serving.
- Separate Components: If you want to prepare quickly, store the coated balls in one container and keep extra melted chocolate (with coconut oil) in a small jar in the fridge. Reheat briefly when you want to refresh the coating for a shiny finish.
- Transport Tips: When taking them to a potluck or picnic, keep the container on a small ice pack or in a cooler. This ensures they stay firm on the journey and arrive looking as beautiful as when you made them.
CONCLUSION
Celebrating fall has never been easier or more delicious than with these No Bake Pumpkin Cheesecake Balls. From the first smooth swirl of cream cheese and pumpkin puree to the final glossy dip in white chocolate, every step is a culinary hug for your taste buds. This beginner-friendly dessert requires just 15 minutes of hands-on prep, zero oven time, and about an hour and a half of rest—giving you the freedom to entertain, decorate, or simply relax. With roughly 120 calories per ball, these bite-sized treats offer a perfect balance of creamy cheesecake flavor, warm pumpkin spice, and a hint of vanilla. Whether you’re hosting a festive gathering, packing a sweet surprise for loved ones, or indulging in a seasonal snack, these pumpkin cheesecake balls are guaranteed to be a crowd-pleaser.
Feel free to print this article and save it for later use—you’ll find the entire recipe, prep details, and handy tips all in one place. And if you’re curious about any finer points, don’t forget that there’s an FAQ section below for troubleshooting and extra guidance. If you try this recipe, I’d love to hear how it goes: leave a comment, share your thoughts, or ask questions if you hit a snag. Your feedback helps me refine these recipes and craft even more tasty treats for you. Happy baking (or, should I say, no baking!), and may your autumn be filled with cozy flavors and sweet moments.
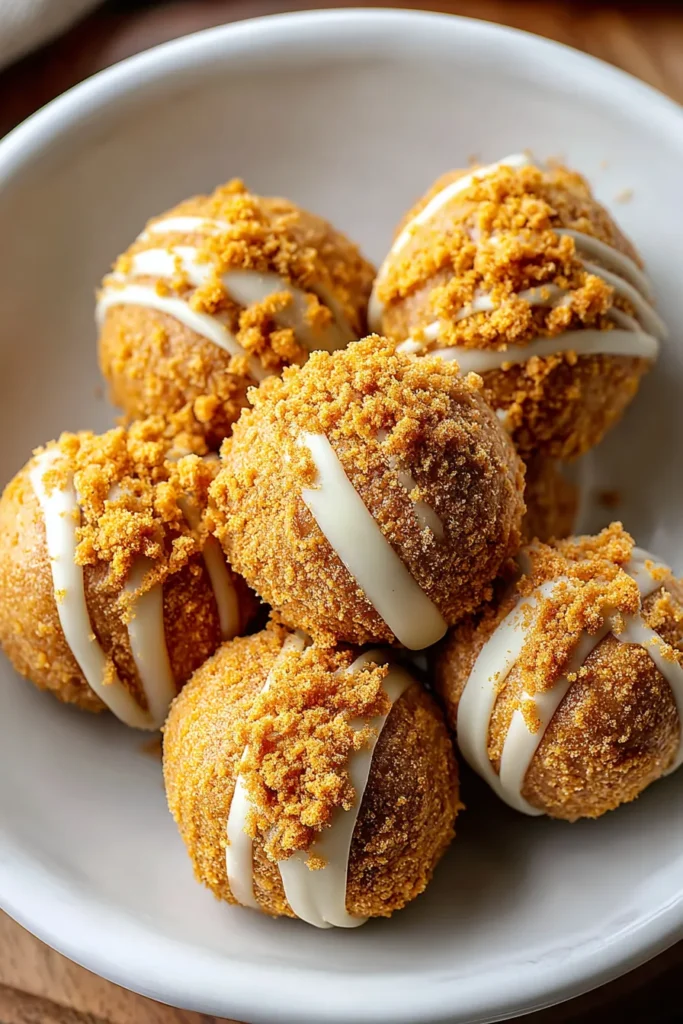

No Bake Pumpkin Cheesecake Balls
Description
These pumpkin cheesecake balls are creamy, dreamy, and packed with pumpkin spice flavor. Perfect for a quick treat or holiday gatherings, they offer a delightful twist on dessert.
Ingredients
Instructions
-
In a mixing bowl, combine the softened cream cheese and pumpkin puree. Mix until smooth and well combined.
-
Add the graham cracker crumbs, confectioners' sugar, pumpkin pie spice, vanilla extract, and a pinch of salt into the cream cheese mixture. Stir until all ingredients are fully incorporated and you achieve a dough-like consistency.
-
Using a small cookie scoop or your hands, roll the mixture into 1-inch balls and place them on a parchment-lined cookie sheet.
-
Freeze the pumpkin cheesecake balls for about 30 minutes or until firm.
-
In a microwave-safe bowl, melt the white chocolate chips in 30-second intervals, stirring between each interval, until smooth. If the melted chocolate is too thick, you can stir in the coconut oil to thin it out.
-
Using a fork, dip each pumpkin cheesecake ball into the melted white chocolate until fully coated. Allow any excess chocolate to drip off before placing the balls back onto the parchment-lined baking sheet.
-
Once all the balls are coated, refrigerate them to set for at least 1 hour.
-
Serve chilled and enjoy the delicious pumpkin cheesecake flavor packed into these bite-sized treats!
Note
- These can be stored in an airtight container in the refrigerator for up to a week.
- For added texture, you can roll the chocolate-coated balls in crushed nuts or additional graham cracker crumbs before they set.
- Feel free to use dark or milk chocolate instead of white chocolate for a different flavor profile.

