

Ghostly sweetness is a must-have at any Halloween gathering, and these No-Bake Oreo Ghost Truffles deliver on flavor, fun, and simplicity. Each bite starts with the unmistakable crunch of Oreo cookies, transformed into a velvety blend when mixed with lush, tangy cream cheese. Then comes the indulgent hug of smooth white chocolate or candy melts that give the truffle its signature ghostly look. It’s like capturing the spirit of the season in a tiny bite-sized treat that’s just as fun to make as it is to devour. You’ll love how effortless this no-bake dessert is, taking barely 20 minutes of active prep time before a short chill, yet delivering a showstopping platter of spooky confections.
I still remember the first time I rolled these little ghosts with my niece Sophia. We giggled as she decorated uneven eyes and goofy mouths, declaring some truffles “happy” and others “surprised.” The kitchen smelled faintly of sweet vanilla from the white chocolate and rich cocoa from the Oreo cores, creating a comforting aroma that reminded me of childhood bake sales. Whether you’re hosting a party, looking for a fun family project, or simply craving an easy, crowd-pleasing Halloween treat, these ghost truffles have your back. They’re beginner-friendly, gluten-friendly if you grab a certified Oreo alternative, and can easily be doubled or tripled for a larger crew. With just four main ingredients and no oven required, this recipe is the ultimate Halloween hack—perfect for anyone who wants maximum impact with minimal effort.
KEY INGREDIENTS IN NO-BAKE OREO GHOST TRUFFLES
Every great recipe starts with star ingredients, and these No-Bake Oreo Ghost Truffles are no exception. From classic sandwich cookies to creamy cheese and silky chocolate, each component plays a vital role in creating the perfect ghostly bite. Here’s what you need and why it’s so important:
- Oreo cookies
These iconic cookies provide the crunchy cocoa foundation. Once processed into fine crumbs, they offer rich chocolate flavor and texture that pairs beautifully with smooth cream cheese.
- Cream cheese
Adds tangy creaminess and helps bind the Oreo crumbs into a moldable dough. The softened texture ensures a silky consistency that makes rolling the truffles a breeze.
- White chocolate or white candy melts
Creates the ghostly coating that’s sweet, smooth, and perfect for decorating. Candy melts melt evenly and set quickly, while white chocolate delivers a deeper vanilla flavor.
- Black decorating gel or edible marker
Brings your ghostly friends to life with spooky eyes and mouths. This finishing touch transforms simple truffles into Halloween-ready treats.
HOW TO MAKE NO-BAKE OREO GHOST TRUFFLES
With just a few steps and no baking required, these ghost truffles come together quickly. The process involves turning Oreo cookies into a creamy base, shaping it into balls, freezing briefly, then giving each truffle a silky white coat and a playful face. Follow these detailed instructions to achieve perfect ghostly bites every time:
1. Begin by placing the entire package of Oreo cookies into a food processor and pulse them until they form fine crumbs. This step ensures even crumb size, which helps the truffles hold together smoothly.
2. In a large mixing bowl, combine the Oreo crumbs with the softened cream cheese. Mix thoroughly with a spatula or hand mixer until the mixture is well blended and achieves a smooth, uniform texture.
3. Scoop out small portions of the Oreo mixture and roll them into 1-inch balls using your palms. Place each ball onto a baking sheet lined with parchment paper. Continue this process until all the mixture is used.
4. Once all the truffle balls are formed, place the baking sheet in the freezer for about 15–20 minutes. This quick chill helps the truffles set and makes them easier to work with during the coating process.
5. While the truffles are chilling, melt the white chocolate or white candy melts according to package instructions until perfectly smooth. Stir gently to avoid air bubbles.
6. Remove the baking sheet from the freezer. Using a fork or dipping tool, dip each Oreo ball into the melted white chocolate, making sure it is completely coated. Allow any excess chocolate to drip off, then place the truffle back onto the parchment-lined sheet.
7. As the coating begins to set but is still slightly tacky, use the black decorating gel to create ghost faces on the truffles. Draw small dots for eyes and a larger dot or oval for a mouth to give each ghost its own spooky expression.
8. Allow the coated truffles to set completely at room temperature or speed up the process by placing them in the refrigerator briefly.
9. Once fully set, transfer the Oreo Ghost Truffles to a serving platter or store them in an airtight container in the refrigerator until ready to serve.
SERVING SUGGESTIONS FOR NO-BAKE OREO GHOST TRUFFLES
When it comes to serving these adorable ghost truffles, a little presentation magic takes them from simple snacks to Halloween showstoppers. Whether you’re setting up a dessert table or offering treats at a casual gathering, these ideas will make your guests grin from ear to ear:
- Arrange the truffles on a tiered stand lined with orange and black doilies for a playful height variation. The contrast of the white ghosts against vibrant Halloween colors will catch everyone’s eye.
- Serve alongside a warm apple cider or hot chocolate station. The combination of creamy chocolate snacks with cozy drinks elevates the tasting experience, especially on chilly autumn nights.
- Place the truffles in clear cellophane bags, tied with seasonal ribbon, for easy grab-and-go party favors. Guests will adore the whimsical packaging and may even share them on social media!
- Present on a platter with edible candy eyes and mini chocolate bats scattered around. Adding extra spooky elements around the ghosts makes for an interactive and visually stunning display.
HOW TO STORE NO-BAKE OREO GHOST TRUFFLES
Storing these truffles correctly ensures they stay fresh, firm, and utterly delicious days after making them. Whether you’re prepping in advance or saving leftovers, follow these storage tips to keep every ghost in tip-top shape:
Storing in an airtight container in the refrigerator is the easiest way to maintain freshness. Layer parchment paper between each row of truffles to prevent sticking and preserve their shape. The cool environment keeps the white chocolate coating firm and the centers perfectly creamy.
- Refrigerate in a single layer or with parchment dividers to avoid smudging the decorations. They’ll keep for up to one week and make for quick, grab-and-enjoy treats right from the fridge.
For longer storage, freeze the truffles in a sealed, freezer-safe container. Place parchment between layers to guard against frost buildup. When ready to enjoy, thaw them in the fridge for about 30 minutes before serving to retain their texture.
- Avoid frequent temperature changes; freeze once and defrost once for best results. Rapid thawing at room temperature can cause condensation on the coating.
If traveling, pack in a cooler bag with ice packs. This method is perfect for outdoor events or potlucks, ensuring the truffles remain solid and don’t melt before serving.
- Keep the cooler out of direct sunlight and open it as little as possible to maintain a consistently cool temperature.
CONCLUSION
Creating these No-Bake Oreo Ghost Truffles is like hosting a mini Halloween workshop in your own kitchen. From processing cookies into fine crumbs to handing your little helpers the decorating gel for the final spooky faces, every step is filled with playful energy and sweet anticipation. These truffles showcase how a handful of simple ingredients—Oreo cookies, cream cheese, white chocolate, and a bit of decorating gel—can transform into a crowd-pleasing dessert that’s both adorable and delicious. Plus, with a total prep time of around 20 minutes, a brief chilling period, and zero oven duty, they’re perfect for busy beginners or seasoned home cooks looking for a fuss-free holiday treat. Don’t forget to note that each truffle clocks in at about 60 calories, making them a light, guilt-free indulgence for your Halloween spread.
Feel free to print this article and save it for later use or tuck it into your recipe binder for Halloween parties down the line. There’s also a handy FAQ section below for any questions you might have about substitutions, troubleshooting melting issues, or storage ideas. I’d love to hear how your Oreo Ghost Truffles turn out: leave a comment with your decorating tips, ask questions if you hit any snags, or share your own spooky stories from the kitchen. Happy haunting—and happy baking!
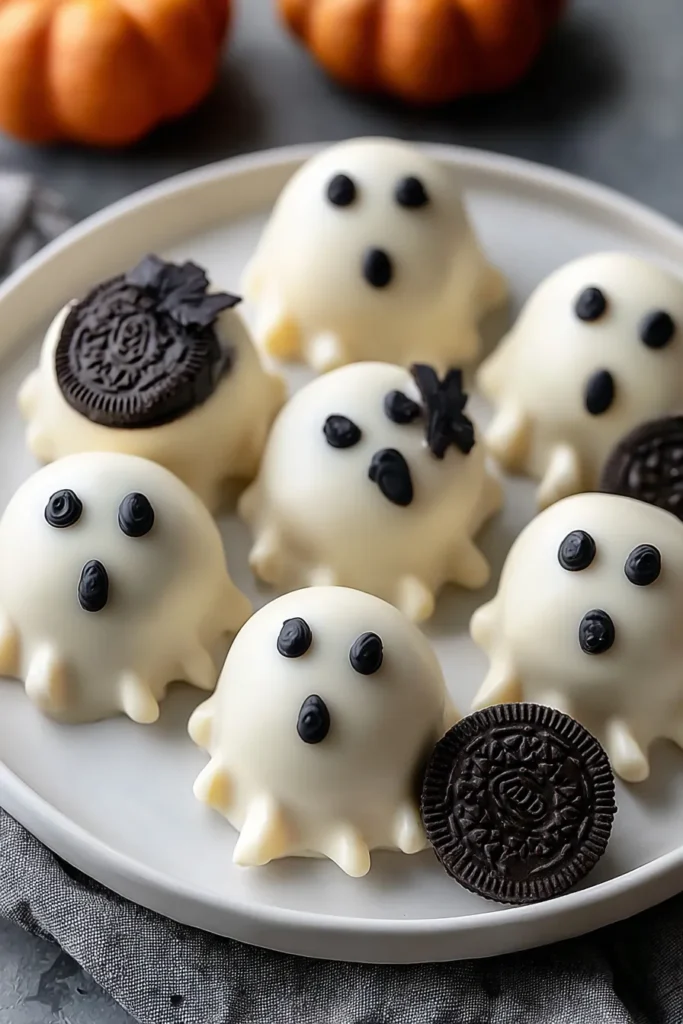

No-Bake Oreo Ghost Truffles
Description
These creamy, chocolatey truffles are a delightful blend of Oreo and cream cheese, all dressed up in a yummy white chocolate coat. Perfect for Halloween fun!
Ingredients
Instructions
-
Begin by placing the entire package of Oreo cookies into a food processor and pulse them until they form fine crumbs.
-
In a large mixing bowl, combine the Oreo crumbs with the softened cream cheese. Mix thoroughly until the mixture is well blended and smooth.
-
Scoop out small portions of the Oreo mixture and roll them into 1-inch balls. Place each ball onto a baking sheet lined with parchment paper. Continue this process until all the mixture is used.
-
Once all the truffle balls are formed, place the baking sheet in the freezer for about 15-20 minutes. This will help the truffles set and make them easier to work with during the coating process.
-
While the truffles are chilling, melt the white chocolate or white candy melts according to package instructions until smooth.
-
Remove the baking sheet from the freezer. Using a fork or dipping tool, dip each Oreo ball into the melted white chocolate, making sure it is completely coated. Allow any excess chocolate to drip off, and then place the truffle back onto the parchment-lined sheet.
-
As the coating begins to set but is still slightly tacky, use the black decorating gel to create ghost faces on the truffles. Draw small dots for eyes and a larger dot or oval for a mouth to give them a spooky expression.
-
Allow the coated truffles to set completely at room temperature or speed up the process by placing them in the refrigerator briefly.
-
Once fully set, transfer the Oreo Ghost Truffles to a serving platter or store them in an airtight container in the refrigerator until ready to serve.
Note
- For a quick and playful finish, use edible candy eyes instead of drawing the faces with gel.
- Add a touch of flavor by incorporating peppermint or orange extract when mixing the cream cheese and Oreo crumbs for themed variations.
- These truffles are perfect for Halloween parties and can be made in advance, saving you time on the day of your event.
- If you're preparing for a larger crowd, simply double or triple the recipe as needed.

