

These ooey-gooey pinkish Rice Krispies Halloween Brains are exactly what your next spooky bash needs. Whip up a spooky treat that’s sure to be the star of your Halloween party with these fun Marshmallow Rice Krispies Halloween Brains! With just a handful of pantry staples and a touch of creativity, you can transform simple marshmallows and crispy cereal into delightfully creepy brain-shaped morsels. The sweet vanilla and buttery tones mingle with that unmistakable crunch, giving you a totally irresistible texture contrast. As a beginner-friendly dessert, this recipe comes together in under half an hour of active time and requires no special equipment—just a saucepan, a bowl, and your hands (greased, of course!).
Every bite bursts with marshmallow sweetness and a hint of cinnamon from the cereal, while the vivid pink hue—thanks to a few drops of red food coloring—sets the perfect eerie mood. Drizzling smooth white chocolate over the molded shapes creates vein-like patterns that will have your guests doing a double take. Whether you’re fueling a haunted house event or a cozy family movie night, these brainy delights balance perfectly between spooky and scrumptious. With just 180 calories per serving (based on 12 treats), you can indulge a little without derailing your Halloween costume fitting. Trust me, once you start shaping these gooey spooksters, you won’t be able to stop until the entire platter disappears!
On a chilly autumn afternoon last year, I scrambled to decorate the kitchen table before trick-or-treaters arrived. My niece insisted on helping, so we rolled our sleeves up, popped on a spooky playlist, and got molding. She giggled at the silly shapes, and I couldn’t help but laugh when a few “brains” looked more like squashed potatoes—but that’s the charm! This recipe is pure nostalgia with a fun twist, and it’s perfect for involving little helpers. You can add chopped nuts or raisins for extra crunch, or sneak in a spoonful of fruit jam for that gory, oozing effect. No matter how you customize them, these Marshmallow Rice Krispies Halloween Brains will be the crowning glory of your dessert table—and a memory your family will treasure long after the last trick-or-treater has gone home.
KEY INGREDIENTS IN MARSHMALLOW RICE KRISPIES HALLOWEEN BRAINS
Before diving into the spooky sculpting, you’ll want to gather a handful of simple, crowd-pleasing ingredients that deliver maximum flavor and fun. Each component plays its own part in turning ordinary Rice Krispies treats into creepy-brain masterpieces—whether it’s the buttery richness, the stretchy marshmallow magic, or the crisp cereal crunch.
- Butter
Provides a silky base and keeps the marshmallow mixture from sticking to your pan. Its rich, creamy taste adds depth and balances the sweetness.
- Marshmallows
The gooey superstar of this recipe. When melted, they become the perfect adhesive to bind the cereal and hold each brain shape together.
- Rice Krispies cereal
Delivers that classic crunch and light texture. It soaks up the marshmallow binding, creating a tender, crispy bite.
- Red food coloring
Just a few drops infuse the treats with a pinkish, brain-like hue, making them pop on any Halloween spread and adding visual drama.
- White chocolate chips
Melted into a smooth drizzle, these mimic creepy veins and add a sweet, creamy finish that contrasts beautifully with the marshmallow core.
- Strawberry or raspberry jam (optional)
For an extra gory effect, this jam oozes from the crevices like real “blood,” intensifying the spooky factor and introducing a fruity burst.
HOW TO MAKE MARSHMALLOW RICE KRISPIES HALLOWEEN BRAINS
Let’s bring these eerie little treats to life! Follow these steps closely to achieve perfectly molded brains with that signature gooey texture and hauntingly delicious drizzle.
1. In a large saucepan, melt the butter over low heat, ensuring it becomes fully liquid without browning.
2. Add the marshmallows to the pan and stir continuously until they transform into a smooth, glossy mass. Remove the saucepan from the heat to prevent scorching.
3. Gradually incorporate drops of red food coloring, stirring until the mixture takes on a pinkish, brain-like tone. Make sure the color is evenly distributed for a consistent look.
4. Add the Rice Krispies cereal to the marshmallow mixture. Fold gently with a spatula until every grain is coated and the mixture looks uniform.
5. Allow the mixture to cool slightly—just until it’s still warm and moldable. With greased hands, shape handfuls into small, rounded brain forms, then place them on wax paper to set.
6. In a microwave-safe bowl, melt the white chocolate chips by heating in 30-second intervals, stirring thoroughly each time until silky smooth.
7. Using a spoon or piping bag, drizzle the white chocolate over each brain in irregular patterns to mimic real cerebral veins.
8. For an extra gruesome effect, optionally drizzle strawberry or raspberry jam over the brains, letting it seep into the grooves.
9. Allow the brains to set completely at room temperature (about 30 minutes) until firm before serving.
SERVING SUGGESTIONS FOR MARSHMALLOW RICE KRISPIES HALLOWEEN BRAINS
When it comes to presentation, these Halloween Brains deserve a stage worthy of their gory glam. Serve them with confidence and watch your guests’ faces light up in delight (or horror!). Whether you’re hosting a frightful feast or a family-friendly gathering, these serving tips will elevate your spooky spread to legendary status.
- Gothic platter display
Arrange the brains on a black or dark-gray platter. Add plastic spiders or small skeleton hands around the edges for a dramatic table centerpiece.
- Bloody serving tray
Drizzle extra raspberry jam artistically across a white tray before placing the brains on top, creating the illusion of “blood splatter” under the treats.
- Haunted cocktail pairing
Place the brains alongside a simple punch bowl filled with deep-red berry punch. Garnish the bowl with floating plastic eyeballs or gummy worms for a fun, interactive combo.
- Individual serving cups
Pop one or two brains into clear plastic cups filled halfway with crushed oreo “gravel.” Top with a swirl of whipped cream so each guest can dive in without sharing germs.
HOW TO STORE MARSHMALLOW RICE KRISPIES HALLOWEEN BRAINS
Proper storage ensures your spooky creations stay fresh, chewy, and ready to serve—even if you make them a day or two in advance. Follow these guidelines to lock in sweetness and texture, so every brain-shaped bite is as perfect as the first.
- Airtight container at room temperature
Place cooled treats in a single layer in an airtight container. Keep at room temperature, away from direct sunlight and heat sources, for up to two days.
- Layered with wax paper
If stacking is necessary, separate layers with wax paper to prevent sticking and protect the delicate drizzle designs.
- Refrigeration for extended freshness
For up to five days of storage, seal the treats in an airtight container and refrigerate. Let them come to room temperature before serving to recapture that classic chewiness.
- Freezing for long-term storage
Wrap each brain individually in plastic wrap, then place in a freezer-safe bag. Freeze for up to one month, thawing at room temperature before serving.
CONCLUSION
This Marshmallow Rice Krispies Halloween Brains recipe has everything you need: quick prep, beginner-friendly steps, and a show-stopping presentation that will haunt the memories of your guests in the best possible way. You’ve learned how to melt, mold, color, and drizzle your way to crunchy, chewy, and oh-so-creepy delights that sit comfortably in the Dessert category and only rack up about 180 calories per serving. Whether you’re whipping these up during the 15-minute prep window or waiting through the 30-minute rest time for that final set, each moment in the kitchen is part of the fun. Pull out your saucepan, measure your marshmallows, and embrace the playful spirit of this Beginner-level project. If you love experimenting, feel free to toss in chopped nuts for crunch or extra jam for gory detail!
Feel free to print this article and save it for later reference—your future self (and any last-minute party planner in you) will thank you. Underneath, you’ll find a handy FAQ section to troubleshoot common questions or help you tweak the recipe when you’re feeling extra adventurous. Do you have comments, questions, or feedback after trying this recipe? Maybe a tip on how you made your brains even scarier? Drop your thoughts below and let’s keep the spooky kitchen conversation going!
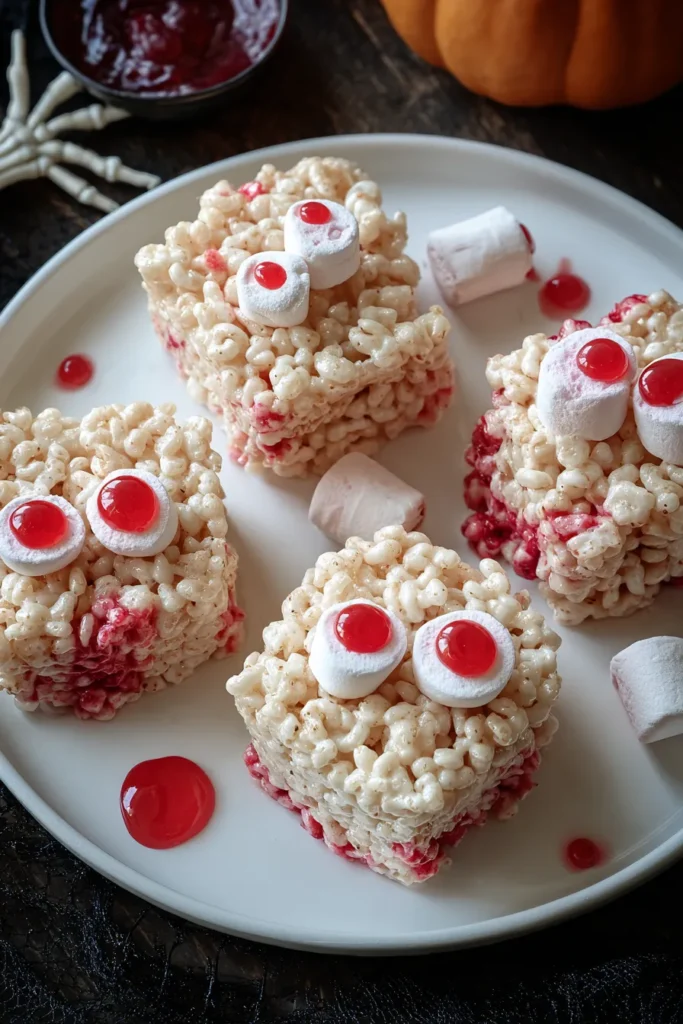

Marshmallow Rice Krispies Halloween Brains
Description
These delightful, gooey treats combine marshmallows and Rice Krispies into creepy brain shapes, drizzled with white chocolate to resemble creepy veins. Perfectly sweet and eerily fun!
Ingredients
Instructions
-
In a large saucepan, melt the butter over low heat.
-
Add marshmallows to the saucepan and stir until completely melted. Remove from heat.
-
Gradually add drops of red food coloring until the mixture has a pinkish brain-like color. Stir well to ensure even color distribution.
-
Add Rice Krispies cereal to the melted marshmallow mixture. Stir until well coated and completely combined.
-
Once the mixture has cooled slightly, but is still moldable, shape handfuls into small brain shapes. Place them on wax paper to set.
-
Melt the white chocolate chips in a microwave-safe bowl, heating in 30-second intervals and stirring in between, until smooth.
-
Drizzle the white chocolate over the Rice Krispies brains in a random fashion to mimic the patterns on a brain.
-
Optional: Drizzle some strawberry or raspberry jam over the brains for an especially gory effect.
-
Allow the brains to set completely until firm before serving.
Note
- This spooky treat is perfect for Halloween parties.
- To add texture, you can mix in some chopped nuts or raisins with the cereal.
- Use greased hands while shaping the brains to prevent sticking.
- Store the brains in an airtight container to keep them fresh longer.
- These can be made a day in advance and stored until your Halloween event.

