

There’s nothing quite like a dessert that greets your taste buds with a burst of sunshine, and these Lemon Crumb Bars do exactly that. With a buttery, golden crust that crumbles at the slightest touch and a gorgeously tangy lemon layer that sings of summer, every bite feels like a mini celebration. The balance of sweet and tart is spot on: the condensed milk adds a creamy sweetness that cushions the bright citrus kick, while the lemon zest lifts the entire experience with its fragrant oils. Whether you’re slicing these bars for a picnic basket or indulging in a quiet afternoon snack, you’ll find yourself savoring the texture contrast between the tender filling and the delicate streusel topping.
This recipe is tailored for home cooks of any skill level—classified as beginner—so you can confidently whip up dessert magic in just about an hour. In only 15 minutes of hands-on prep time, you’ll gather, zest, and measure your ingredients before enjoying a total cooking time of 45 minutes. Then, with a recommended rest time of 1 hour to let everything set, you’ll find the bars slicing neatly into 16 perfect squares. At around 200 calories per bar, they’re a guilt-pleasing treat that pairs wonderfully with an afternoon tea or an after-dinner coffee. Get ready to brighten up any table with bars that are as delightful to look at as they are to devour.
KEY INGREDIENTS IN LEMON CRUMB BARS
Before diving into mixing bowls and oven racks, let’s explore what makes these bars so irresistible. Each component plays a crucial role in delivering the right balance of texture and flavor—from the crunchy base to the silky lemon filling.
- Unsalted butter
Provides the rich, creamy foundation for both the crust and the crumb topping. At room temperature, it blends seamlessly with dry ingredients, ensuring a tender yet cohesive base.
- All-purpose flour
The structural backbone that gives the crust its shape and the streusel its delicate crumble. It absorbs fat and moisture to create that perfectly balanced texture.
- Granulated sugar
Sweetens the dough and contributes to a crisp crust once baked. It also adds a subtle crunch in every bite.
- Salt
Enhances the overall flavors and prevents the sweetness from becoming cloying. It brings out the buttery notes in the crust.
- Vanilla extract
Infuses a warm, aromatic undertone that complements the sharp citrus. It deepens the flavor profile of the crumb mixture.
- Sweetened condensed milk
Acts as the creamy base for the lemon filling, adding both sweetness and a smooth, custard-like consistency.
- Fresh lemon juice
Delivers the bright, zesty tang that defines these bars. Freshly squeezed juice ensures maximum flavor and freshness.
- Lemon zest
Packs concentrated citrus oils that elevate the lemon layer with an intense aroma and vibrant taste.
- Powdered sugar
Used as a final dusting, it adds a delicate snowy finish and a whisper of extra sweetness just before serving.
HOW TO MAKE LEMON CRUMB BARS
Gather your ingredients and prepare for a seamless baking adventure. This section will guide you through every step, ensuring you create perfect Lemon Crumb Bars with minimal fuss.
1. Preheat your oven to 350°F (175°C). Grease a 9×13 inch baking pan or line it with parchment paper to ensure easy removal of the bars once they’re baked.
2. In a medium bowl, combine the butter, flour, granulated sugar, and salt. Use a pastry cutter or fork to mix until the texture is crumbly and the ingredients are well incorporated.
3. Transfer half of the crumb mixture to the prepared pan. Use your fingers or a flat-bottomed cup to press it firmly into the bottom, forming an even crust layer.
4. Place the pan on the middle rack and bake for 15–18 minutes, or until the edges turn a light golden color. This par-bake ensures a sturdy base for the lemon filling.
5. While the crust bakes, whisk together the sweetened condensed milk, lemon juice, and lemon zest in a separate bowl until the mixture is smooth and free of lumps.
6. Remove the crust from the oven and pour the lemon mixture evenly over the warm base, allowing it to spread to the edges.
7. Sprinkle the remaining crumb mixture on top of the lemon layer, ensuring an even distribution for the streusel effect.
8. Return the pan to the oven and bake for an additional 25–30 minutes, or until the top turns a light brown and the filling is set (no longer jiggly).
9. Take the pan out and let the bars cool completely on a wire rack. This resting period helps the layers to firm up for clean slices.
10. Once cooled, dust the top with powdered sugar, covering the surface with a delicate, snowy layer.
11. Carefully cut into squares and serve, revealing the vibrant yellow filling and buttery crumbs in each piece.
SERVING SUGGESTIONS FOR LEMON CRUMB BARS
Now that your bars are baked and artfully dusted with powdered sugar, let’s talk presentation. Whether you’re hosting a summer barbeque, gifting homemade treats, or simply indulging at home, these serving ideas will elevate your Lemon Crumb Bars to show-stopping status.
- Serve them on a vintage cake stand lined with a doily for a charming, nostalgic display. Layer the bars neatly in rows to showcase their bright lemon filling and golden crumb top.
- Pair each square with a light herbal tea, such as chamomile or mint. The gentle infusion of herbs balances the citrus punch and turns your snack into an elegant afternoon ritual.
- Add a garnish of fresh mint leaves or additional lemon zest right before serving. These little green or yellow accents bring a burst of color that makes every plate pop.
- For a festive twist, serve alongside a scoop of vanilla bean ice cream. The cold creaminess contrasts beautifully with the tangy lemon and crumbly base, creating a dessert pairing that’s pure heaven.
HOW TO STORE LEMON CRUMB BARS
Keeping your Lemon Crumb Bars fresh and tasty doesn’t have to be a challenge. With the right storage methods, you can preserve their texture and flavor for up to a week or even extend their life in the freezer. Read on for simple tips that will help you maintain that fresh-baked magic.
- Store in an airtight container at room temperature for up to two days. Ensure the bars have cooled completely before sealing to prevent condensation from softening the crumb topping.
- For refrigerator storage, layer the bars between sheets of parchment paper inside a sealed container. Chill for up to one week, which helps the lemon filling stay firm and tangy.
- To freeze, place individual squares on a baking sheet and freeze until solid. Then transfer the frozen bars to a zip-top bag or airtight container, separating layers with parchment. They’ll keep for up to three months.
- When ready to enjoy, thaw refrigerated bars at room temperature for about 30 minutes, or microwave frozen pieces for 10–15 seconds. A quick dusting of powdered sugar revives their fresh look.
CONCLUSION
From the buttery first bite of the crisp crust to the lively zing of the lemon filling and the gentle sweetness of the crumb topping, these Lemon Crumb Bars encapsulate everything delightful about citrus desserts. They are beginner-friendly, requiring just 15 minutes of hands-on prep and a total cooking time of 45 minutes, followed by a one-hour rest so every layer sets beautifully. As a dessert course that yields 16 bars at approximately 200 calories each, they strike a perfect balance between indulgence and lightness. Whether you’re hosting summer gatherings, seeking a cheerful addition to your tea time, or exploring your baking skills, this recipe offers a refreshing twist that’s sure to impress.
Feel free to print this article and save it for later use—you can even tuck it into a binder or pin it to your favorite recipe board. Below, you’ll find a FAQ section to answer any lingering questions you might have about ingredients, techniques, or troubleshooting. If you give these Lemon Crumb Bars a try, I’d love to hear how they turned out! Please leave comments, share your tips, or ask for help if you hit any bumps along the way. Your feedback always brightens my day and helps our baking community grow. Happy baking!
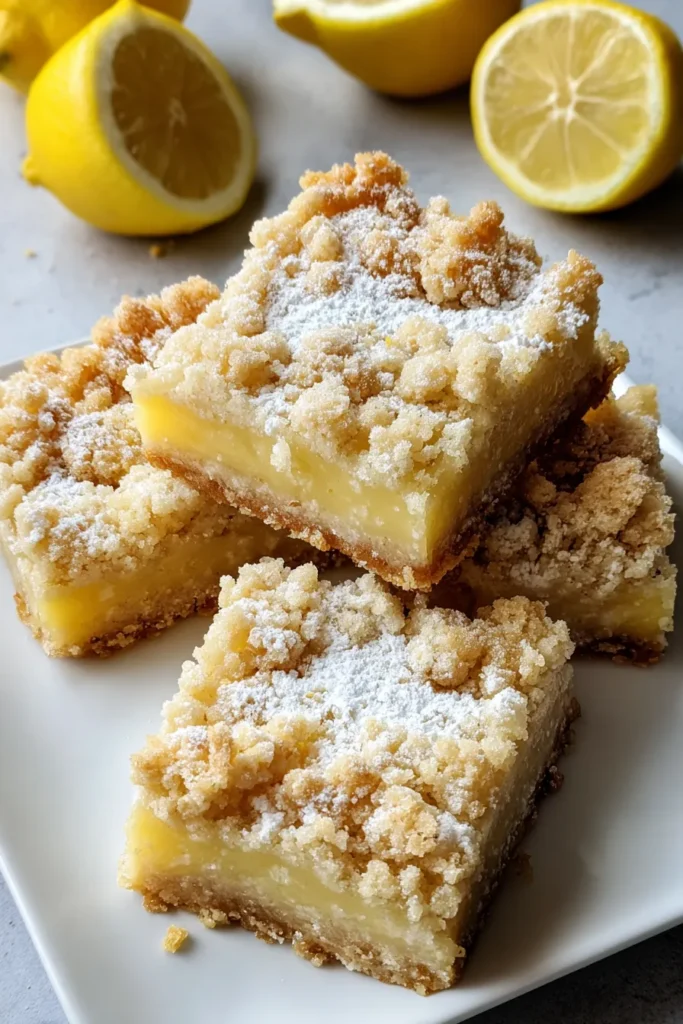

Lemon Crumb Bars
Description
These Lemon Crumb Bars feature a buttery crumb crust topped with a tangy lemon filling, creating a perfect balance of sweetness and tartness in every bite.
Ingredients
Instructions
-
Preheat your oven to 350°F (175°C). Grease a 9x13 inch baking pan or line it with parchment paper for easier removal of the bars.
-
In a medium bowl, mix together the butter, flour, granulated sugar, and salt until well combined and crumbly.
-
Take half of this mixture and press it firmly into the bottom of the prepared baking pan to form an even crust layer.
-
Place the pan in the preheated oven and bake for 15-18 minutes, or until the edges are lightly golden.
-
In a separate bowl, whisk together the sweetened condensed milk, lemon juice, and lemon zest until smooth and well combined.
-
Pour this lemon mixture evenly over the baked crust.
-
Sprinkle the remaining crumb mixture over the lemon filling, distributing it evenly across the top.
-
Return the pan to the oven and bake for an additional 25-30 minutes, or until the top is lightly browned and the filling is set.
-
Allow the bars to cool completely in the pan on a wire rack before cutting.
-
Once cooled, dust the top of the bars with powdered sugar.
-
Carefully cut into squares and serve.
Note
- For a more intense lemon flavor, consider adding a bit more lemon zest.
- These bars can be stored in the refrigerator for up to a week, keeping them fresh.
- If you prefer a thicker crust and crumble topping, you can increase the butter and flour mixture proportionately.
- These bars are an excellent choice for summer gatherings due to their refreshing taste.

