

Jam Donut Focaccia brings soft, pillowy focaccia together with sweet strawberry jam bubbling in every dimple, creating a playful twist on classic Italian bread. With golden, crisp edges and a dusting of granulated sugar, each bite delivers that irresistible sweet-salty crunch you won’t be able to resist—making it the perfect dessert (or breakfast treat!) to impress friends and family.
Key Ingredients
Get ready to see how these simple staples work together to create our Jam Donut Focaccia:
- 450 grams bread flour: Provides structure and that signature chewy interior.
- 7 grams instant yeast: Leavens the dough quickly, giving it lift and a light crumb.
- 300 milliliters warm water: Hydrates the flour and activates the yeast for a soft dough.
- 30 milliliters olive oil: Adds moisture and helps achieve a golden, crisp crust.
- 10 grams fine sugar: Feeds the yeast and contributes a hint of sweetness.
- 8 grams salt: Balances flavor and strengthens the gluten network.
- 200 grams strawberry jam: The sweet filling that bursts from each dimple for a fun jam donut feel.
- 30 grams melted butter: Brushed on top for extra richness and a glossy finish.
- 20 grams granulated sugar: Provides a final sweet crunch when dusted over the warm bread.
How To Make Jam Donut Focaccia
Ready to dive into making your own sweet-hearty focaccia? These straightforward steps guide you from mixing the dough to filling each dimple with jam. You’ll work the dough until it’s smooth, let it rise to perfection, press and dimple it by hand, and finish with a bake that yields a golden exterior and tender crumb—then seal the deal with strawberry jam, butter, and sugar.
1. In a large bowl, combine the bread flour, instant yeast, fine sugar, and salt.
2. Pour in the warm water and olive oil, then mix until a shaggy dough forms.
3. Transfer the dough to a floured surface and knead for 8 minutes until smooth and elastic.
4. Place the dough in an oiled bowl, cover, and let rise in a warm spot for 1 hour or until doubled.
5. Punch down the dough and transfer it to a baking sheet lined with parchment paper, pressing into a 30×20 centimeter rectangle.
6. Use your fingertips to create deep dimples across the surface of the dough.
7. Drizzle additional olive oil over the top and sprinkle a pinch of salt into the dimples.
8. Bake at 200°C for 18–20 minutes until golden brown.
9. Allow focaccia to cool completely on a wire rack.
10. Fill a piping bag fitted with a small tip with strawberry jam, then inject jam into each dimple.
11. Brush the top lightly with melted butter and dust evenly with granulated sugar.
12. Slice into squares and serve fresh.
Serving Suggestions
This Jam Donut Focaccia is as versatile as it is delicious—perfect for brunch buffets or a sweet snack break. Here are four fun ways to serve:
- Warm with coffee: Reheat slices gently in the oven at 160°C for 5 minutes, then pair with a strong brew for a morning pick-me-up.
- Ice cream sandwich: Place a scoop of vanilla or mascarpone ice cream between two slices for a decadent dessert twist.
- Fruit platter accompaniment: Arrange wedges alongside fresh berries and citrus segments to complement the sweet jam pockets.
- Brunch board highlight: Stack squares on a wooden board with cheese, nuts, and charcuterie for a playful sweet element at your next gathering.
Tips For Perfect Jam Donut Focaccia
Nailing this recipe is all about attention to detail and a bit of fun creativity. Here are my favorite insider tips to ensure each bake comes out flawless:
- Use a firm piping tip for clean jam filling that stays neatly in each dimple.
- Let the focaccia cool completely before filling to prevent jam from melting and sliding off.
- Experiment with different jam flavors like raspberry or apricot for a fun taste twist.
- Enjoy this focaccia fresh on the day of baking to capture that ideal balance of crisp crust and soft crumb.
How To Store It
Want to keep this sweet focaccia at its best after baking? Here are four simple storage methods to preserve that fresh-baked texture and flavor:
- Room temperature: Store cooled, unfrosted focaccia in an airtight container for up to 24 hours.
- Refrigeration: Place wrapped slices in the fridge for up to 2 days—allow to come to room temperature before serving.
- Freezing: Wrap individual slices in cling film and foil, then freeze for up to 1 month; thaw in the fridge overnight.
- Reheating: Refresh chilled or frozen slices by baking at 160°C for 5–7 minutes to restore crisp edges.
Frequently Asked Questions
Here are answers to some common questions about this recipe:
- Can I substitute active dry yeast for the instant yeast called for in the recipe?
Yes, you can replace the 7 grams of instant yeast with 7 grams of active dry yeast, but you’ll need to proof it first. Dissolve the active dry yeast in a portion of the 300 milliliters of warm water (around 40°C) with a pinch of the 10 grams of fine sugar and let it sit for 5–10 minutes until foamy. Then proceed with the recipe as written, mixing it into the remaining ingredients. Keep in mind the rise time may vary slightly.
- Why is it crucial to let the focaccia cool completely before injecting the jam?
Allowing the focaccia to cool fully on a wire rack prevents the jam from melting and running out of the dimples. A warm crumb will not hold the jam cleanly, and you risk creating a sticky mess or soggy pockets. Cooling ensures the structure sets so the jam stays neatly in place.
- What adjustments should I make if I want to use whole wheat flour instead of bread flour?
Whole wheat flour absorbs more liquid and yields a denser crumb. Consider substituting up to 50% of the 450 grams of bread flour with whole wheat, then increase the water by 10–15 milliliters if needed. You may also need to knead a bit longer and allow a slightly longer rise time for proper gluten development.
- How can I prevent the jam from leaking after filling the dimples?
Start with deep, well-defined dimples created by your fingertips, and use a firm piping tip to control the flow of jam. Don’t overfill any single dimple—aim for just enough jam to fill the cavity without cresting over. The cooled dough and precise filling technique will keep the jam contained.
- Is it possible to prep the dough ahead of time and refrigerate it overnight?
Yes, after kneading, place the dough in an oiled, airtight container and refrigerate for up to 12 hours. The slow cold fermentation will develop more flavor. When ready to bake, bring the dough to room temperature for 30–45 minutes, then proceed with pressing it out, dimpling, topping with olive oil and salt, and baking as instructed.
- How should I store any leftover focaccia to maintain its texture?
Store cooled, unfrosted focaccia in an airtight container at room temperature for up to 24 hours. If you’ve already filled the dimples with jam and dusted with sugar, consume within the same day for the best texture. Reheating slices briefly in a warm oven (160°C for 5 minutes) can refresh the crust.
What Makes This Special
This Jam Donut Focaccia shines because it balances the sturdy, chewy charm of Italian focaccia with playful jam-filled pockets that feel like a sweet surprise in every bite. The combination of crisp, olive oil–kissed crust and tender crumb means you get both texture and flavor, while the dusting of sugar adds that finishing touch of nostalgia. Go ahead and print this recipe to save for your next baking adventure, and drop a comment if you swap jams or tweak anything—you’ve got to share how your focaccia turned out!
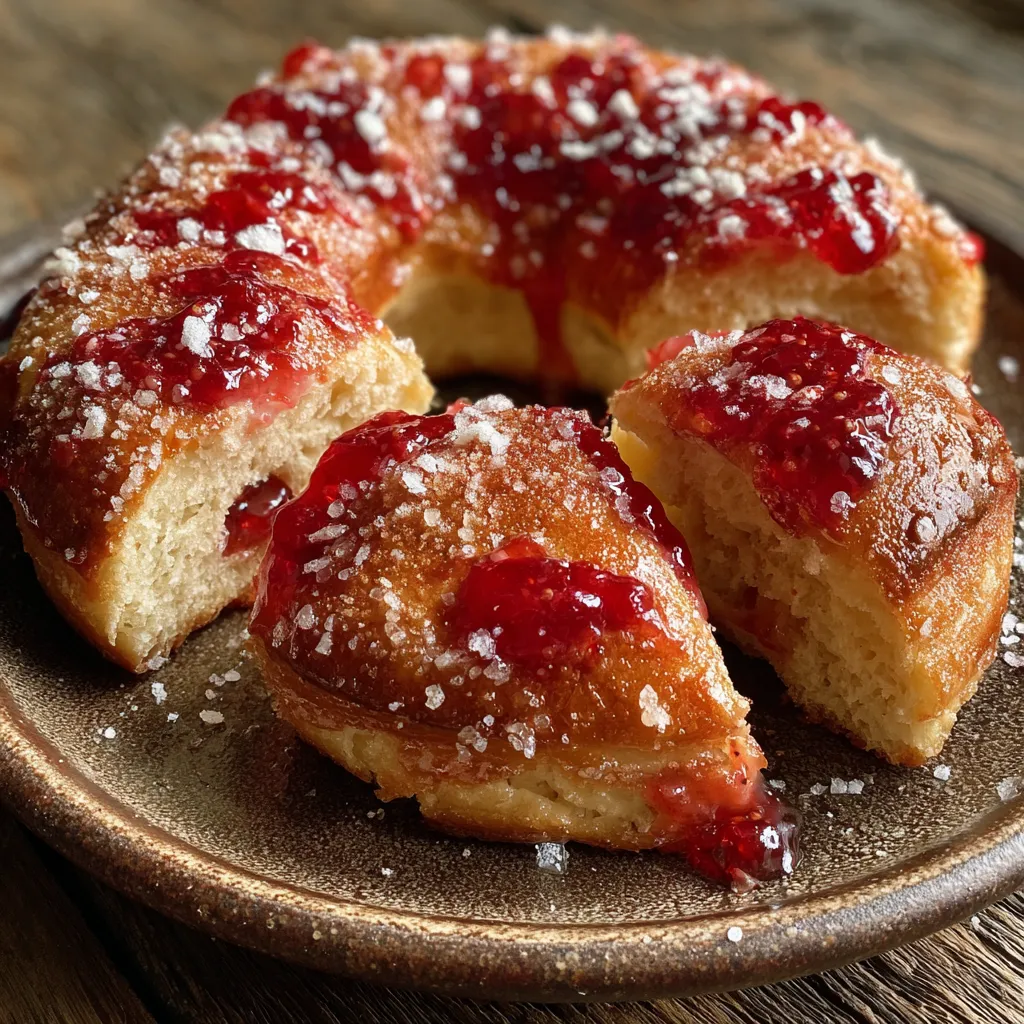

Jam Donut Focaccia
Description
Pillowy dough bakes up golden and crisp, each dimple bursting with strawberry jam and a dusting of sugar for a perfect sweet-salty crunch.
Ingredients
Instructions
-
In a large bowl combine bread flour instant yeast fine sugar and salt.
-
Pour in warm water and olive oil then mix until a shaggy dough forms.
-
Transfer dough to a floured surface and knead for 8 minutes until smooth and elastic.
-
Place dough in an oiled bowl cover and let rise in a warm spot for 1 hour or until doubled.
-
Punch down the dough and transfer to a baking sheet lined with parchment paper pressing into a 30x20 centimeter rectangle.
-
Use your fingertips to create deep dimples across the surface of the dough.
-
Drizzle additional olive oil over the top and sprinkle a pinch of salt into the dimples.
-
Bake at 200°C for 18–20 minutes until golden brown.
-
Allow focaccia to cool completely on a wire rack.
-
Fill a piping bag fitted with a small tip with strawberry jam then inject jam into each dimple.
-
Brush the top lightly with melted butter and dust evenly with granulated sugar.
-
Slice into squares and serve fresh.
Note
- Use a firm piping tip for clean jam filling
- Let focaccia cool completely before filling
- Experiment with different jam flavors for variety
- Best enjoyed fresh on the day of baking

