

Nothing quite beats the thrill of biting into a golden, crispy piece of chicken that’s been lovingly coated in a sticky, sweet, and savory glaze. In this recipe, juicy bone-in, skin-on chicken thighs are the stars of the show, delivering tender meat under an irresistible crackle of seared skin. Every forkful dances between the rich honey sweetness and the bold umami of soy sauce, with a gentle tang from apple cider vinegar that keeps each bite perfectly balanced. As a beginner-friendly, one-pan dinner solution, these Honey Garlic Chicken Thighs require just a few simple pantry staples and about forty-five minutes from start to finish—ten minutes for prep, thirty minutes of cooking, and a five-minute resting window before you dive in.
Whether you’re planning a cozy weeknight meal or a family dinner that needs to impress without the fuss, this recipe hits all the right notes. At roughly 420 calories per serving, it’s hearty enough to satisfy hungry appetites and versatile enough to pair beautifully with steamed vegetables or fluffy white rice. With minimal cleanup and maximum flavor, you’ll find yourself coming back to this easy dinner recipe time and again. Let’s embark on this sweet and savory journey together—your taste buds are in for a treat!
KEY INGREDIENTS IN HONEY GARLIC CHICKEN THIGHS
Before we dive into the cooking process, let’s take a moment to appreciate the handful of ingredients that come together to create such depth of flavor. Each component plays a vital role: the chicken thighs provide succulent, juicy meat beneath crisp skin, while the honey-garlic sauce brings a perfect harmony of sweetness, savoriness, and gentle heat. Here’s what you’ll need:
- Chicken thighs
Bone-in and skin-on for maximum juiciness and crispy, golden-brown skin, making each bite rich and satisfying.
- Salt and pepper
Essential for seasoning, these simple staples enhance the natural flavors of the chicken and help the glaze adhere.
- Olive oil
A light, neutral oil that promotes even searing and browning of the chicken skin without overwhelming the sauce.
- Honey
The star sweetener that caramelizes beautifully under heat, creating a luscious, sticky coating that clings to every nook of the meat.
- Soy sauce
Brings a deep umami kick, saltiness, and complexity, balancing the honey’s sweetness and adding depth.
- Apple cider vinegar
Adds a bright, tangy note that cuts through the richness and prevents the sauce from feeling cloying.
- Garlic
Freshly minced for a bold, aromatic punch that infuses the entire dish with savory goodness.
- Crushed red pepper flakes
Optional but highly recommended if you enjoy a subtle, lingering heat that wakes up your palate.
- Cornstarch mixture
A simple slurry of cornstarch and water that thickens the sauce to a glossy finish, ensuring it clings to the chicken.
- Fresh parsley
Chopped and sprinkled on top for a pop of color, freshness, and herbaceous brightness.
- Cooked white rice or steamed vegetables
The perfect canvas for soaking up every drop of that magnificent honey garlic sauce.
HOW TO MAKE HONEY GARLIC CHICKEN THIGHS
Ready to bring all those ingredients together? This section will guide you step by step through creating a sticky, savory, and slightly sweet masterpiece in just one skillet.
1. Preheat your oven to 375°F (190°C). Ensuring the oven is at the right temperature helps the chicken finish cooking evenly and the sauce caramelize without burning.
2. Pat the chicken thighs dry with paper towels and season both sides generously with salt and pepper. This essential step guarantees crispy skin and well-seasoned meat.
3. Heat the olive oil in a large oven-safe skillet over medium-high heat. Add the chicken thighs, skin-side down, and sear until the skin is golden-brown and crispy, about 5–7 minutes. Do not move them around too much—steady contact is key.
4. Turn the chicken thighs over and sear the other side for an additional 2–3 minutes. Once both sides are beautifully browned, remove the chicken from the skillet and set aside.
5. In the same skillet, reduce the heat to medium and add the minced garlic. Sauté for about 30 seconds until fragrant, being careful not to let it burn.
6. Stir in the honey, soy sauce, apple cider vinegar, and crushed red pepper flakes. Bring the mixture to a gentle simmer, allowing the flavors to meld.
7. Pour the cornstarch mixture into the skillet, and stir constantly until the sauce thickens slightly and turns glossy.
8. Return the chicken thighs, skin-side up, to the skillet. Spoon some of the sauce over the tops of the chicken to ensure each piece is well coated.
9. Transfer the skillet to the preheated oven and roast for 20–25 minutes, or until the chicken is fully cooked through and reaches an internal temperature of 165°F (74°C).
10. Remove from the oven and let the chicken rest for a few minutes. This resting time helps the juices redistribute, keeping the meat tender and moist.
11. Garnish with chopped fresh parsley before serving, then serve the honey garlic chicken thighs over cooked white rice or with steamed vegetables, drizzling extra sauce over the top for maximum flavor.
SERVING SUGGESTIONS FOR HONEY GARLIC CHICKEN THIGHS
When it comes to serving these honey garlic chicken thighs, the possibilities are both delicious and endless. The glossy, sticky sauce begs to be mopped up with something tender, while the dish’s sweet-savory profile pairs beautifully with bright, crisp accompaniments. Whether you’re hosting a casual dinner or treating yourself to a cozy meal at home, these serving tips will elevate your presentation and flavor experience.
- Season your steamed white rice with a sprinkle of toasted sesame seeds and a drizzle of the honey garlic sauce for a simple, comforting side that soaks up every drop of flavor.
- Serve alongside vibrantly steamed broccoli, carrots, and snap peas. The crisp, cool vegetables create a perfect contrast to the warm, sticky chicken and add a healthy, colorful element.
- Plate with a bed of fluffy cauliflower rice or quinoa to lighten up the meal while still offering a satisfying, grain-like base that captures the sauce.
- Finish with a handful of fresh cilantro or green onions for a refreshing, herby lift. Their bright notes cut through the richness, adding pops of color and freshness to each bite.
HOW TO STORE HONEY GARLIC CHICKEN THIGHS
If you’re lucky enough to have leftovers, proper storage ensures that every delicious morsel stays as close to freshly made as possible. The sweet and savory sauce can thicken or lose a bit of its glossy sheen when refrigerated, so following these storage tips will help you maintain that signature stickiness and depth of flavor for up to three days.
- Refrigerate in an airtight container: Transfer cooled chicken pieces and sauce directly into a sealed container. This minimizes air exposure and helps preserve moisture.
- Separate the rice or veggies: Store any accompaniments in a different container to prevent them from absorbing excess sauce and becoming too soggy.
- Reheat gently: Warm up individual portions in a skillet over low heat, adding a splash of water or chicken broth if the sauce has thickened too much. This brings back the sauce’s smooth consistency.
- Freeze for longer storage: For up to one month, place chicken and sauce in a freezer-safe bag or container. Thaw overnight in the refrigerator before reheating gently to avoid overcooking.
CONCLUSION
What began as a simple lineup of everyday ingredients transforms into a dinner that’s bursting with layered sweetness, savory richness, and just the right hint of tang and spice. These honey garlic chicken thighs prove that a beginner-level recipe can still deliver restaurant-quality flavor without demanding hours in the kitchen or an arsenal of exotic ingredients. From the delicate sear that crisps the skin to the glossy finish of the sticky sauce, each step prioritizes both texture and taste to create a dish that’s as delightful to cook as it is to eat. Feel free to jot down this recipe, print out the article, and save it for future reference—your weekly dinner rotation will thank you! You’ll also find a handy FAQ below to answer any burning questions that might pop up along the way.
I hope you’ve enjoyed learning how to make these succulent, flavor-packed chicken thighs. If you decide to try this recipe, I’d love to hear how it turned out for you! Leave a comment with your thoughts, ask any questions you might have, or share feedback on tweaks you made—maybe you experimented with extra ginger or swapped honey for maple syrup? Your experiences help our cooking community grow, and I’m always excited to chat about kitchen triumphs (and mishaps!). Happy cooking, and may your next meal be filled with that irresistible honey garlic glow!
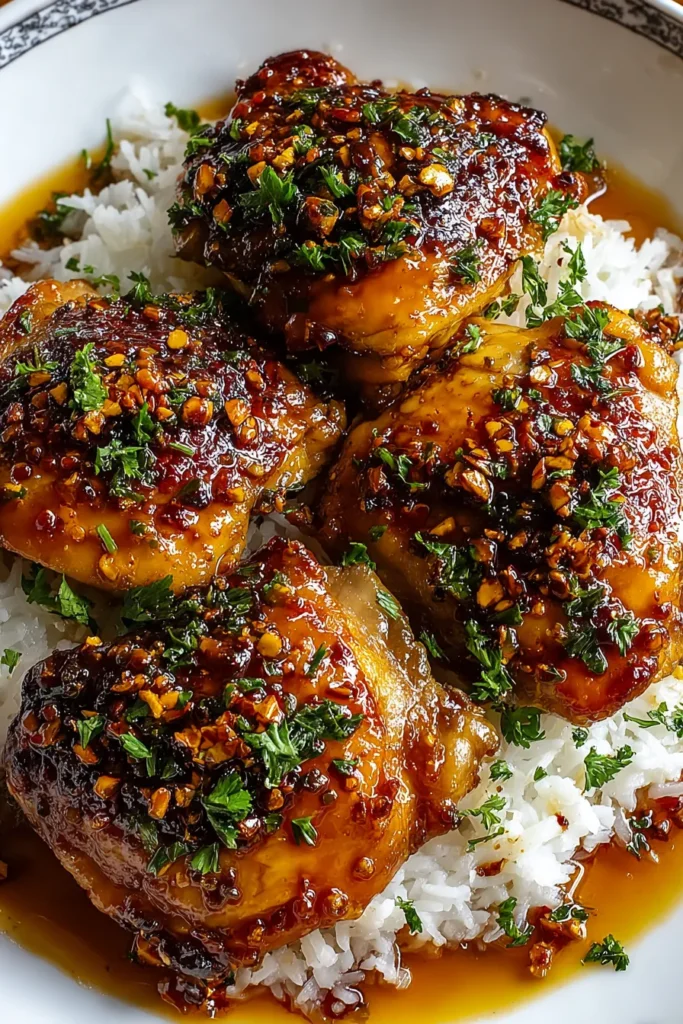

Honey Garlic Chicken Thighs
Description
These honey garlic chicken thighs are succulent, sticky, and bursting with flavor. A perfect blend of sweetness and savory goodness makes this dish irresistible. Serve it over rice or with veggies for a wholesome meal!
Ingredients
Instructions
-
Preheat your oven to 375°F (190°C).
-
Pat the chicken thighs dry with paper towels and season both sides generously with salt and pepper.
-
Heat the olive oil in a large oven-safe skillet over medium-high heat. Add the chicken thighs, skin-side down, and sear until the skin is golden-brown and crispy, about 5-7 minutes.
-
Turn the chicken thighs over and sear the other side for an additional 2-3 minutes. Remove the chicken from the skillet and set aside.
-
In the same skillet, reduce the heat to medium and add the minced garlic. Sauté for about 30 seconds until fragrant.
-
Stir in the honey, soy sauce, apple cider vinegar, and crushed red pepper flakes. Bring the mixture to a simmer.
-
Pour the cornstarch mixture into the skillet, and stir constantly until the sauce thickens slightly.
-
Return the chicken thighs, skin-side up, to the skillet. Spoon some of the sauce over the tops of the chicken.
-
Transfer the skillet to the preheated oven and roast for 20-25 minutes, or until the chicken is fully cooked through and reaches an internal temperature of 165°F (74°C).
-
Remove from the oven and let the chicken rest for a few minutes. Garnish with chopped fresh parsley before serving.
-
Serve the honey garlic chicken thighs over cooked white rice or with steamed vegetables, drizzling extra sauce over the top.
Note
- Adjust the amount of crushed red pepper flakes to suit your spice preference or omit them entirely for a milder dish.
- For a deeper flavor, marinate the chicken in the honey garlic sauce for 1-2 hours before cooking.
- Leftovers can be stored in an airtight container in the refrigerator for up to 3 days. Reheat gently to maintain the sauce's consistency.

