

There’s nothing quite like pulling a golden, butter-rich pastry fresh from the oven, its tender layers flaking apart with every bite. These Homemade Cheese Danishes bring together the best of a bakery-worthy treat and the comfort of your own kitchen. With a simple sheet of thawed puff pastry, creamy cheese filling, and just a handful of pantry staples, you can whip up a tray of these beauties in no time. Whether you’re easing into a slow weekend morning or surprising your friends at brunch, the process feels effortless—only about 15 minutes of prep, followed by 18 minutes of oven time, then a brief 10-minute rest before serving. Even if you’re a beginner baker, this recipe will guide you through each step, ensuring that your pastry puffs up perfectly and your filling stays luxuriously smooth.
When you bite into these flaky, cream-filled stars, you’ll understand why they’ve become a favorite for breakfast and dessert alike. The tender interior gives way to a hint of lemon zest and vanilla, while the puff pastry offers that satisfying crisp. At just 290 calories per serving, these Danishes strike a lovely balance between indulgence and portion control. No need for complicated laminating or advanced skills—this beginner-level delight proves that sometimes the simplest recipes deliver the biggest smiles. So gather your cream cheese, sugar, and a sheet of puff pastry, and let’s bring a little bakery magic home today!
KEY INGREDIENTS IN HOMEMADE CHEESE DANISH
Before diving into the fun folding and baking, let’s get acquainted with the stars of our show. Each ingredient plays a vital role in creating the perfect balance between crispy pastry and silky-smooth filling. Understanding their purpose helps you tweak or experiment (try a splash of almond extract!) and makes the overall process more enjoyable.
- Puff Pastry
This buttery, flaky sheet acts as the vessel for our cheese filling. When kept cold and handled gently, it rises into delicate layers that crumble in the most delightful way.
- Cream Cheese
The heart of the filling, cream cheese provides a rich, tangy base that melds beautifully with sugar and vanilla. Softening it first ensures a smooth, lump-free texture.
- Granulated Sugar
Adds sweetness to balance the tang of the cream cheese. It also helps the filling set up nicely as it bakes, giving a spoonable consistency that doesn’t weep.
- Vanilla Extract
A splash of pure vanilla extract amplifies the overall flavor, lending warm aromatic notes that pair perfectly with the cheese.
- Egg Yolk
Enriches the filling with a silky mouthfeel and subtle color. Reserve the white to create an egg wash, which boosts that glossy, golden-brown finish.
- All-Purpose Flour
A small sprinkle helps stabilize and thicken the cheese mixture. It prevents the filling from becoming too runny as the pastry bakes.
- Lemon Zest
Brightens the filling with citrusy flair. Just half a teaspoon creates a lift that keeps each bite lively and fresh.
- Milk or Water
Combined with reserved egg white, it forms an easy egg wash. This simple mixture coats the pastry, encouraging even browning.
- Powdered Sugar
An optional garnish that dusts the finished Danishes with a delicate sweetness. It adds a pretty, bakery-style touch before serving.
HOW TO MAKE HOMEMADE CHEESE DANISH
With your ingredients prepped and your workstation organized, the step-by-step process will feel seamless. From unfolding the pastry to watching it puff up in the oven, each move contributes to an irresistible final treat.
1. Preheat your oven to 400°F (200°C) and line a baking sheet with parchment paper. This ensures even heat distribution and prevents sticking.
2. On a lightly floured surface, roll out the puff pastry sheet to smooth any creases. Then cut it into eight equal squares, keeping them chilled until ready to fill.
3. In a medium bowl, combine the cream cheese, granulated sugar, vanilla extract, egg yolk, flour, and lemon zest. Mix vigorously until the mixture is completely smooth and creamy, with no lumps.
4. Place a heaping tablespoon of the cream cheese mixture in the center of each puff pastry square, leaving a border for folding.
5. Fold each square’s corners into the center to form a star shape, gently sealing the tips with your fingertips so the filling stays nestled inside.
6. Whisk the reserved egg white with milk or water to create an egg wash. Brush the tops of each Danish generously, which promotes that perfect golden color.
7. Arrange the Danishes on the prepared baking sheet, leaving space for them to puff and expand without touching.
8. Bake for 15–18 minutes, or until they are golden brown and noticeably puffed up around the filling.
9. Remove from the oven and transfer the pastries to a wire rack to cool for about 10 minutes.
10. Optionally, sprinkle with powdered sugar just before serving for an extra touch of sweetness and visual appeal.
SERVING SUGGESTIONS FOR HOMEMADE CHEESE DANISH
Knowing how to present these Homemade Cheese Danishes can transform a simple tray into a memorable spread. Whether you’re hosting a leisurely brunch or treating yourself to a cozy afternoon coffee, the right accompaniments and presentation elevate the experience. Here are a few ideas to get the creativity flowing, from pairing with warm beverages to styling a vibrant dessert plate that delights the eyes as much as the palate. Each suggestion highlights how subtle additions or garnishes can create a balanced flavor profile and a visually inviting display that will have everyone reaching for seconds.
- Serve Warm with Coffee or Tea
Plate the Danishes straight from the oven when they’re still slightly warm. The contrast between the hot pastry and cool cream cheese is heavenly alongside a strong cup of coffee or a light herbal tea.
- Top with Fresh Berries and Mint
Add a burst of color by garnishing each Danish with a few fresh raspberries, blueberries, or strawberries and a sprig of mint. The bright fruit complements the creamy filling and makes for an Instagram-worthy presentation.
- Drizzle with Fruit Compote or Honey
Spoon a small amount of warm berry compote or a delicate honey drizzle over the Danishes just before serving. It adds an extra layer of sweetness and moisture that pairs beautifully with the crisp pastry.
- Create a Dessert Platter
Arrange several Danishes on a long wooden board alongside small bowls of assorted jams, whipped cream, and chopped nuts. This interactive setup encourages guests to customize each pastry to their liking.
HOW TO STORE HOMEMADE CHEESE DANISH
Life gets busy, but you don’t have to let these delightful pastries go to waste. Proper storage keeps them tasting fresh, ensuring that a batch made for brunch can still deliver enjoyment days later. Whether you’re planning ahead or dealing with leftover Danishes, follow these simple tips to maintain that signature flaky texture and creamy interior. Temperature control, airtight sealing, and proper reheating techniques all come into play. Read on to keep your pastries performing at their best, whether you choose to savor them over the next couple of days or pop them in the freezer for longer-term enjoyment.
- Room Temperature (Up to 24 Hours)
Store cooled Danishes in a single layer inside an airtight container. Place a sheet of parchment paper between layers if stacking. Keep them on the counter in a cool, dry spot for easy access and a fresh taste.
- Refrigeration (2–3 Days)
For slightly longer storage, wrap each pastry individually in plastic wrap and place in a sealed container. The chill will slow staling, though it may soften the flakiness. Reheat in a 350°F oven for 5–7 minutes to crisp the exterior.
- Freezing (Up to 1 Month)
Freeze baked Danishes on a tray until solid, then transfer to a resealable freezer bag, removing as much air as possible. Thaw overnight in the fridge, then warm in the oven to revive that just-baked texture.
- Reheating Tips
Always preheat your oven to about 350°F and reheat Danishes for 5–8 minutes. This method restores crispiness far better than a microwave, which can make the pastry soggy.
CONCLUSION
By now, you’ve discovered how simple ingredients—puff pastry, cream cheese, sugar, and a touch of vanilla and lemon—can come together to create something truly special. We’ve covered everything from the key ingredients and detailed steps to expert serving ideas and foolproof storage methods. These Homemade Cheese Danishes shine whether you’re enjoying a slow morning at home or hosting a casual get-together. They bring warmth, sweetness, and that irresistible crunch that makes each mouthful memorable. Feel free to print this article and save it for future baking adventures; you’ll find it’s a breeze to follow, even on busy weekdays.
Don’t forget that a FAQ section follows below if you need quick answers on substitutions, troubleshooting, or dietary tweaks. Let me know how your batch turned out, and drop any comments, questions, or feedback if you try this recipe or need a hand along the way. Your kitchen stories and creative twists are exactly what makes home baking such a joy—so I can’t wait to hear from you!
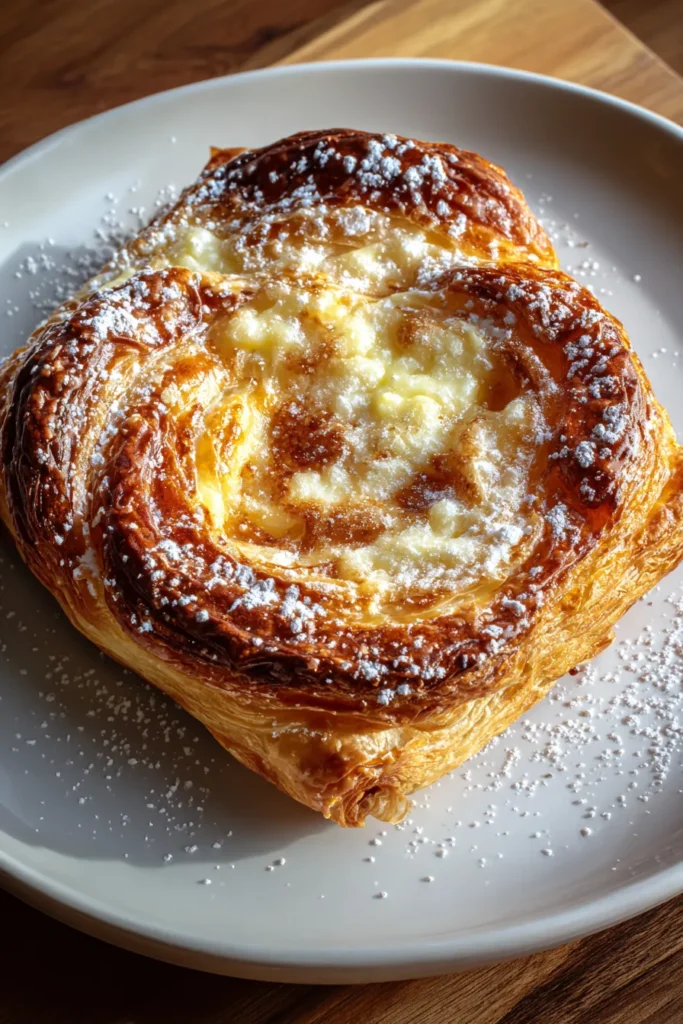

Homemade Cheese Danish
Description
Experience the rich, creamy filling enveloped in crispy puff pastry that rises to perfection. These delightful pastries are sure to impress at any gathering!
Ingredients
Instructions
-
Preheat your oven to 400°F (200°C). Line a baking sheet with parchment paper.
-
On a lightly floured surface, roll out the puff pastry sheet to smooth the creases. Cut into 8 equal squares.
-
In a medium bowl, combine the cream cheese, granulated sugar, vanilla extract, egg yolk, flour, and lemon zest. Mix until smooth and creamy.
-
Place a heaping tablespoon of the cream cheese mixture in the center of each puff pastry square.
-
Fold each square corner into the center to form a star shape, sealing the tips gently with your fingers.
-
Whisk the reserved egg white with the milk or water. Brush the tops of each Danish with this mixture to ensure a beautiful golden color when baked.
-
Place the Danishes on the prepared baking sheet, ensuring space in between.
-
Bake in the preheated oven for 15-18 minutes or until golden brown and puffed up.
-
Remove from the oven and allow them to cool on a wire rack.
-
Optionally, sprinkle with powdered sugar before serving.
Note
- Puff pastry must be thawed before use, but keep it cold to ensure it puffs up properly.
- Feel free to experiment by adding a dollop of fruit preserves atop the cream cheese before baking for a fruity touch.
- This recipe can be doubled to serve more guests.
- An egg wash helps to achieve that perfect golden-brown finish.
- Adding a touch of almond extract to the filling can provide a delightful twist.

