

Hawaiian Guava Cake transports your taste buds to the islands with tender sponge infused with sweet guava, a hint of coconut, and a silky vanilla glaze. Light, fluffy layers woven with fruity guava paste and juice release bursts of tangy sweetness, while optional coconut shreds add a gentle crunch. Whether you’re craving a midweek treat or planning a tropical-themed gathering, this beginner-friendly dessert is sure to delight and make every slice feel like a refreshing escape.
Key Ingredients
Before you start baking, let’s gather the essentials that make this cake shine:
- 2 cups all-purpose flour: Provides the structural base and tender crumb needed for a soft, fluffy cake.
- 1 cup granulated sugar: Sweetens the batter and helps achieve a moist texture.
- 1 tablespoon baking powder: Acts as a leavening agent, giving the cake its light rise.
- 1/2 teaspoon salt: Balances sweetness and enhances overall flavor.
- 1/2 cup unsalted butter, softened: Adds richness and creates a tender, buttery crumb.
- 2 large eggs: Bind ingredients together and contribute to a stable structure.
- 1 teaspoon vanilla extract: Infuses a warm, aromatic vanilla flavor throughout the cake.
- 1 cup milk: Adds moisture and helps dissolve the dry ingredients for a smooth batter.
- 1 cup guava paste, diced: Delivers bursts of concentrated tropical guava flavor.
- 1/4 cup guava juice: Intensifies the fruity taste and keeps the cake moist.
- 1/4 cup shredded coconut (optional): Provides a textural contrast and tropical flair.
- 1/2 cup powdered sugar: Forms the base of a silky-smooth glaze.
- 2 tablespoons milk: Adjusts the glaze consistency for a perfect drizzle.
How To Make Hawaiian Guava Cake
Baking this Hawaiian Guava Cake is delightfully straightforward. You’ll mix the dry ingredients, cream butter and eggs, fold in guava paste and juice, then bake until golden. A quick whisk of powdered sugar and milk turns into a glossy glaze that crowns your cake. Follow these ten steps for a tender, fruity dessert that feels like sunshine on a plate.
1. Preheat the oven to 350°F and grease a 9-inch round cake pan. Position a rack in the center, then use softened butter or nonstick spray to coat the pan and lightly dust with flour to prevent sticking.
2. In a large bowl whisk together the flour, granulated sugar, baking powder, and salt until evenly combined and free of lumps.
3. In a separate bowl cream the softened butter with the eggs until the mixture is smooth and slightly fluffy, ensuring an even texture.
4. Stir in the vanilla extract and milk into the butter mixture until combined, scraping the sides of the bowl to form a smooth batter.
5. Fold the diced guava paste and guava juice into the batter gently, so you maintain pockets of fruit without overmixing.
6. Pour the batter into the prepared pan and sprinkle shredded coconut on top if using, for a crunchy, tropical finish.
7. Bake for 30 to 35 minutes, or until the cake is golden and a toothpick inserted in the center comes out clean.
8. While the cake cools, whisk the powdered sugar and milk to create a smooth glaze with no lumps.
9. Drizzle the glaze over the cooled cake in a zigzag pattern, covering the top for a sweet finish.
10. Slice and serve warm or at room temperature to enjoy the tender crumb and fruity pockets of guava.
Serving Suggestions
Once your Hawaiian Guava Cake is ready to slice, it’s time to think about serving! Whether you’re hosting a backyard luau or simply craving a solo slice with your afternoon tea, these ideas will bring out the best of that tropical flavor. From fresh fruit accents to contrasting textures and fun plating, each suggestion here will help you turn each slice into a mini escape, no sunscreen required.
- Serve slices warm with a dollop of coconut whipped cream and a sprinkling of toasted coconut for extra luxury.
- Pair a slice with fresh guava or mango slices on the side to amplify the fruity, tropical notes.
- Add a scoop of vanilla ice cream to each plate, allowing it to melt slowly into the warm cake for a creamy contrast.
- Present the cake on a palm leaf–lined platter or use tiki-style picks to enhance that island-inspired presentation.
Tips For Perfect Hawaiian Guava Cake
Getting this cake just right is all about quality ingredients and gentle handling. Using ripe guava paste ensures you’ll taste that vibrant tropical punch in every bite, while optional coconut flakes can add a lovely crunch without overpowering the cake. Keep your mixing gentle to maintain a tender crumb—overmixing can make any cake tough! When it comes to storing and garnishing, a few simple tweaks can keep slices fresh and visually appealing, so you can enjoy this island treat throughout the week or wow guests at your next gathering.
- Use ripe guava paste for a more intense tropical flavor.
- Shredded coconut is optional but adds a pleasant texture contrast.
- Store leftovers in an airtight container at room temperature for up to three days.
- Garnish with fresh guava slices for an extra tropical presentation.
How To Store It
After you’ve savored a slice of Hawaiian Guava Cake, storing the rest properly will keep that tropical goodness intact. Since this cake is moist and tender, you’ll want to protect it from drying out or absorbing extra humidity. Here are some easy ways to preserve freshness and flavor for days—whether you’re planning to snack on leftovers or prepare for healthier make-ahead treats.
- Store in an airtight container at room temperature for up to three days to maintain that soft crumb and prevent drying.
- Place a paper towel at the bottom of the container or between layers to absorb extra moisture and keep the cake from getting soggy.
- Wrap individual slices tightly in plastic wrap or aluminum foil and freeze for up to one month; thaw at room temperature before serving.
- For quick access, cut the cake into portions, wrap each, and arrange in a zip-top freezer bag, removing as much air as possible to maximize freshness.
Frequently Asked Questions
Here are answers to the most common questions about this tropical treat:
- How can I tell when the Hawaiian Guava Cake is fully baked?
You’ll know the cake is done when the top turns a light golden brown and begins to pull away slightly from the sides of the pan. Insert a toothpick or cake tester into the center—if it comes out clean or with just a few moist crumbs (but no wet batter), the cake is fully baked. Investing in an oven thermometer can also help ensure your oven is at the correct 350°F for accurate baking times.
- Can I substitute fresh guava for the guava paste in this recipe?
Yes, you can use fresh guava, but you’ll want to puree about 1¼ cups of ripe guava flesh to replace the diced paste and juice. Reduce the milk by 2 to 3 tablespoons to account for the extra moisture in the puree. If your fresh guavas are very sweet, you might also cut the granulated sugar by 1 to 2 tablespoons to keep the cake from becoming overly sweet.
- What can I use if I don’t have shredded coconut or want a nutty crunch instead?
If you skip the shredded coconut, you can garnish the cake top with chopped macadamia nuts or chopped toasted pecans for a tropical crunch. Simply sprinkle about ¼ cup of your chosen nuts over the batter before baking. Toasting them lightly in a dry pan for 3 to 4 minutes first will deepen their flavor and complement the guava.
- How should I store leftovers to maintain freshness?
Allow the cake to cool completely before covering. Store slices in an airtight container at room temperature for up to three days. If you live in a humid climate, place a paper towel beneath the cake to absorb excess moisture. For longer storage, wrap individual slices tightly in plastic wrap and freeze for up to one month—thaw at room temperature before serving.
- Can I make this cake gluten-free?
Yes. Substitute a 1:1 gluten-free flour blend that contains xanthan gum for the all-purpose flour. Because gluten-free flours sometimes absorb more moisture, you may need to add an extra tablespoon of milk to achieve the same batter consistency. Mix until just combined to avoid a dense texture, then bake as directed.
- Is it possible to use coconut milk instead of regular milk?
Absolutely. Swap the cup of regular milk for canned coconut milk for an even more tropical flavor. Stir the coconut milk well before measuring to incorporate the cream. Coconut milk’s richness may slightly slow rise, so check doneness with a toothpick after 35 minutes and add a few more minutes if needed.
- How can I turn this recipe into cupcakes or a sheet cake?
For cupcakes, line a standard muffin tin with 12 liners and fill each two-thirds full of batter. Bake at 350°F for 18 to 22 minutes or until a toothpick comes out clean. For a sheet cake, pour the batter into a greased 9×13-inch pan and bake at 350°F for 25 to 30 minutes, checking doneness with a toothpick. Adjust garnish and glaze amounts accordingly.
What Makes This Special
This Hawaiian Guava Cake is special because it combines bright guava flavors with a tender crumb and that fun coconut crunch, all under a silky vanilla glaze that’ll have you dreaming of beach breezes. The mix of diced guava paste and juice creates juicy fruity pockets, while simple pantry staples make it surprisingly easy to bake—even for beginners. Go ahead and print this recipe, stash it in your recipe box, and let the feedback roll in! I’d love to hear how yours turns out and any fun twists you try in your kitchen.
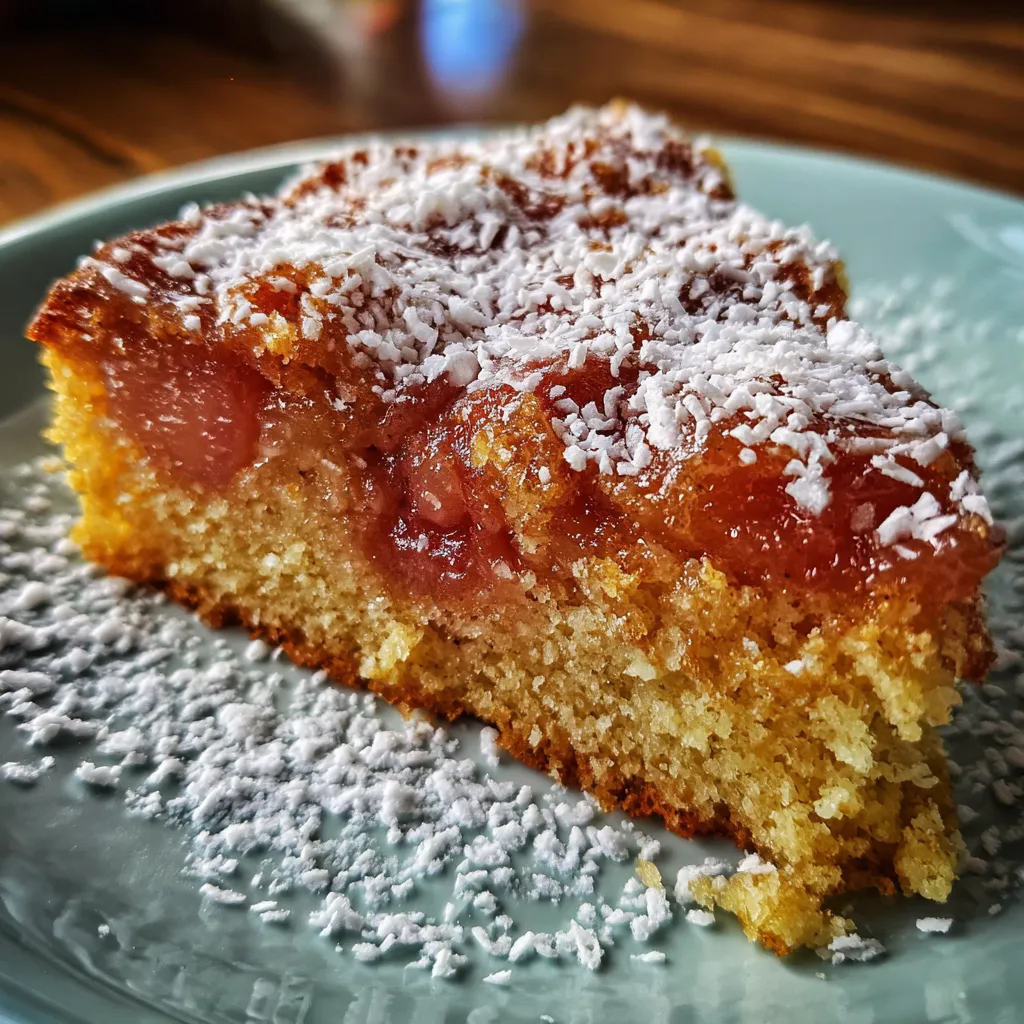

Hawaiian Guava Cake
Description
Light, fluffy layers woven with fruity guava paste and juice release bursts of tangy sweetness, while optional coconut shreds add a gentle crunch. A smooth glaze drapes over each slice for a refreshing tropical escape.
Ingredients
Instructions
-
Preheat the oven to 350°F and grease a 9-inch round cake pan.
-
In a large bowl whisk together the flour, granulated sugar, baking powder, and salt.
-
In a separate bowl cream the softened butter with the eggs until smooth.
-
Stir in the vanilla extract and milk into the butter mixture until combined.
-
Fold the diced guava paste and guava juice into the batter.
-
Pour the batter into the prepared pan and sprinkle shredded coconut on top if using.
-
Bake for 30 to 35 minutes until the cake is golden and a toothpick inserted in the center comes out clean.
-
While the cake cools, whisk the powdered sugar and milk to create a glaze.
-
Drizzle the glaze over the cooled cake.
-
Slice and serve.
Note
- Use ripe guava paste for a more intense tropical flavor.
- Shredded coconut is optional but adds a pleasant texture contrast.
- Store leftovers in an airtight container at room temperature for up to three days.
- Garnish with fresh guava slices for an extra tropical presentation.

