

There’s something deeply satisfying about sinking your teeth into a loaf of freshly baked sourdough bread, its crisp, golden crust crackling under your fingertips and giving way to a tender, chewy interior. This garlic and herb sourdough takes that classic comfort and elevates it with bold flavors that dance on your palate. Each slice reveals pockets of fresh rosemary and thyme, flecked with minced garlic that has mellowed and sweetened during baking. Whether you’re carving off a thick hunk to accompany your dinner or munching on a warm slice drizzled with olive oil and balsamic, this bread promises to imbue any moment with cozy, rustic charm.
Beyond the delightful flavor, there’s an almost ritualistic joy in the process of making this loaf. Feeding your starter, gently kneading the dough until it springs back, and watching it double in size in a warm corner of the kitchen—all these steps connect you to a centuries-old tradition of sourdough baking. The anticipation builds as you preheat your Dutch oven, ready to trap steam and coax that signature crust into existence. When at last you lift the lid and behold a loaf crowned with a crackly, herb-speckled top, you know the wait was worth every second. This is more than just bread; it’s a labor of love that fills your home with warmth and your table with delicious possibility.
KEY INGREDIENTS IN GARLIC AND HERB SOURDOUGH BREAD
Before we dive into the step-by-step instructions, let’s take a moment to appreciate the star players in this recipe. Each ingredient contributes its own unique properties to create a loaf that’s flavorful, structured, and utterly irresistible.
- Bread flour
High in protein, bread flour gives the dough the strength it needs to develop a robust gluten network. This results in a chewy interior that holds its shape and traps the lovely bubbles created during fermentation.
- Warm water
Using water at just the right temperature helps activate the wild yeast in your starter. It ensures even hydration of the flour and promotes that gentle rise you’re looking for.
- Active sourdough starter
The heart and soul of sourdough baking, a lively starter brings natural leavening power and a characteristic tang. It’s responsible for the bread’s complex flavor profile and tender crumb.
- Salt
More than a simple seasoning, salt enhances the bread’s taste, regulates fermentation speed, and strengthens the gluten matrix. It keeps the dough in balance and prevents overly rapid rise.
- Garlic
Minced garlic infuses the crumb with a gentle pungency that mellows out in the oven. These savory bursts complement the tang of the dough and knit the flavors together.
- Fresh rosemary
Chopped rosemary lends aromatic, piney notes. Its fragrant oils release during baking, perfuming each slice with an herbal brightness.
- Fresh thyme
With its subtle earthy and floral nuances, thyme layers in depth and complexity, partnering beautifully with both garlic and rosemary.
- Olive oil
A drizzle of good-quality olive oil softens the dough, enriches the crumb, and contributes to a golden, glossy crust.
- Additional flour for dusting
A light dusting keeps the dough from sticking during shaping and handling, ensuring clean edges and a uniform loaf.
HOW TO MAKE GARLIC AND HERB SOURDOUGH BREAD
Ready to roll up your sleeves? Follow these steps for a rewarding baking adventure that culminates in an herb-infused sourdough masterpiece.
1. In a large mixing bowl, combine the bread flour and salt, mixing them together until they’re evenly distributed. This ensures the salt won’t inhibit the starter’s fermentation.
2. In a separate bowl, stir together the active sourdough starter and warm water until the starter is fully dissolved. Add the minced garlic, chopped rosemary, thyme, and olive oil, then stir until the flavors meld into a fragrant, amber-hued mixture.
3. Pour the wet ingredients into the dry ingredients. Using a wooden spoon or your hand, gently mix until a shaggy dough forms. Don’t worry about perfection here; you’re simply bringing the components together.
4. Turn the dough out onto a lightly floured surface and begin kneading for about 10 minutes. Aim for a smooth, elastic texture—when you press your finger into the dough, it should spring back gently.
5. Lightly grease a clean bowl, place the kneaded dough inside, then cover it with a damp cloth. Let it rest at room temperature for 4–6 hours, or until it has roughly doubled in size.
6. After the first rise, gently turn out the dough onto a floured work surface. Shape it into a tight round loaf by folding the edges toward the center, then let it rest uncovered for about 30 minutes.
7. Preheat your oven to 450°F (230°C), placing a Dutch oven or bread cloche inside to heat up. This step is key to achieving that crisp, blistered crust.
8. Once the dough has rested, transfer it onto a piece of parchment paper. Use a sharp knife or razor blade to carefully score the top, creating shallow cuts to guide the loaf’s expansion.
9. Remove the preheated Dutch oven from the oven (watch out for the heat!), then lift the parchment paper with the dough and place it inside. Cover with the lid and slide it back into the oven.
10. Bake for 30 minutes with the lid on to lock in steam. Then, remove the lid and continue baking for an additional 15–20 minutes, or until the crust is a deep golden brown and an instant-read thermometer reads 200°F (93°C) at the center.
11. Carefully lift the bread out and place it on a wire rack. Allow to cool for at least 30 minutes before slicing so the interior sets and the crumb finishes its transformation.
SERVING SUGGESTIONS FOR GARLIC AND HERB SOURDOUGH BREAD
Bringing a fresh loaf of garlic and herb sourdough to the table is a delight in itself, but serving it creatively can elevate your meal even further. Whether you’re hosting a casual gathering or enjoying a cozy solo dinner, these suggestions will help you showcase every savory note and crunchy bite.
- Savor it warm with an olive oil and balsamic vinegar dip. Pour extra-virgin olive oil into a shallow dish, drizzle with aged balsamic, then sprinkle a pinch of sea salt and cracked pepper. Tear off hearty chunks of bread and let each piece soak up that tangy richness.
- Transform it into an open-faced avocado toast. Lightly toast a slice, mash ripe avocado with a squeeze of lemon juice and a pinch of red pepper flakes, then spread it generously. Top with halved cherry tomatoes and a sprinkle of flaky sea salt for a brunch-worthy treat.
- Build a gourmet sandwich. Layer slices of mozzarella or aged cheddar, fresh greens, roasted peppers, or prosciutto between two thick slabs of this herb-laced loaf. Press in a panini maker or grill briefly for a satisfying crunch that holds everything together.
- Pair it with cream-based soups like tomato bisque or roasted butternut squash. The crusty exterior makes for the perfect dunker, and the tender interior absorbs soup beautifully without turning mushy too quickly.
HOW TO STORE GARLIC AND HERB SOURDOUGH BREAD
Ensuring your garlic and herb sourdough stays delicious beyond the first day is all about proper storage. While fresh is always best, these methods will help maintain that signature crust and soft crumb when you need to save some for later.
- Store at room temperature in a bread box or paper bag. The slight airflow prevents moisture buildup, keeping the crust crisp for up to two days. Avoid plastic wrap, which can trap steam and soften the crust.
- For longer storage, slice and freeze individual pieces. Place them in an airtight freezer bag with parchment between layers to prevent sticking. When you’re ready to enjoy, pop slices into a toaster or oven straight from the freezer.
- Keep a portion in a reusable cloth bag. Cotton or linen allows just enough breathability to ward off mold while guarding against excessive dryness. This method works well for up to three days at room temperature.
- If refrigeration is your only option, wrap the loaf tightly in plastic wrap or a zip-top bag. Although the crust will soften, you can revive its texture by warming slices in a 375°F (190°C) oven for 5–7 minutes before serving.
CONCLUSION
From the moment you gather your ingredients to the second you savor that first, fragrant bite, this garlic and herb sourdough bread is an experience that blends the art of tradition with the joy of home baking. We’ve walked through the essentials—from understanding why bread flour gives you that coveted chew, to coaxing out flavor with fresh garlic, rosemary, and thyme, to mastering the techniques of mixing, kneading, proofing, and steaming in a Dutch oven. Then, with a flurry of scoring and a 45-minute bake, you’ll unveil a loaf that glistens with herbal flecks and beckons you to slice into it. Don’t forget the serving ideas—drizzled with olive oil and balsamic, piled high with avocado, layered into towering sandwiches, or dunked into creamy soups—each bite offers its own delightful twist. And when it comes to storage, whether you choose room-temperature rest, cloth-bag breathing, or the convenience of frozen slices, you’ll ensure your efforts stay as delicious as possible for days afterward. You’re welcome to print out this article, tuck it into your recipe binder, or pin it to your kitchen board so you can refer back anytime you’re craving that perfect blend of tangy sourdough, mellow garlic, and bright herbs. You’ll also find a helpful FAQ below to answer any lingering questions about timing, substitutions, or troubleshooting your bake.
As you venture into your next baking session, I’d love to hear how it goes! Did your loaf rise to glorious heights? Did the crust crackle just right? If you have any questions about strengthening your starter, adjusting proofing times, or experimenting with new herbs like oregano or basil, drop them in the comments. Your feedback, tips, and stories help build our community of enthusiastic home bakers. Maybe you’ll discover a genius hack for adding pimentos or a family tradition for serving sourdough that becomes a new favorite. Whatever unfolds, know that every crumb of success—and every learning moment—is worth celebrating. So, when you pull that bread from the oven, pause to admire your handiwork, breathe in that herb-infused warmth, and share your joy here. Your questions, comments, and kitchen triumphs are more than welcome—bring them on!
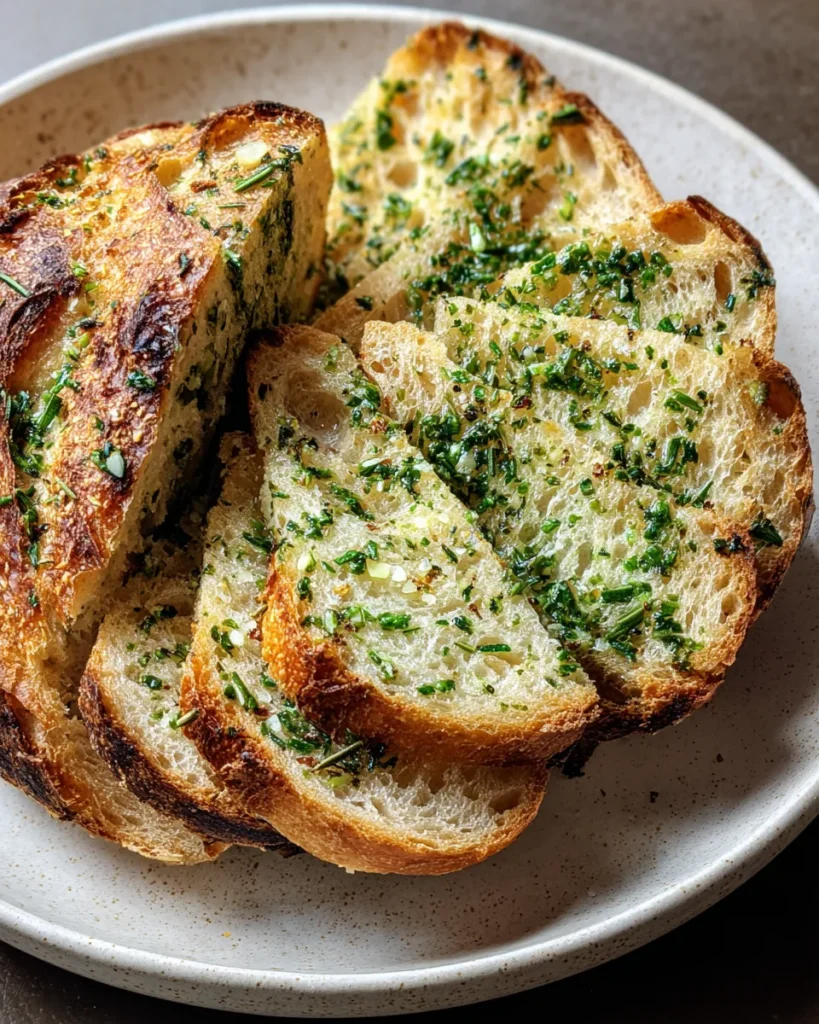

Garlic and Herb Sourdough Bread
Description
This aromatic sourdough bread, infused with garlic and fresh herbs, boasts a crisp crust and a soft, chewy interior. Perfect for any meal or as a delightful snack!
Ingredients
Instructions
-
In a large mixing bowl, combine the bread flour and salt, mixing them together until well combined.
-
In a separate bowl, mix the active sourdough starter with warm water until dissolved. Add the minced garlic, chopped rosemary, thyme, and olive oil to the mixture and stir well to combine.
-
Pour the wet ingredients into the dry ingredients, and using a wooden spoon or your hand, mix until a shaggy dough forms.
-
Once the dough comes together, begin kneading it on a lightly floured surface for about 10 minutes, or until it is smooth and elastic.
-
Place the kneaded dough in a lightly greased bowl, cover it with a damp cloth, and let it rest for about 4-6 hours at room temperature, or until it has doubled in size.
-
After the first rise, gently turn the dough out onto a floured surface and shape it into a round loaf. Allow it to rest for about 30 minutes.
-
Preheat your oven to 450°F (230°C) with a Dutch oven or bread cloche inside.
-
After resting, carefully transfer the dough onto a parchment paper and score the top with a sharp knife or a razor blade.
-
Remove the preheated Dutch oven from the oven and lift the parchment paper with the dough into it. Cover with the lid and return it to the oven.
-
Bake for 30 minutes with the lid on, then remove the lid and bake for an additional 15-20 minutes, or until the crust is a deep golden brown and the internal temperature of the bread reaches 200°F (93°C).
-
Allow the bread to cool on a wire rack for at least 30 minutes before slicing.
Note
- Experiment with different herbs like oregano or basil for a unique flavor.
- This bread is best eaten fresh but can be stored in an airtight container for up to 3 days.
- For an extra kick, you can add a pinch of red pepper flakes to the garlic mixture.
- Save some sourdough starter to use in your next baking adventure.
- Serve with olive oil and balsamic vinegar for a delicious dip alongside the bread.

