

Football Blossom Cookies bring the excitement of game day right into your kitchen. Kick off your next gathering with these fun and delicious Football Blossom Cookies! These chewy treats combine the winning team of rich cocoa and creamy peanut butter, crowned with a chocolate football candy or kiss at their center. With each bite, you’ll experience a soft, tender cookie base that yields a slight crunch around the edges, delivering a satisfying contrast of textures. Whether you’re rallying friends around the TV or surprising your home team with a sweet halftime snack, these cookies score big on flavor and presentation. A touch of vanilla extract rounds out the taste, making every mouthful addictive enough to keep even the staunchest football fan glued to the pitch. From the moment you line your baking sheets to the final press of the chocolate, Football Blossom Cookies transform basic pantry staples into a standout dessert that celebrates tailgating tradition and the thrill of every touchdown. Not only are they one of the best game day treats you can whip up on a whim, they also double as sweet party favors or crowd-pleasing snacks for bake sales and birthday celebrations.
With a Difficulty Level set to Beginner, this recipe is perfect for bakers of all ages and skill levels. You’ll find that the Preparation Time of just 20 minutes makes it easy to mix, shape, and pop these cookies into the oven, while the quick Cooking Time of 10 minutes and a brief Rest Time of 5 minutes mean you’ll be savoring warm, gooey bites in under half an hour. Clocking in at about 120 calories per cookie, these treats are a guilt-friendly way to indulge without sidelining your dietary goals. As a Course Type: Dessert, they pair beautifully with a cold glass of milk, a frothy coffee, or even a warm cup of cocoa on brisk fall afternoons. Every bite highlights the harmony of peanut butter and chocolate cookies, making them not just any dessert recipe, but the star of any bake sale, tailgate, or holiday spread. Gather your ingredients, and let’s get baking!
KEY INGREDIENTS IN FOOTBALL BLOSSOM COOKIES
Before you dive into mixing and baking, let’s take a quick look at the lineup of flavors and textures you’ll need to create these crowd-pleasing cookies. Each ingredient brings its own magic to the final result, from providing structure and moisture to delivering that irresistible peanut butter–chocolate taste.
- Unsalted Butter: Adds richness and a tender crumb to the cookie dough while ensuring the flavor isn’t overly salty.
- Creamy Peanut Butter: Contributes that signature nutty flavor and moisture, binding the dough and offering a silky, melt-in-your-mouth texture.
- Granulated Sugar: Helps create a light sweetness and encourages crisp edges when the cookies bake.
- Brown Sugar: Infuses the dough with moisture, chewiness, and a gentle hint of caramel undertone.
- Eggs: Provide structure and lift while binding all ingredients together and adding a touch of richness.
- Vanilla Extract: Enhances the overall flavor profile and introduces warm, aromatic notes.
- Baking Soda: Acts as a leavening agent, helping the cookies rise and achieve that perfect balance of soft center and firm edges.
- Salt: Balances sweetness and deepens the chocolate and peanut butter flavors.
- All-Purpose Flour: Forms the backbone of the dough, giving the cookies their structure and body.
- Cocoa Powder: Delivers intense chocolate flavor and a beautiful deep color.
- Chocolate Football-Shaped Candies or Kisses: Serve as the fun, decorative finish at the center of each cookie, adding melty chocolate goodness.
HOW TO MAKE FOOTBALL BLOSSOM COOKIES
Let’s walk through how to bring these cookies to life. The step-by-step instructions below guide you through mixing, shaping, and baking your Football Blossom Cookies with precision, so that each batch turns out soft, chewy, and studded with chocolate in the center.
1. Preheat your oven to 375°F (190°C). Line two baking sheets with parchment paper or silicone baking mats to ensure your cookies bake evenly and release easily.
2. In a large mixing bowl, cream the softened butter, peanut butter, granulated sugar, and brown sugar until the mixture is smooth and creamy, using either a hand mixer or stand mixer on medium speed.
3. Add the eggs one at a time, beating well after each addition to incorporate air, then stir in the vanilla extract until fully combined.
4. In another bowl, whisk together the baking soda, salt, all-purpose flour, and cocoa powder to ensure even distribution of dry ingredients.
5. Gradually blend the dry ingredients into the peanut butter mixture until just combined. Do not over-mix, as overworking the dough can lead to tough cookies.
6. Roll the dough into 1-inch balls and place them 2 inches apart on the prepared baking sheets, giving each cookie room to spread.
7. Bake in the preheated oven for 8–10 minutes until the edges are set but the center remains soft and slightly underbaked.
8. Remove from the oven and immediately press a chocolate football-shaped candy or kiss into the center of each cookie, gently nestling it into place.
9. Allow the cookies to cool on the baking sheets for 5 minutes before transferring them to wire racks to cool completely and set.
SERVING SUGGESTIONS FOR FOOTBALL BLOSSOM COOKIES
Whether you’re hosting a big game-day gathering or enjoying a cozy night in, the way you present and pair these cookies can elevate the entire experience. From themed displays to perfect drink pairings, here are four fun ideas that will have everyone cheering for more.
- Serve warm on a platter lined with parchment paper, allowing the chocolate centers to remain gooey and inviting. The contrast between the soft cookie and the melty candy will delight every fan.
- Create a football-themed display by arranging cookies on an artificial turf runner or grass-patterned tablecloth. Add small goalposts or mini helmets for a festive touch that captures the spirit of the big game.
- Pair with dipping sauces such as a salted caramel drizzle or peanut butter frosting. Place small bowls nearby and let guests customize each bite with extra layers of flavor.
- Pack in individual treat bags tied with team-colored ribbons for easy grab-and-go snacks. Perfect for tailgates, take-home party favors, or sharing with fellow fans when they arrive.
HOW TO STORE FOOTBALL BLOSSOM COOKIES
After all that baking and decorating, you’ll want to keep your Football Blossom Cookies fresh and delicious for as long as possible. Proper storage prevents staleness and preserves the perfect chewy texture and chocolate center that everyone loves.
- Store at room temperature in an airtight container with layers separated by parchment paper. This method keeps the cookies soft and retains moisture for up to a week.
- Refrigerate in a sealed container if you live in a warm climate or prefer a slightly firmer texture. Cookies will stay fresh for up to 10 days, though you may want to let them come back to room temperature before serving.
- Freeze individual cookies on a baking sheet until solid, then transfer to a freezer-safe bag or container with parchment between layers. They can be frozen for up to three months—thaw on the counter or gently warm in the oven before serving.
- If you’re storing cookies with unwrapped chocolates in the center, place them in a single layer and wrap the container tightly to prevent the candies from picking up any unwanted flavors or sticking together.
CONCLUSION
These Football Blossom Cookies are more than just another dessert recipe—they’re a play-by-play celebration of two classic flavors coming together in perfect harmony. From the very first step of creaming butter and sugar to the satisfying press of a chocolate football candy into each warm cookie, you’re crafting a treat that’s bound to be the MVP of any game day, bake sale, or family gathering. We covered everything you need: a clear list of key ingredients, a detailed, beginner-friendly method, tons of serving suggestions to match any team colors or party theme, and foolproof storage tips to extend their shelf life. With just 20 minutes of prep, 10 minutes of baking, and a brief 5-minute rest, you’ll have about 24 cookies ready to delight your guests, each at approximately 120 calories per serving. Feel free to print this article or save it for later use, and be sure to scroll down for a handy FAQ section if you have any questions.
Now that you’ve got the full playbook, go ahead and try the recipe yourself—then come back and let me know how it went! Your feedback, questions, or creative twists (like adding a dash of espresso powder or team-colored food dye) are always welcome. If you hit any snags or want to share photos of your winning batch, drop a comment below. I love hearing about your baking adventures and cheering you on from the sidelines as you score your own sweet victory in the kitchen!
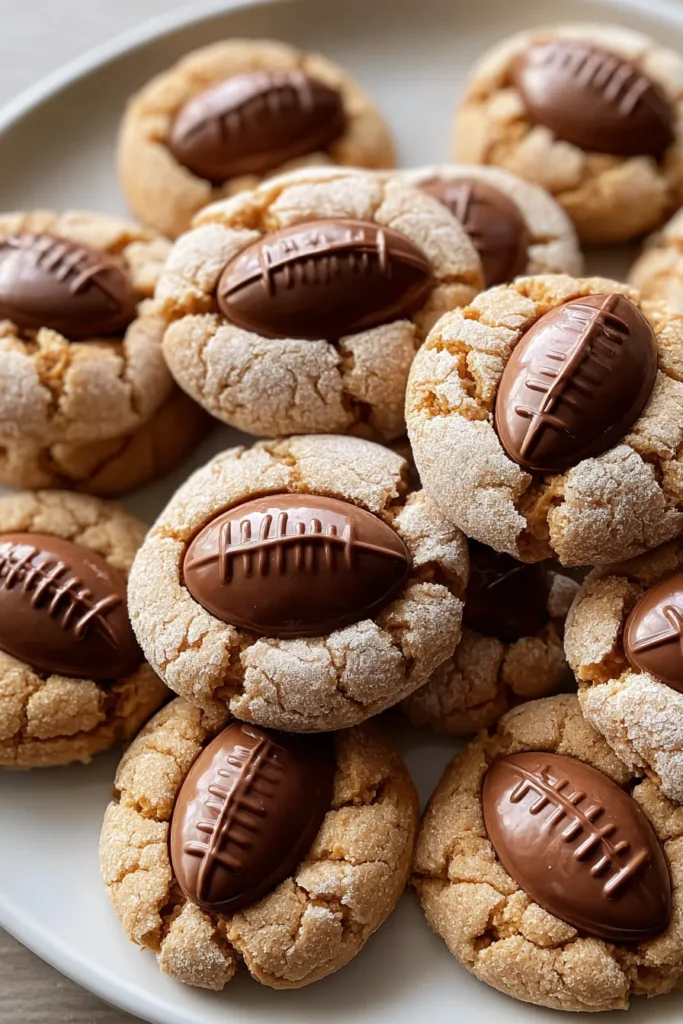

Football Blossom Cookies
Description
These chewy cookies are a delightful mix of chocolate and peanut butter, topped with a chocolate football candy for the perfect sweet touch. Ideal for any football fan!
Ingredients
Instructions
-
Preheat your oven to 375°F (190°C). Line two baking sheets with parchment paper or silicone baking mats.
-
In a large mixing bowl, cream the softened butter, peanut butter, granulated sugar, and brown sugar until the mixture is smooth and creamy.
-
Add the eggs one at a time, beating well after each addition. Stir in the vanilla extract until well combined.
-
In another bowl, whisk together the baking soda, salt, flour, and cocoa powder.
-
Gradually blend the dry ingredients into the peanut butter mixture until just combined. Do not over-mix.
-
Roll the dough into 1-inch balls and place them 2 inches apart on the prepared baking sheets.
-
Bake in the preheated oven for 8-10 minutes until the edges are set, but the center is still soft.
-
Remove from the oven and immediately press a chocolate football-shaped candy or kiss into the center of each cookie.
-
Allow the cookies to cool on the baking sheets for 5 minutes before transferring them to wire racks to cool completely.
Note
- For an extra flavor twist, consider adding a teaspoon of espresso powder to the dry ingredients.
- These cookies can be made ahead and stored in an airtight container for up to a week.
- If you’re making these for a game day event, consider tinting the dough with a small amount of food coloring to match team colors.
- You can replace the peanut butter with sunflower seed butter for a nut-free version.

