

Filled Cookie Butter Cupcakes are your new dessert obsession—soft vanilla butter cupcakes envelop a velvety cookie butter surprise, crowned with a creamy swirl and a sprinkle of crunchy cookie crumbs. Each bite delivers tender vanilla crumb giving way to a molten core of creamy cookie butter, finished with a luscious frosting that melts on your tongue. Whether you’re celebrating a special occasion or craving a midday pick-me-up, these cupcakes are guaranteed to make your sweet tooth very happy. Let’s dive in and bake some bliss!
Key Ingredients
Let’s talk about what makes these Filled Cookie Butter Cupcakes so irresistible. From the basic pantry staples to the star ingredient—cookie butter—each component plays a crucial role in building flavor, texture, and that dreamy filling.
- 1 cup all-purpose flour: Provides structure and a tender crumb.
- 1 teaspoon baking powder: Gives the cupcakes a light, fluffy rise.
- 1/4 teaspoon salt: Balances sweetness and enhances flavor.
- 3/4 cup unsalted butter, room-temperature, divided: Adds richness; half for the batter and half for the frosting.
- 3/4 cup granulated sugar: Sweetens and helps create a light, airy crumb when creamed with butter.
- 1 large egg: Acts as a binder and contributes to lift and moisture.
- 2 tablespoons milk: Keeps the batter moist and tender.
- 1 teaspoon vanilla extract: Infuses warm, comforting vanilla notes.
- 1/2 cup cookie butter: Fills each cupcake with a creamy, spiced center.
- 1 1/2 cups powdered sugar: Sweetens and thickens the frosting to a pipeable texture.
- 2 tablespoons cookie butter: Blends into the frosting for that signature flavor.
- 1 tablespoon heavy cream: Adds silkiness and helps thin the frosting to the perfect consistency.
- 1 tablespoon extra cookie butter: Warmed and drizzled over the frostings for extra indulgence.
- 2 tablespoons crushed cookies for garnish: Provides a crunchy, decorative finishing touch.
How To Make Filled Cookie Butter Cupcakes
Baking these cupcakes is a joyful process that combines classic vanilla techniques with our secret weapon: creamy cookie butter. From whisking your dry ingredients to coring and filling each cooled cake, we’ll walk you through every step so your cupcakes turn out picture-perfect and irresistibly gooey inside.
1. Preheat the oven to 350°F and line a 12-cup muffin tin with liners.
2. In a bowl, combine the flour, baking powder, and salt; whisk until evenly distributed.
3. In another bowl, beat ½ cup of the room-temperature butter with granulated sugar on medium speed until light and fluffy, about 3–4 minutes.
4. Add the egg and vanilla extract, then beat until fully incorporated and smooth.
5. Gradually add the dry ingredients in three additions, alternating with milk, beginning and ending with the flour mixture. Mix on low speed until just combined—avoid overmixing.
6. Fill each liner two-thirds full with batter, smoothing the tops with the back of a spoon.
7. Bake for 18–20 minutes or until a toothpick inserted in the center comes out clean. Transfer to a wire rack and cool completely.
8. Use a small knife or cupcake corer to remove a 1-inch-deep center from each cupcake. Spoon ½ tablespoon of cookie butter into each cavity.
9. For the frosting, beat the remaining ¼ cup butter with 2 tablespoons of cookie butter on medium until smooth and creamy.
10. Gradually add powdered sugar, then heavy cream, beating on low until it comes together; increase speed and beat until light and fluffy.
11. Pipe or spread the frosting onto each filled cupcake using a piping bag or offset spatula.
12. Warm the extra tablespoon of cookie butter in the microwave for 5–10 seconds, then drizzle over the frosting. Finish with a sprinkle of crushed cookies.
Serving Suggestions
Once your Filled Cookie Butter Cupcakes are frosted and garnished, it’s time to make them shine on the table. Here are four fun ways to serve them that highlight their creamy center and crunchy topping:
- Milk Pairing: Serve alongside a tall glass of cold milk to contrast the rich filling and balance sweetness.
- Fruit Side: Plate with fresh berries (strawberries, raspberries) for a pop of color and bright acidity.
- Coffee Companion: Enjoy with a shot of espresso or a latte—cookie butter and coffee are a match made in heaven.
- Gift Box: Arrange in a decorative box with cupcake inserts for a lovely homemade present that travels well.
Tips For Perfect Filled Cookie Butter Cupcakes
Nailing these cupcakes is all about precision and timing, and I’ve gathered my best tips from countless kitchen experiments. With these pointers, you’ll be whipping up bakery-worthy treats in no time.
- Store in an airtight container at room temperature for up to 3 days to keep the crumb tender and the filling lush.
- You can use any brand of cookie butter—Biscoff, Trader Joe’s Speculoos, or homemade—for delicious results; just ensure it’s smooth and spreadable.
- Make sure cupcakes are completely cool before frosting so your frosting stays firm and doesn’t melt over the sides.
- For a stronger cookie flavor, add crushed cookies (2–3 tablespoons) directly into the batter right before dividing it into liners—fold gently to maintain fluffiness.
How To Store It
Keeping these cupcakes fresh and fabulous is simple if you follow a few guidelines. Proper storage preserves both the tender cake and that gooey cookie butter core, so you can enjoy leftovers (if there are any) just as much as the first bite.
- Keep in an airtight container at room temperature, away from direct sunlight, for up to 3 days.
- If your kitchen runs warmer than 70°F, refrigerate the cupcakes in a single layer; let them come to room temperature before serving for the best texture.
- To prepare ahead, bake and cool cupcakes fully, then store unfrosted in an airtight container for up to 2 days before coring and filling.
- Store frosting separately in the refrigerator for up to 1 day; bring to room temperature and re-whip briefly before piping for the fluffiest swirl.
Frequently Asked Questions
Here are answers to the questions I get most about these cupcakes. Let me know if you have more!
- What brands of cookie butter work best for these cupcakes?
You can use any brand of cookie butter, such as Biscoff or Trader Joe’s Speculoos, for these cupcakes. Choose a smooth, spreadable version for easy filling and drizzling. If your cookie butter is very thick, warm it slightly in the microwave (5–10 seconds) before spooning or drizzling.
- How can I prevent the cupcakes from sinking or becoming dense?
To avoid sinking centers and dense crumbs, be sure to cream the butter and sugar until very light and fluffy, about 3–4 minutes. Alternate adding the dry ingredients with milk, beginning and ending with the dry mix. Mix only until just combined—overmixing develops gluten and leads to denser cupcakes.
- My frosting is too runny or too stiff. How do I fix its consistency?
If the frosting is too runny, add a bit more powdered sugar—about 1 tablespoon at a time—until it reaches a pipeable consistency. If it’s too stiff, stir in heavy cream, 1 teaspoon at a time, until it loosens. Room-temperature butter will blend more smoothly, so ensure it isn’t too cold when you start.
- Can I prepare the cupcakes or frosting ahead of time?
Yes. Bake and cool the cupcakes fully, then store them in an airtight container at room temperature for up to 2 days before coring and filling. You can also make the frosting a day ahead: keep it in the refrigerator, then bring it to room temperature and re-whip briefly before using.
- What’s the best way to core and fill the cupcakes without making a mess?
Use a dedicated cupcake corer or a small, sharp knife. Turn the cupcake upside down, insert the corer about 1½ inches deep, and twist gently. Lift out the cake plug. Hold the cupcake in one hand over a bowl, then spoon ½ tablespoon of cookie butter into each cavity. Wipe any excess from the top edge before frosting.
- How should I store leftover cupcakes and for how long?
Store filled and frosted cupcakes in a single layer inside an airtight container at room temperature for up to 3 days. Avoid stacking them to prevent frosting damage. If your kitchen is warmer than 70°F, consider refrigerating them; bring to room temperature before serving for best flavor and texture.
- Can I add crushed cookies to the batter for extra texture?
Yes—if you want a stronger cookie flavor and crunch, fold in 2–3 tablespoons of finely crushed cookies into the batter right before filling the liners. Do not overmix; gently incorporate until evenly distributed. This tweak adds texture without affecting bake time.
What Makes This Special
Filled Cookie Butter Cupcakes stand out because they’re more than just a vanilla cupcake—they’re a sweet surprise party in every bite, with molten cookie butter hiding at the center and a pillow of frosting on top. The contrast of textures—soft cake, creamy filling, and crunchy crumbs—keeps every mouthful exciting. Grab your mixer, get cozy in the kitchen, and whip up a batch you’ll want to print and save in your recipe box. Don’t forget to drop a comment if you try them or have any questions!
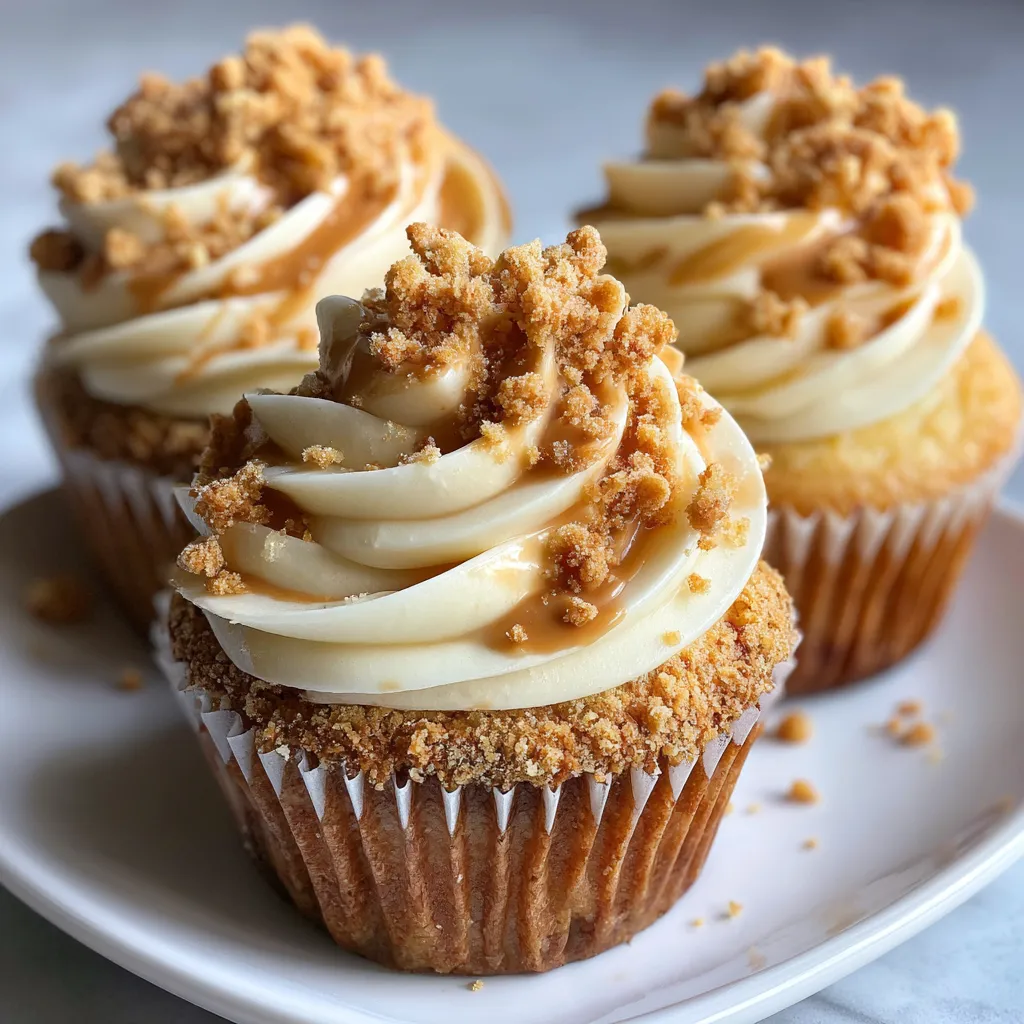

Filled Cookie Butter Cupcakes
Description
Soft vanilla cupcakes hold a gooey dollop of warm cookie butter at their heart, crowned with light, sweet frosting and a drizzle of extra spread. Each bite marries tender crumb, rich spice and crunchy cookie bites.
Ingredients
Instructions
-
Preheat oven to 350°F and line a 12-cup muffin tin with liners.
-
In a bowl combine flour, baking powder, and salt.
-
In another bowl beat 1/2 cup of the room-temperature butter with sugar until light and fluffy.
-
Add the egg and vanilla and beat until combined.
-
Gradually add the dry ingredients alternating with milk, mixing until just combined.
-
Fill each liner two-thirds full with batter.
-
Bake for 18-20 minutes or until a toothpick inserted comes out clean. Cool completely.
-
Use a small knife or cupcake corer to remove a small center from each cupcake. Spoon 1/2 tablespoon of cookie butter into each cavity.
-
For the frosting, beat the remaining 1/4 cup butter with 2 tablespoons of cookie butter until smooth.
-
Gradually add powdered sugar and heavy cream, beating until light and fluffy.
-
Pipe or spread the frosting onto each filled cupcake.
-
Warm the extra tablespoon of cookie butter and drizzle over the frosted cupcakes. Sprinkle crushed cookies on top.
Note
- Store in an airtight container at room temperature for up to 3 days.
- You can use any brand of cookie butter for best results.
- Make sure cupcakes are completely cool before frosting to prevent melting.
- For a stronger cookie flavor, add crushed cookies to the batter.

