

Dill Pickle Canning Crispy & Flavorful is all about sealing fresh cucumbers in a bubbling brine of vinegar, dill, and garlic, then water-bath canning them for crunchy, tangy treats you’ll crave. With just a handful of spices and a bit of patience, you can create shelf-stable pickles that brighten sandwiches, snack boards, and lunchboxes alike. Once you taste that satisfying snap and zesty kick, you’ll wonder why you ever bought store-bought jars.
Key Ingredients
Before you dive into canning, let’s gather the essentials that make these pickles shine:
- 2 kilograms small pickling cucumbers: Crisp, firm cucumbers that hold up perfectly during canning and retain maximum crunch.
- 4 stalks fresh dill: Aromatic herb that imparts classic, herbal brightness and balances the tang.
- 8 cloves garlic peeled: Savory punch that infuses each jar with a rich, garlicky depth.
- 2 liters water: The brine’s base, ensuring salts and vinegar distribute evenly around each cucumber.
- 500 milliliters white vinegar (5% acidity): Provides essential acidity for safe preservation and tangy flavor.
- 60 grams canning salt: Maintains crispness, enhances flavor, and helps prevent spoilage.
- 2 tablespoons pickling spice blend: A warming mix of coriander, peppercorns, and other aromatics for complexity.
- 4 teaspoons mustard seeds: Tiny bursts of mild heat and texture in every bite.
- 1 teaspoon red pepper flakes: Just enough fiery kick to keep things interesting.
- 6 jars 1-quart canning jars with lids: Sterile, airtight containers that lock in freshness and flavor.
How To Make Dill Pickle Canning Crispy & Flavorful
Canning pickles may feel like a big endeavor, but breaking it into clear steps makes it totally manageable—even fun! You’ll begin by sterilizing jars, then layer in herbs and spices before packing in cucumbers and pouring over a hot, seasoned brine. A final water bath seals everything up, creating that satisfying “pop” when you open your first jar. Follow each instruction carefully to ensure crunch, flavor, and food-safe preservation.
1. Place jars and lids in a large pot of water and bring to a gentle boil to sterilize for 10 minutes, then carefully remove and drain.
2. Rinse cucumbers thoroughly under cold water and trim off the blossom ends to improve crispness.
3. Divide fresh dill stalks, garlic cloves, pickling spice, mustard seeds, and red pepper flakes evenly among the jars.
4. Pack cucumbers tightly into each jar, standing upright and leaving about 1 centimeter of headspace.
5. In a saucepan, combine water, vinegar, and canning salt and bring to a boil, stirring until the salt dissolves.
6. Carefully ladle the hot brine into jars, covering cucumbers while maintaining 1 centimeter headspace, and remove any air bubbles with a nonmetallic utensil.
7. Wipe the jar rims with a clean damp cloth, then place lids on jars and screw on bands fingertip tight.
8. Submerge jars in a boiling water bath, ensuring at least 2.5 centimeters of water covers the tops, and process for 10 minutes.
9. Remove jars and place on a towel, allowing them to cool undisturbed for 12 to 24 hours, then check seals.
10. Label jars with date and store in a cool, dark place for a minimum of two weeks before tasting.
Serving Suggestions
These crisp, tangy pickles are incredibly versatile. Whether you’re elevating a simple sandwich or building a snack platter, here are a few fun ways to enjoy them:
- Layer sliced pickles on a classic deli sandwich for extra crunch and acidity that cuts through rich meats.
- Toss chopped pickles into potato or egg salad to brighten and add texture.
- Pair whole spears with a cheese board, alongside sharp cheddar and cured meats for a salty, sour contrast.
- Chop pickles finely to make a quick relish for burgers, hot dogs, or grilled fish.
Tips For Perfect Dill Pickle Canning Crispy & Flavorful
With a few insider moves, you’ll take these pickles from great to unforgettable. First, always start with the freshest cucumbers you can find—firmness is key. Keep your brine piping hot as you fill jars to eliminate bacteria and secure a solid seal. Consistency is your friend: distribute spices evenly among jars so every bite tastes balanced. Ready for pro-level tweaks? Check out these pointers:
- For extra crispness add a couple of grape leaves or a pinch of tannin to each jar
- Ensure jars are completely sealed before storage to prevent spoilage
- Adjust garlic, dill, and spices according to personal taste preferences
- Store in a cool dark location and refrigerate after opening
How To Store It
Proper storage keeps your dill pickles at peak flavor and crunch. Store sealed jars in a cool, dark place like a pantry or cellar, where temperatures stay stable. After opening, move the jar to the refrigerator and keep cucumbers fully submerged in brine. Here are a few methods to maintain freshness:
- Store unopened jars in a pantry or basement away from direct sunlight and heat sources.
- After opening, keep the jar upright in the fridge, ensuring cucumbers stay covered by brine.
- Use airtight containers if transferring pickles out of their original jars to prevent aroma transfer.
- Consume opened pickles within two months for the best texture and taste.
Frequently Asked Questions
Here are quick answers to common canning curiosities:
- How long does it take to complete the dill pickle canning process from start to finish?
The active prep and processing time is about 40 minutes—10 minutes to sterilize jars, 15–20 minutes to rinse, trim, assemble jars, and boil the brine, plus 10 minutes in the water bath. After processing, jars must cool undisturbed for 12–24 hours, and pickles should rest at least two weeks before tasting.
- What steps ensure my pickles stay extra crisp during canning?
Trim blossom ends, use only canning salt, pack cucumbers tightly, optionally add a grape leaf or tannin per jar, keep jars cold until filling, and choose fresh, firm cucumbers.
- Can I customize the garlic, dill, or spice levels in this recipe?
Yes. The listed amounts are guidelines—feel free to increase or decrease garlic, dill, pickling spice, mustard seeds, or red pepper flakes to suit your taste, keeping them evenly distributed for balanced flavor.
- What should I do if a jar fails to seal after cooling?
Refrigerate that jar immediately and consume its pickles within a month. To store long-term, replace the lid and reprocess in a boiling water bath for 10 minutes.
- Can I use different vinegar or adjust the acidity level?
Use white vinegar at 5% acidity for safe preservation. You can substitute other vinegars at 5% acidity, but don’t dilute or use lower-strength vinegar to avoid spoilage.
- How long will these pickles keep, and how should I store them after opening?
Unopened jars last up to one year in a cool, dark pantry. After opening, refrigerate and use within two months, ensuring cucumbers remain submerged in brine.
What Makes This Special
Dill Pickle Canning Crispy & Flavorful stands out because it nails that perfect snap-and-zing balance, turning humble cucumbers into a zesty crunch fest you’ll crave all year. The magic lies in simple, quality ingredients—fresh dill, garlic, and spices—and the time-honored water bath process that locks in brightness and texture. Grab a jar, slice into your favorite sandwich, or snack straight from the jar; either way, these pickles deliver instant satisfaction. Don’t forget to print and save this guide, and if you give this recipe a whirl, drop a comment or question—I’m here to help!
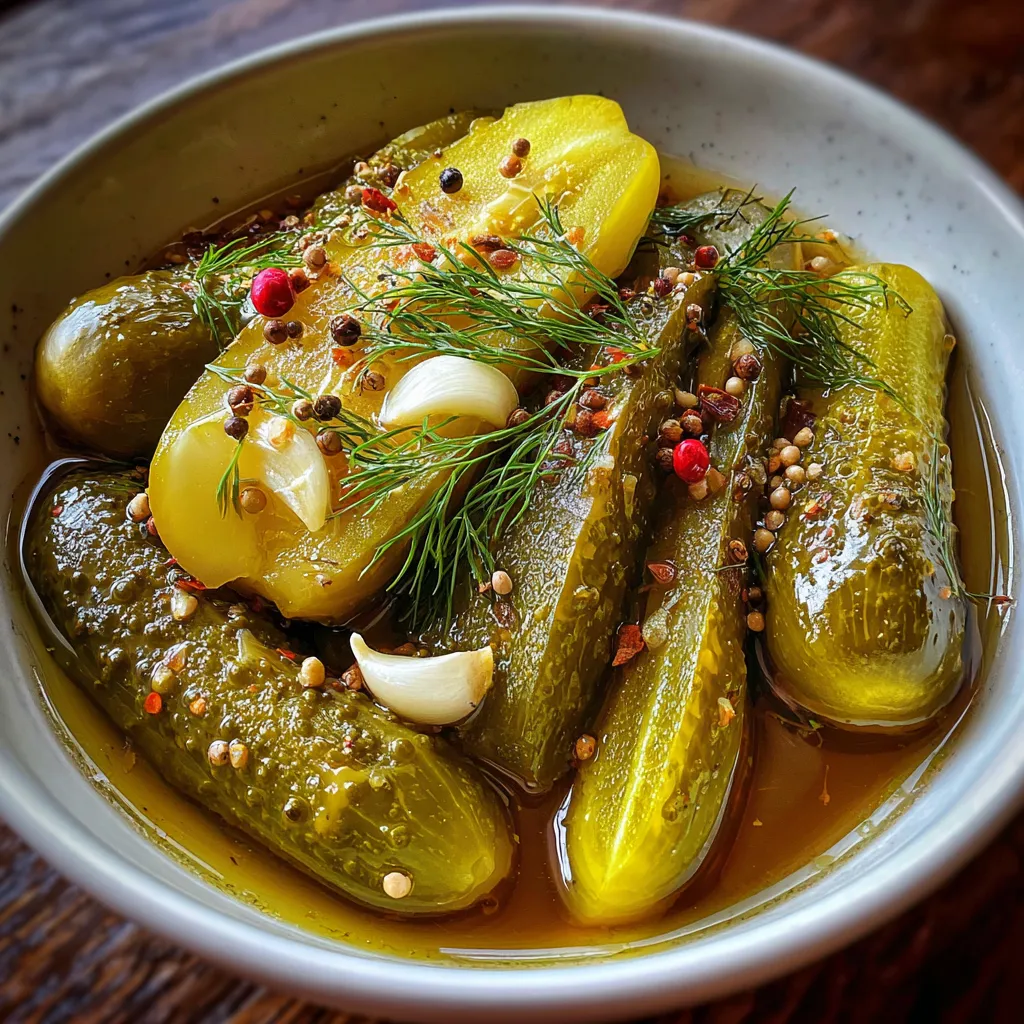

Dill Pickle Canning Crispy & Flavorful
Description
Seal fresh cucumbers in a bubbling brine of vinegar, dill and garlic, then water-bath can for crispy, tangy pickles that brighten sandwiches and snacks with every crunchy bite.
Ingredients
Instructions
-
Place jars and lids in a large pot of water and bring to a gentle boil to sterilize for 10 minutes then carefully remove and drain.
-
Rinse cucumbers thoroughly and trim off the blossom ends to improve crispness.
-
Divide fresh dill stalks garlic cloves pickling spice mustard seeds and red pepper flakes evenly among the jars.
-
Pack cucumbers tightly into each jar standing upright to leave about 1 centimeter headspace.
-
In a saucepan combine water vinegar and canning salt and bring to a boil stirring until the salt dissolves.
-
Carefully ladle the hot brine into jars covering cucumbers while maintaining 1 centimeter headspace and remove any air bubbles with a nonmetallic utensil.
-
Wipe the jar rims with a clean damp cloth then place lids on jars and screw on bands fingertip tight.
-
Submerge jars in a boiling water bath ensuring at least 2.5 centimeters of water covers tops and process for 10 minutes.
-
Remove jars and place on a towel allowing to cool undisturbed for 12 to 24 hours then check seals.
-
Label jars with date and store in a cool dark place for a minimum of two weeks before tasting.
Note
- For extra crispness add a couple of grape leaves or a pinch of tannin to each jar
- Ensure jars are completely sealed before storage to prevent spoilage
- Adjust garlic dill and spices according to personal taste preferences
- Store in a cool dark location and refrigerate after opening

