

Craving something decadently chocolatey with a coffee kick? This Dark Chocolate Tart with Espresso Whipped Cream is the perfect treat for any dessert lover. A crisp cocoa crust gives way to a velvety dark chocolate ganache infused with vanilla, then topped with cloudlike espresso-spiked whipped cream. Whether you’re winding down a dinner party or indulging a sweet tooth, this recipe will have you swooning.
Key Ingredients
Before diving into the steps, let’s gather everything you need for a foolproof tart. From the rich cocoa crust to the creamy filling and that dreamy espresso whipped cream, here’s what goes on your shopping list:
- 1 ½ cups all-purpose flour: Provides the sturdy structure for the tart crust.
- ¼ cup unsweetened cocoa powder: Adds deep chocolate flavor and color to the dough.
- ½ cup powdered sugar: Sweetens the crust while keeping it tender.
- ½ teaspoon salt: Balances the sweetness and enhances chocolate notes.
- ½ cup unsalted butter, chilled and diced: Creates a flaky texture when cut into the flour.
- 1 large egg yolk: Binds the dough and adds richness.
- 2 to 4 tablespoons ice cold water: Helps bring the dough together without warming the butter.
- 8 ounces dark chocolate (70% cacao), chopped: Forms the base of the rich, bittersweet ganache.
- ½ cup heavy cream: Makes the filling smooth and silky.
- ¼ cup granulated sugar: Adds sweetness to balance the dark chocolate.
- 3 large eggs: Thicken the ganache for a custard-like texture.
- 1 teaspoon vanilla extract: Lends aromatic warmth to the filling.
- Pinch of salt: Enhances the chocolate’s depth.
- 1 cup heavy cream: Whips into soft, airy peaks.
- 2 tablespoons powdered sugar: Sweetens and stabilizes the cream.
- 1 tablespoon espresso powder (or finely ground coffee): Delivers that bold coffee flavor.
- 1 teaspoon vanilla extract: Rounds out the whipped cream with a hint of vanilla.
How To Make Dark Chocolate Tart with Espresso Whipped Cream
This recipe unfolds in three main stages: crafting a crisp cocoa crust, filling it with a silky dark chocolate custard, and finishing with an airy espresso whipped cream. Follow these steps closely for the perfect blend of textures and flavors:
1. Begin by preparing the tart crust. In a large mixing bowl, combine the all-purpose flour, cocoa powder, powdered sugar, and salt. Whisk until evenly mixed.
2. Add the chilled, diced butter to the dry ingredients. Using a pastry cutter or your fingers, blend the butter in until the mixture resembles coarse crumbs.
3. In a small bowl, whisk together the egg yolk and 2 tablespoons of ice cold water. Gradually add this to the crumb mixture, stirring until a dough forms. If it’s too dry, add more ice water one teaspoon at a time.
4. Shape the dough into a disk, wrap it tightly in plastic wrap, and refrigerate for at least 30 minutes.
5. Preheat your oven to 350°F (175°C). On a lightly floured surface, roll out the chilled dough into a circle large enough for your tart pan. Press it into the pan and trim any excess.
6. Line the crust with parchment paper and fill with pie weights or dried beans. Blind bake for 15 minutes, then remove weights and paper and bake for another 10 minutes until the crust is set. Let cool completely.
7. For the filling, place the chopped chocolate and heavy cream in a heatproof bowl. Melt together over a double boiler or in short microwave bursts, stirring until smooth.
8. In another bowl, whisk the granulated sugar, eggs, vanilla extract, and salt until combined. Slowly incorporate the melted chocolate, whisking until glossy and even.
9. Pour the chocolate mixture into the cooled crust. Bake for 20-25 minutes, until the edges are set but the center still jiggles. Cool to room temperature, then refrigerate for at least 2 hours.
10. Finally, make the espresso whipped cream: in a chilled bowl, beat the heavy cream, powdered sugar, espresso powder, and vanilla extract until soft peaks form.
11. Serve slices of the tart topped with a generous dollop of the espresso whipped cream.
Serving Suggestions
Serving this tart is like giving your dessert plate a standing ovation. Whether it’s for a cozy family night or a fancy dinner party, presentation and pairing can elevate every slice. Here are a few ideas to make each bite even more memorable:
- Dust with cocoa powder: Lightly sift extra cocoa over each slice for an elegant, professional look.
- Add chocolate shavings: Use a vegetable peeler on a chocolate bar to create curls that add texture and visual flair.
- Pair with fresh berries: Serve alongside raspberries or strawberries to cut through the richness and add brightness.
- Drizzle caramel or espresso sauce: Warm a simple caramel or coffee reduction and gently swirl it on the plate for extra decadence.
Tips For Perfect Dark Chocolate Tart with Espresso Whipped Cream
While this tart might sound impressive, a few insider tricks will make sure yours turns out flawlessly every time. From choosing the best chocolate to strategically planning ahead, these notes will help you breeze through the process and wow anyone lucky enough to take a bite:
- Ensure the chocolate is of high quality for the best flavor result in the filling.
- The tart can be made a day ahead, as it tastes even better the next day after chilling.
- Feel free to garnish with chocolate shavings or a dusting of cocoa powder for an elegant presentation.
- For a twist, add a splash of coffee liqueur to the chocolate filling for added depth.
How To Store It
After enjoying a slice or two, you might have leftovers that deserve just as much love as the first serving. Proper storage will keep your tart fresh, the crust crisp, and the cream light. Here’s how to preserve every decadent layer:
- Refrigerate in an airtight container: Store whole or sliced tart covered to prevent the whipped cream from absorbing fridge odors.
- Separate whipped cream if long-term: If you plan to keep slices for more than a day, remove excess whipped cream and store it separately in a sealed bowl.
- Freeze individual slices: Wrap each slice tightly in plastic wrap and foil; freeze for up to one month without whipped cream.
- Thaw correctly: Move frozen slices to the refrigerator overnight, then top with freshly whipped espresso cream before serving.
Frequently Asked Questions
Got questions? Here are some quick answers to common queries that will help you nail this recipe.
- How long does it take to prepare and bake the Dark Chocolate Tart with Espresso Whipped Cream?
A: Active preparation takes about 30-40 minutes, including making the crust, preparing the filling, and whipping the cream. Baking the crust requires 25 minutes (15 minutes with weights plus 10 minutes uncovered), baking the filling takes 20-25 minutes, and the tart needs at least 2 hours of chilling time before serving.
- My tart crust shrank during baking—how can I prevent that?
A: Prevent shrinkage by chilling the dough for at least 30 minutes before rolling, ensuring the dough is cold throughout handling. Roll the crust slightly larger than the pan to account for trimming. After pressing into the pan, chill it again for 10-15 minutes before blind baking. Using pie weights and avoiding overworking the dough also help maintain its shape.
- The chocolate filling turned out grainy. What went wrong and how can I fix it?
A: Graininess often results from overheating the chocolate or adding cold eggs directly into the hot chocolate mixture. To fix this, finely chop the chocolate and melt it gently over a double boiler or in short microwave bursts, stirring constantly. When combining with eggs, temper them by whisking a small amount of the warm chocolate into the egg mixture before fully mixing to ensure a smooth custard.
- How do I know when the chocolate filling is perfectly baked?
A: The filling is done when the edges are set and slightly pulling away from the crust, but the center still jiggles gently when you shake the pan. It will continue to firm up as it cools and chills in the refrigerator. Avoid baking until completely firm, as this can result in a dry texture.
- Can I make the espresso whipped cream ahead of time, and how should I store it?
A: You can whip the cream a few hours in advance and store it covered in the refrigerator to maintain its texture. If it deflates slightly, rewhip briefly before serving to restore soft peaks. For best flavor and stability, prepare the whipped cream on the day you serve the tart.
- What substitutions or add-ins can I use for extra flavor?
A: For extra depth, add 1-2 tablespoons of coffee liqueur (such as Kahlúa) to the chocolate filling. You can also sprinkle finely chopped toasted nuts or sea salt flakes on top before chilling for a contrast in texture. If you prefer a sweeter crust, substitute half of the cocoa powder with more all-purpose flour and increase powdered sugar to ⅔ cup.
- How should I store leftovers, and how long will the tart keep?
A: Store any leftover tart in an airtight container in the refrigerator for up to 3 days. The flavors will mellow and harmonize over time. You can freeze individual slices without whipped cream for up to one month—wrap each slice tightly in plastic wrap and foil. Thaw in the fridge before serving and top with freshly whipped espresso cream.
What Makes This Special
With its crisp cocoa crust, silky dark chocolate ganache, and cloudlike espresso whipped cream, this tart hits all the right notes. The interplay of bittersweet chocolate, a hint of vanilla, and coffee-rich cream delivers a dessert that’s both elegant and utterly satisfying. Make it ahead to let flavors deepen, then surprise your friends or family with something they’ll rave about. Feel free to print and save this recipe for future indulgences, and let me know in the comments if you gave it a whirl or have any questions—I’m here to help!
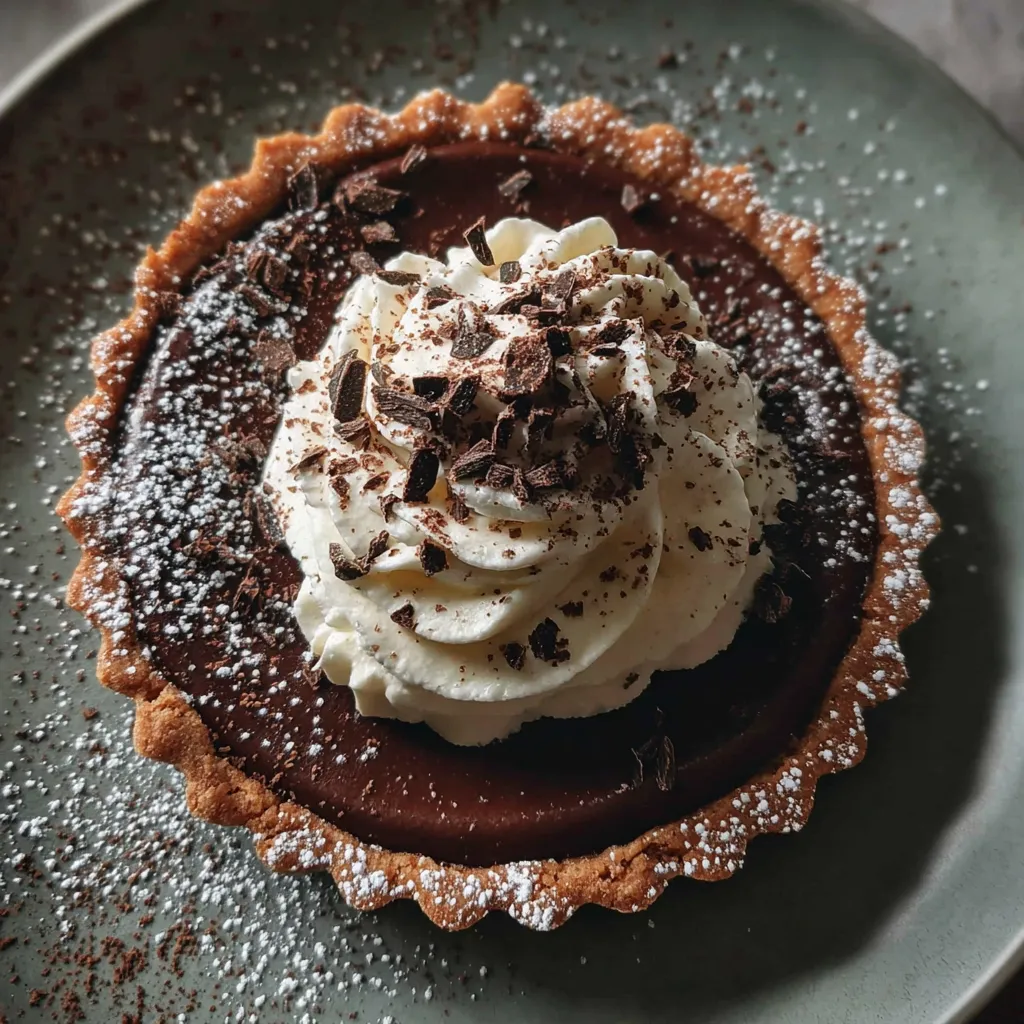

Dark Chocolate Tart with Espresso Whipped Cream
Description
A crisp cocoa crust gives way to a luxuriously smooth dark chocolate filling, its bittersweet notes dancing with a whisper of vanilla, topped by airy espresso-spiked whipped cream.
Ingredients
Instructions
-
Begin by preparing the tart crust. In a large mixing bowl, combine the all-purpose flour, cocoa powder, powdered sugar, and salt. Whisk together until well combined.
-
Add the chilled, diced butter to the dry ingredients. Using a pastry cutter or your fingers, blend the butter into the mixture until it resembles coarse crumbs.
-
In a small bowl, combine the egg yolk and 2 tablespoons of ice cold water. Gradually add the egg mixture to the crust mixture, stirring until the dough comes together. If it seems too dry, add more ice water, one teaspoon at a time, until it holds together.
-
Form the dough into a disk, wrap it in plastic wrap, and refrigerate for at least 30 minutes.
-
After chilling, preheat your oven to 350°F (175°C). Roll out the chilled dough on a lightly floured surface into a circle that fits your tart pan. Press the dough into the pan and trim the edges.
-
Place a piece of parchment paper over the crust and fill it with pie weights or dried beans. Bake in the preheated oven for about 15 minutes. Remove the weights and parchment paper, then bake for an additional 10 minutes until the crust is firm. Allow it to cool completely.
-
For the chocolate filling, combine the chopped dark chocolate and heavy cream in a heatproof bowl. Melt together over a double boiler or in the microwave in short bursts, stirring until smooth.
-
In a separate bowl, whisk the granulated sugar, eggs, vanilla extract, and a pinch of salt until well combined. Gradually mix in the melted chocolate mixture until smooth and well incorporated.
-
Pour the chocolate filling into the cooled tart crust. Bake in the oven for about 20-25 minutes, or until the filling is set but still slightly jiggly in the center. Allow cooling to room temperature, then refrigerate for at least 2 hours before serving.
-
To prepare the espresso whipped cream, beat the heavy cream, powdered sugar, espresso powder, and vanilla extract in a mixing bowl until soft peaks form.
-
Once the tart has set and chilled, serve slices topped with a generous dollop of espresso whipped cream.
Note
- Ensure the chocolate is of high quality for the best flavor result in the filling.
- The tart can be made a day ahead, as it tastes even better the next day after chilling.
- Feel free to garnish with chocolate shavings or cocoa powder for an elegant presentation.
- For a twist, add a splash of coffee liqueur to the chocolate filling for added depth.

