

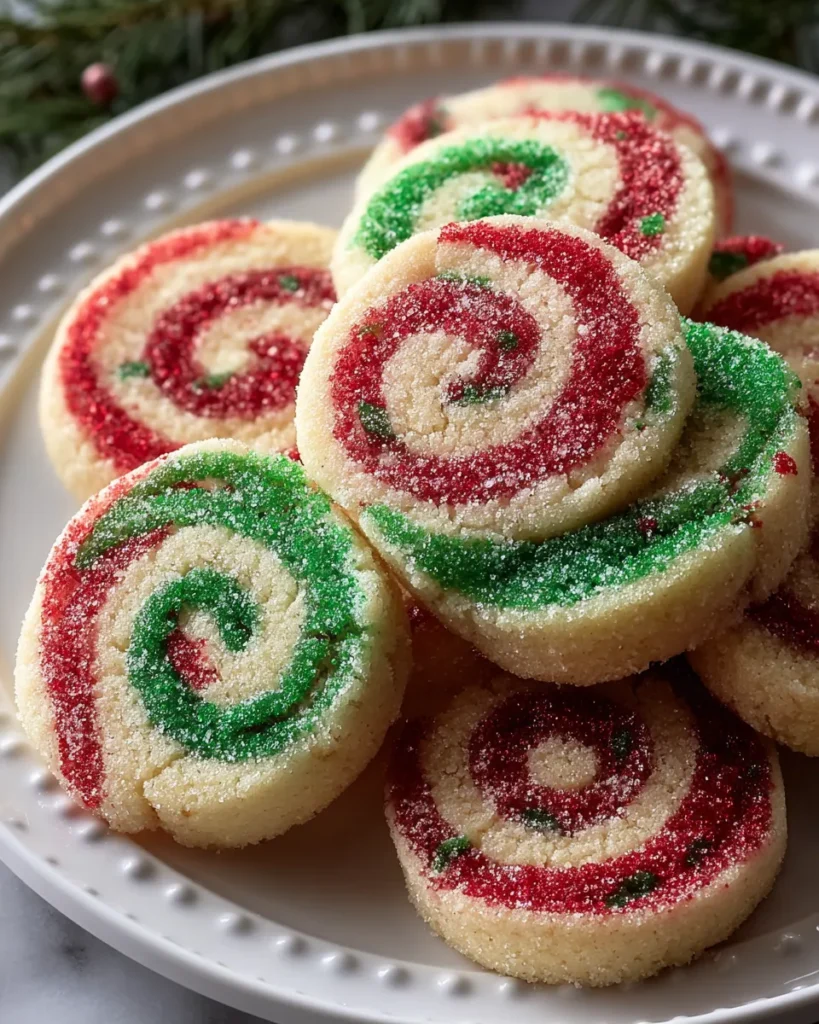
There’s something truly magical about rolling out dough in festive colors and watching those spirals come to life. Christmas Pinwheel Cookies are not just another sweet treat on the holiday table—they’re a vibrant celebration in each bite. With layers of rich, unsweetened cocoa nestled against pillowy vanilla cookie dough, these pinwheels offer a delightful contrast of flavor and texture. Every slice reveals that classic swirl pattern, brightened up by red and green colored sugars that glisten like tiny edible ornaments. The sweet crunch of sugar gives way to a tender, buttery crumb that practically melts on your tongue. When you bite in, you’ll notice how the almond extract adds a subtle, nutty warmth, while vanilla provides its timeless sweetness. It’s a recipe that goes beyond taste; it brings a little artistry to your holiday baking.
The best part? This recipe is as fun as it is delicious. With a preparation time of about 1 hour (plus 1 hour 30 minutes of resting time) and a cooking time of only 12 minutes per batch, you’ll have 24 cheerful cookies ready to share in just a couple of hours. At an intermediate difficulty level, it’s perfect for home cooks who want to stretch their baking skills without feeling intimidated. Whether you’re gathering around the kitchen counter with family or hosting a cookie exchange, these pinwheels will steal the show. They’re low on fuss but high on festive flair, and each cookie clocks in at about 120 calories. So grab your rolling pin and let’s dive into this joyful baking adventure!
KEY INGREDIENTS IN CHRISTMAS PINWHEEL COOKIES
Before we dive into the step-by-step process, let’s get familiar with the stars of our show. Each ingredient plays its part in creating that perfect balance of flavor, texture, and visual appeal. From the backbone of the dough to the colorful decorations, here’s what you’ll need:
- All-purpose flour
Provides the structure and stability for the dough, giving the cookies their soft, tender crumb while holding the pinwheel shape without spreading too much.
- Baking powder
Acts as a gentle leavening agent, helping the dough rise slightly so the cookies stay light and airy rather than dense or heavy.
- Salt
Balances the sweetness and enhances the overall flavor, making the buttery and vanilla notes shine through.
- Unsalted butter
Adds richness and moisture; when creamed with sugar, it helps create a light and fluffy texture that’s essential for a tender cookie.
- Granulated sugar
Sweetens the dough and contributes to the light, delicate crumb. When beaten with butter, it also helps incorporate air into the dough.
- Vanilla extract
Infuses the dough with warm, classic flavor, elevating all the other ingredients and binding the taste profile together.
- Almond extract
Introduces a subtle nutty undertone that complements both the vanilla and the cocoa for a more complex, festive taste.
- Egg
Binds the ingredients together, providing structure while keeping the cookies moist and tender.
- Green colored sugar
Adds a crunchy, colorful coating that glistens and enhances the visual appeal for holiday presentation.
- Red colored sugar
Offers a festive pop of color and an extra layer of sweet crunch, making each cookie look like a miniature holiday decoration.
- Unsweetened cocoa powder
Delivers deep chocolate flavor and a rich color contrast when layered against the vanilla dough.
- Confectioner's sugar
Lightly dusted on top for a snow-kissed finish, adding gentle sweetness and a delicate aesthetic.
HOW TO MAKE CHRISTMAS PINWHEEL COOKIES
Now that we’ve reviewed the ingredients, let’s talk about bringing this dough to life. From creaming to chilling, each step matters in achieving those crisp, defined swirls and perfect texture. Follow these detailed instructions to get beautiful, evenly baked cookies every time.
1. Preheat your oven to 350°F (175°C) and line two baking sheets with parchment paper, ensuring even heat distribution and easy cleanup.
2. In a medium bowl, combine the flour, baking powder, and salt. Use a whisk to mix until evenly blended and set aside, keeping the dry ingredients ready for incorporation.
3. In a large bowl, beat the softened butter and granulated sugar with an electric mixer on medium speed until the mixture is light and fluffy, about 2–3 minutes, to incorporate air and create a tender crumb.
4. Add the egg, vanilla extract, and almond extract to the butter mixture and continue beating until the ingredients are fully incorporated and the dough is smooth.
5. Gradually add the dry ingredient mixture to the wet ingredients, mixing on low speed until just combined. Avoid overmixing to maintain a delicate texture.
6. Divide the dough in half. To one half, add the unsweetened cocoa powder, mixing until the dough is uniformly chocolate. If it feels too crumbly, add a teaspoon of milk to bring it together.
7. Wrap each portion of dough tightly in plastic wrap and refrigerate for at least 1 hour or until firm. This chilling step ensures clean, sharp swirls when rolling.
8. Once chilled, place a sheet of parchment paper on your work surface. Roll out the vanilla dough into a rectangle about 1/4 inch thick, keeping the edges straight for an even roll.
9. Repeat the same process with the chocolate dough, matching the size and thickness exactly.
10. Place the chocolate rectangle on top of the vanilla rectangle, gently pressing the layers together to adhere. Starting at one short end, roll the dough tightly into a log, using the parchment paper to guide and prevent sticking.
11. Wrap the dough log tightly in plastic wrap and refrigerate for at least 30 minutes to firm up, making slicing easier.
12. After chilling, unwrap the log and slice into 1/4 inch thick rounds using a sharp knife, wiping the blade between cuts for clean edges.
13. On a plate, sprinkle green colored sugar on one side of half the slices and red colored sugar on the other half, gently pressing the sugar into the dough.
14. Arrange the cookies on the prepared baking sheets, sugar side up, spacing them about 2 inches apart for even baking and room to spread.
15. Bake in the preheated oven for 10–12 minutes or until the edges are just turning lightly golden, ensuring they remain tender in the center.
16. Let the cookies cool on the baking sheets for 5 minutes to set, then transfer them to a wire rack to cool completely and maintain crisp edges.
17. Once cooled, lightly dust with confectioner's sugar for a festive, snow-kissed finish before serving.
SERVING SUGGESTIONS FOR CHRISTMAS PINWHEEL COOKIES
Serving these pinwheel cookies isn’t just about taste—it’s about creating a festive moment that delights guests of all ages. Whether you’re setting up a holiday dessert table or gifting these treats to friends and neighbors, presentation can make all the difference. To truly showcase the rich contrast of chocolate and vanilla swirls punctuated by red and green sugars, consider elegant displays and thoughtful pairings.
- Festive Platter Display
Arrange the cookies on a large, decorative holiday-themed platter, alternating red and green sugared sides for a vibrant swirl of color. Add sprigs of fresh rosemary or holly for a seasonal accent.
- Cookie Gift Boxes
Layer parchment paper inside small festive tins or cardboard boxes, stack the cookies neatly, and finish with a bow. Include a handwritten tag with the cookie name and a warm holiday greeting for a personal touch.
- Accompanied by Warm Beverages
Serve the cookies alongside steaming mugs of hot chocolate or spiced coffee. The rich chocolate in the cookies will pair beautifully with the creamy drink, creating a cozy experience.
- Holiday Dessert Buffet
Combine these pinwheels with other classic holiday sweets—like gingerbread men and peppermint bark—on a buffet table. Provide small dessert plates and festive napkins so guests can curate their own sweet platters.
HOW TO STORE CHRISTMAS PINWHEEL COOKIES
Preserving the flavor and texture of your Christmas Pinwheel Cookies is simple when you follow a few key storage tips. Proper storage ensures they stay tender, maintain their swirl definition, and retain the sparkle of red and green sugars. Whether you’re prepping ahead or saving leftovers, these methods will keep your cookies tasting fresh for days or even weeks.
- Room Temperature in an Airtight Container
Place completely cooled cookies in a single layer (or separate layers with parchment paper) inside an airtight container. Store at room temperature for up to one week, preserving the delicate crumb without drying out.
- Refrigeration for Longer Freshness
For up to two weeks of freshness, store the cookies in an airtight container in the refrigerator. Allow cookies to come to room temperature before serving to restore their tender texture.
- Freezing Individual Slices
Before baking, freeze the rolled dough log wrapped in plastic wrap for up to three months. When ready, slice and bake directly from frozen, adding a minute or two to the baking time. This method ensures perfectly fresh cookies on demand.
- Freezing Baked Cookies
After baking and cooling, arrange cookies in a single layer on a baking sheet and freeze until solid. Transfer to a freezer-safe zip-top bag or container, separating layers with parchment paper. Thaw at room temperature before serving for ideal texture.
CONCLUSION
What a joyous journey we’ve had creating these Christmas Pinwheel Cookies—from mixing rich cocoa and vanilla doughs to rolling out perfect swirls and adorning each slice with festive sugars. You’ve learned not only the detailed steps to achieve that signature spiral but also how each ingredient contributes to the cookies’ delicate texture and holiday flavor. With a preparation time of around an hour plus rest, and a quick 12-minute bake, these cookies deliver big on festive appearance without demanding hours in the kitchen. They’re an intermediate-level dessert that yields 24 beautiful treats, each about 120 calories—perfect for sharing or gifting. So don’t hesitate to print this article and save it for later; tuck it into your holiday recipe binder so you can revisit these cheerful cookies year after year. Beneath this conclusion, you’ll find a handy FAQ to answer any lingering questions.
I’d love to hear from you once you’ve tried this recipe! Please leave your comments, questions, or feedback below. Did the pinwheels turn out perfectly spiraled? Have you experimented with other colored sugars or added crushed candies for extra flair? Your experiences can help fellow home bakers achieve cookie success and add even more fun to their holiday season. Happy baking, and may your kitchen be filled with laughter, the joy of creating, and the sweet taste of Christmas!

Christmas Pinwheel Cookies
Description
These vibrant pinwheel cookies bring the spirit of the holidays to your kitchen with layers of rich chocolate and sweet vanilla, each bite is a delightful surprise.
Ingredients
Instructions
-
Preheat your oven to 350°F (175°C) and line two baking sheets with parchment paper.
-
In a medium bowl, combine the flour, baking powder, and salt. Whisk together until evenly mixed and set aside.
-
In a large bowl, beat the softened butter and granulated sugar with an electric mixer on medium speed until light and fluffy, about 2-3 minutes.
-
Add the egg, vanilla extract, and almond extract to the butter mixture and beat until well incorporated.
-
Gradually add the dry ingredients to the wet mixture, mixing until just combined. Do not overmix.
-
Divide the dough in half. In one half, mix in the cocoa powder until well blended. If the dough is too crumbly, add a teaspoon of milk to help it come together.
-
Wrap both portions of dough in plastic wrap and refrigerate for at least 1 hour or until firm.
-
Once chilled, lay a sheet of parchment paper on your workspace. Roll out the vanilla dough into a rectangle about 1/4 inch thick.
-
Repeat with the chocolate dough, creating another rectangle of the same size.
-
Place the chocolate dough on top of the vanilla dough, then gently press together. Starting from one end, carefully roll the dough into a tight log, using the parchment paper to help.
-
Once rolled, wrap the log tightly in plastic wrap and place back in the refrigerator for at least 30 minutes to firm up.
-
After chilling, remove the log from the refrigerator and slice it into 1/4 inch thick rounds.
-
On a plate, sprinkle the green colored sugar on one side of half the slices and the red colored sugar on the other side.
-
Place the cookies on the prepared baking sheets, sugar side up, spacing them about 2 inches apart.
-
Bake in the preheated oven for 10-12 minutes or until the edges are lightly golden.
-
Allow the cookies to cool on the baking sheets for 5 minutes before transferring to a wire rack to cool completely.
-
Once cool, dust lightly with confectioner's sugar before serving.
Note
- These cookies can be frozen for up to 3 months; just wrap them in plastic wrap and place in an airtight container.
- Experiment with different colors of sugar to match your holiday decor!
- Consider adding crushed candies or nuts to the dough for added texture and flavor.
- These cookies not only taste great but also make perfect gifts when packaged in festive tins.

