

When you crave a sweet holiday treat, Christmas Cookie Bars rise to the occasion with a delightful blend of chewy cookie goodness and festive flair. These bars are like a holiday party in every bite, packed with vibrant red and green M&M’s, creamy white chocolate chips, and an optional hint of crushed peppermint for that extra merry crunch. As you slice through the warm, golden edges and see those colorful candies peeking out, you’ll know you’ve created something truly special. Whether you’re a seasoned baker or a kitchen newbie, these bars are a beginner-friendly dessert recipe that promises big holiday impact without any of the stress.
What makes these Cheerful Cookie Bars so perfect for your winter spread is how they hit all the right notes: buttery richness, a dash of vanilla warmth, and a sprinkle of chocolatey pops and minty surprises. With just 15 minutes of prep time, followed by 25–30 minutes of baking and a quick 10-minute rest to set, you’ll have a tray of twelve warm, chewy bars ready to share. Clocking in at around 300 calories per bar, they’re ideal for dessert tables, potlucks, or an after-dinner indulgence with a mug of cocoa. Festive Cookie Bars for a Merry Holiday Season truly capture the joy of holiday baking, and they’re bound to earn you rave reviews from friends and family.
KEY INGREDIENTS IN CHRISTMAS COOKIE BARS
To create these festive cookie bars, you’ll need a handful of pantry staples and a few seasonal treats. Each ingredient plays a specific role in building the perfect balance of texture, flavor, and holiday cheer.
- All-purpose flour
Provides the structure and body of the cookie bars, giving them that tender yet sturdy crumb that holds all the mix-ins together.
- Baking powder
Acts as a leavening agent to help the bars rise just enough, ensuring they’re light and airy rather than dense.
- Baking soda
Works alongside the baking powder to give a subtle lift and creates a soft, tender crumb by balancing acidity.
- Salt
Enhances all the sweet flavors and caramel notes, and balances out the richness of the butter and sugars.
- Unsalted butter
Adds moisture, richness, and a creamy mouthfeel. Using unsalted lets you control the overall salt content.
- Granulated sugar
Sweetens the dough and contributes to a slightly crisp edge as the sugars caramelize in the oven.
- Brown sugar
Infuses the bars with a deeper, caramel-like flavor and keeps them moist and chewy.
- Vanilla extract
Infuses warmth and depth, rounding out the sweet flavors with its aromatic profile.
- Eggs
Provide structure, moisture, and binding power, ensuring your bars hold together when cut.
- Festive M&M’s
Offer colorful pops of red and green, playful crunch, and chocolatey bursts in every bite.
- White chocolate chips
Bring creamy sweetness that melts into luscious pockets throughout the bars.
- Crushed peppermint candies (optional)
Add a refreshing minty crunch and a touch of winter wonder to each square.
HOW TO MAKE CHRISTMAS COOKIE BARS
Below is a step-by-step guide to transforming these ingredients into warm, chewy Christmas Cookie Bars. Follow each instruction carefully to achieve the ideal texture and festive look.
1. Preheat your oven to 350°F (175°C) and prepare a 9×13-inch baking dish by greasing it lightly or lining it with parchment paper for easy removal. This ensures even baking and effortless cleanup.
2. In a medium bowl, whisk together the flour, baking powder, baking soda, and salt. This dry mix guarantees that your leavening agents are evenly distributed.
3. In a large mixing bowl, cream together the softened butter, granulated sugar, and brown sugar using an electric mixer on medium speed until the mixture is light and fluffy—about 2–3 minutes.
4. Add the vanilla extract and eggs one at a time, mixing well after each addition until fully combined and silky smooth.
5. Gradually add the dry ingredients to the wet mixture, mixing on low speed just until there are no streaks of flour left. Do not over mix to keep the bars tender.
6. Gently fold in the festive M&M’s, white chocolate chips, and crushed peppermint candies (if using) with a spatula until they’re evenly distributed throughout the dough.
7. Pour the cookie dough into the prepared baking dish and spread it evenly into the corners and edges using a spatula to ensure uniform thickness.
8. Bake in the preheated oven for 25–30 minutes, or until the edges are lightly golden and a toothpick inserted into the center comes out clean.
9. Allow the cookie bars to cool in the pan for about 10 minutes, then transfer them to a wire rack to cool completely before cutting into squares.
SERVING SUGGESTIONS FOR CHRISTMAS COOKIE BARS
When it comes to serving these festive treats, presentation is part of the fun. Whether you’re hosting a holiday brunch, dessert table, or cozy night in, these cookie bars shine in every setting. Here are a few creative ways to elevate your Christmas Cookie Bars:
- Serve warm with a scoop of vanilla ice cream on top, letting it melt into the chewy pastries for a dreamy, creamy contrast.
- Pair each bar with a steaming mug of hot cocoa or espresso, the perfect companions that enhance both the chocolate and peppermint notes.
- Arrange on a holiday dessert platter lined with evergreen sprigs or a dusting of powdered sugar “snow” to create a festive centerpiece that’s as beautiful as it is delicious.
- Package in festive gift tins or mason jars layered with parchment paper, tying each container with a ribbon. These make heartwarming homemade presents to share with neighbors and friends.
HOW TO STORE CHRISTMAS COOKIE BARS
Once the holiday hustle settles down, you’ll want to keep these cookie bars fresh and flavorful for days—or even weeks—to come. Proper storage not only preserves their chewy texture but also maintains that inviting aroma and taste. Here’s how to make sure every square is just as delightful as the day you baked it:
- Store at room temperature in an airtight container with parchment or wax paper between layers to prevent sticking. They’ll stay soft and chewy for up to a week.
- For longer enjoyment, freeze individual bars by wrapping them tightly in plastic wrap and placing them in a labeled freezer bag. Thaw at room temperature for about 30 minutes before serving.
- If you prefer a slightly firmer bite, refrigerate in a sealed container for up to 10 days. Bring bars back to room temperature or warm them briefly in the microwave before eating.
- When stacking multiple batches, separate layers with parchment or wax paper to keep the festive M&M’s and white chocolate chips from clumping together, ensuring easy, clean slices.
CONCLUSION
This festive roundup of Christmas Cookie Bars has taken you from mixing bowl to mouthwatering finish, all while keeping things fun, simple, and beginner-friendly. We’ve covered everything from the key pantry staples—like flour, butter, and sugar—to the star ingredients that add color and crunch. Following the step-by-step guide, you’ll whisk, cream, fold, and bake your way to a dozen warm, chewy bars that are bursting with holiday spirit. Don’t forget to garnish with crushed peppermint for that extra seasonal flair. With just 15 minutes of prep and under half an hour in the oven, these bars prove that elaborate dessert recipes aren’t necessary to make a memorable holiday treat. Feel free to swap mix-ins or sprinkles, and make this recipe truly your own.
You’re welcome to print this article and save it for your recipe binder, bookmark it for next year’s holiday baking, or pass it along to a friend in need of a simple, festive dessert. Below, you’ll find a FAQ section to answer any lingering questions about substitutions, troubleshooting, or tweaking flavors. If you try these cookie bars, please leave a comment with your thoughts, questions, or feedback—your experience helps this recipe grow and glow even brighter. Happy baking, and may your holiday season be as sweet as these delightful bars!
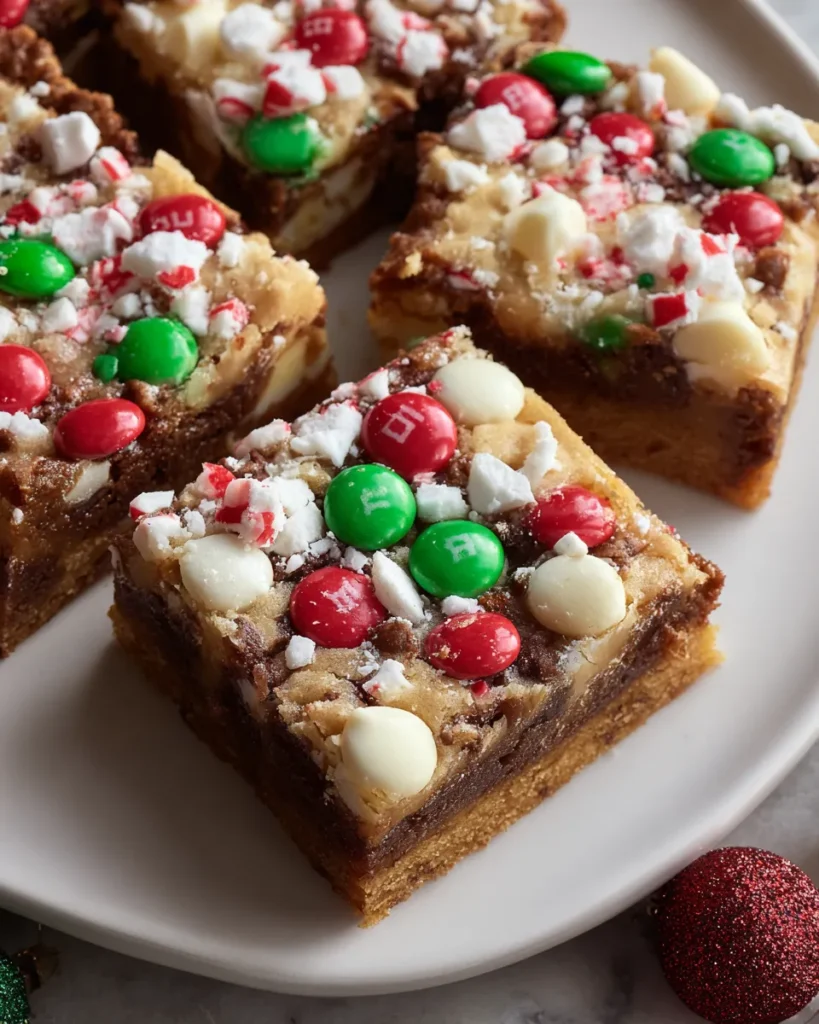

Christmas Cookie Bars
Description
Warm and chewy, these Christmas Cookie Bars are packed with festive M&M's and a hint of peppermint, making them the perfect treat for holiday gatherings.
Ingredients
Instructions
-
Preheat your oven to 350°F (175°C) and prepare a 9x13-inch baking dish by greasing it lightly or lining it with parchment paper for easy removal.
-
In a medium bowl, whisk together the flour, baking powder, baking soda, and salt. Set this mixture aside.
-
In a large mixing bowl, cream together the softened butter, granulated sugar, and brown sugar using an electric mixer on medium speed until it becomes light and fluffy.
-
Add the vanilla extract and eggs one at a time, mixing well after each addition until fully combined.
-
Gradually add the dry ingredients to the wet mixture, mixing on low speed just until combined. Do not over mix.
-
Gently fold in the festive M&M's, white chocolate chips, and crushed peppermint candies (if using) with a spatula until evenly distributed throughout the dough.
-
Pour the cookie dough into the prepared baking dish and spread it evenly into the corners and edges using a spatula.
-
Bake in the preheated oven for 25-30 minutes or until the edges are lightly golden and a toothpick inserted into the center comes out clean.
-
Allow the cookie bars to cool in the pan for about 10 minutes, then transfer them to a wire rack to cool completely before cutting them into squares.
Note
- For a fun twist, try using different colored chocolate chips or holiday-themed sprinkles.
- Store the cookie bars in an airtight container at room temperature for up to a week.
- These bars freeze well; just wrap them tightly in plastic wrap and place in a freezer bag for up to a month.
- Customize with your favorite mix-ins like nuts, dried fruit, or certain chocolates to suit your tastes.
- Ideal for holiday gatherings and potlucks, these bars are easy to transport and serve!

