

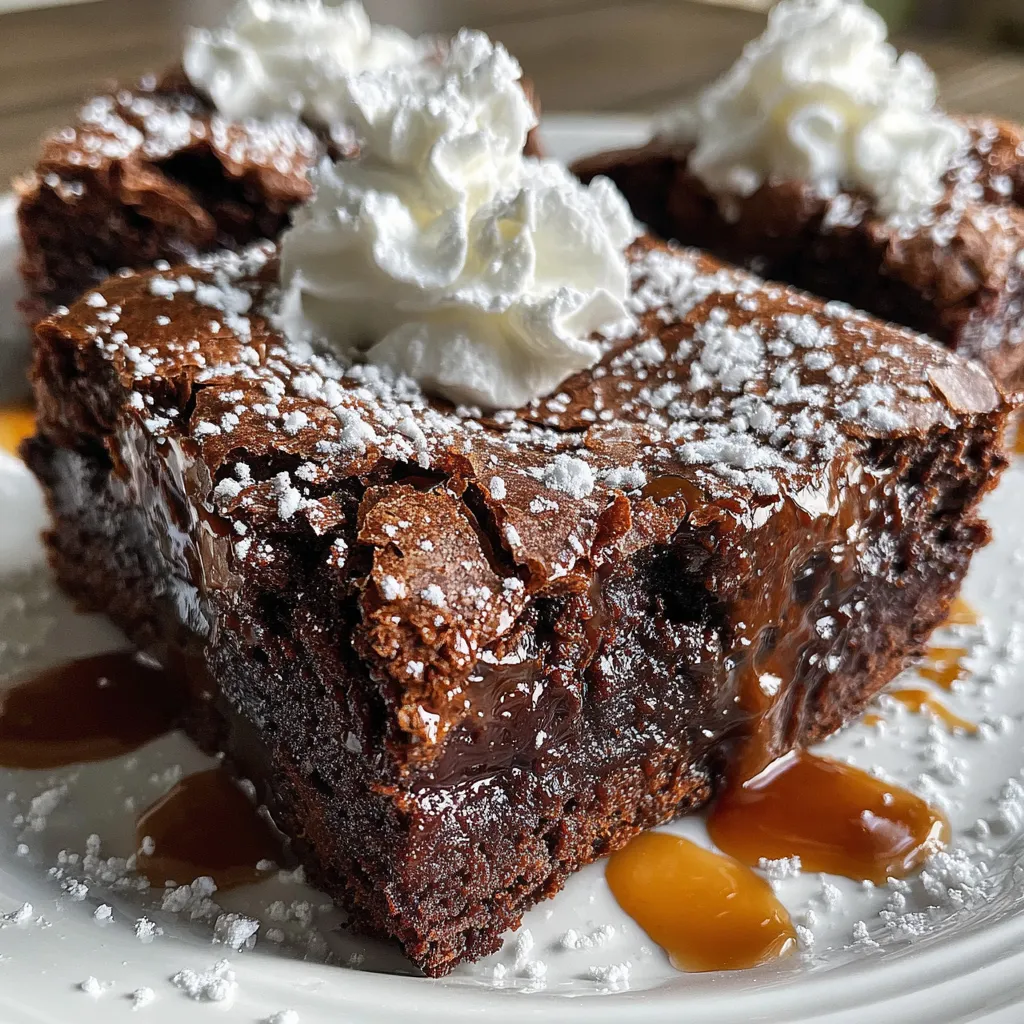
Chocolate Mousse Brownies bring together fudgy brownies crowned with airy chocolate mousse for a perfect balance of rich cocoa depth and silky cream in every sumptuous bite. Silky mousse nestles atop warm, fudgy brownies, blending deep chocolate notes with light, creamy sweetness. Each spoonful reveals tender crumbs and a fluffy topping that melts on your tongue, making this dessert a must-try for chocoholics and casual bakers alike.
Key Ingredients
Before diving in, let’s round up the simple yet powerful components that make these Chocolate Mousse Brownies shine:
- 1/2 cup unsalted butter: Provides a rich, creamy fat that keeps the brownie base moist and irresistibly fudgy.
- 8 ounces semisweet chocolate, chopped: Divided between base and mousse for that deep chocolate punch and smooth topping.
- 3/4 cup granulated sugar: Sweetens and balances the bittersweet chocolate intensity in the brownie layer.
- 2 large eggs: Bind ingredients and add structure while contributing to a tender, cakey texture.
- 1 teaspoon vanilla extract: Enhances all chocolate flavors with a warm, aromatic note.
- 1/4 teaspoon salt: Elevates sweetness and deepens the overall chocolate flavor profile.
- 1/2 cup all-purpose flour: Provides just enough structure to support the lusciously dense brownie.
- 1/4 cup unsweetened cocoa powder: Intensifies the cocoa depth without extra fat.
- 1 cup heavy cream: Split between heating for the chocolate melt and whipping into the light mousse.
- 1 tablespoon powdered sugar: Sweetens and stabilizes the whipped cream for a perfectly airy mousse.
How To Make Chocolate Mousse Brownies
Ready to create layers of dreamy chocolate bliss? In this section, we’ll guide you through each step—melting, folding, chilling, whipping—to transform pantry staples into a stunning dessert. From preheating your oven to artfully spreading that final mousse layer, these instructions ensure professional results even if you’re new to layered desserts.
1. Preheat your oven to 350°F and line an 8×8-inch baking pan with parchment paper, leaving an overhang for easy removal.
2. In a heatproof bowl set over a saucepan of simmering water, combine the butter and 4 ounces of chopped semisweet chocolate, stirring until completely melted and smooth.
3. Remove from heat and stir in the granulated sugar until the mixture is glossy and well combined.
4. Beat in the eggs one at a time, ensuring each is fully incorporated, then stir in the vanilla extract and salt.
5. Sift the all-purpose flour and unsweetened cocoa powder directly over the chocolate mixture, then gently fold until just combined—avoid overmixing.
6. Pour the batter into the prepared pan and bake for 20–25 minutes, or until a toothpick inserted in the center comes out with moist crumbs attached.
7. Let the brownies cool completely in the pan, then transfer to the refrigerator to chill for 30 minutes.
8. Meanwhile, heat 1/4 cup of the heavy cream until it just simmers, then pour over the remaining 4 ounces of chopped semisweet chocolate, stirring until melted and smooth.
9. In a chilled bowl, whip the remaining 3/4 cup heavy cream with powdered sugar to soft peaks, then gently fold in the melted chocolate mixture until smooth and uniform.
10. Spread the chocolate mousse evenly over the chilled brownie layer and refrigerate for at least 2 hours before slicing into neat squares.
Serving Suggestions
Once your Chocolate Mousse Brownies are perfectly set, presentation is everything. Here are a few ideas to make each serving Instagram-worthy and utterly delicious:
- Top each square with a dusting of cocoa powder and a single fresh raspberry for a pop of color and tart contrast.
- Serve on a chilled dessert plate alongside a scoop of vanilla bean ice cream to highlight the brownie’s fudginess.
- Arrange bites on a charcuterie board of chocolate morsels and nuts for a decadent shareable platter.
- Garnish with whipped cream rosettes and chocolate curls for an elegant café-style treat.
Tips For Perfect Chocolate Mousse Brownies
Turning out flawless Chocolate Mousse Brownies is easier than you think—with a few insider tricks you’ll nail the texture and look every time. From prep to garnish, these friendly pointers ensure your layers stay distinct, your edges stay sharp, and your mousse stays light and airy:
- Use parchment paper for easy removal and clean edges
- Make sure the brownies are fully cooled before adding mousse to prevent melting
- Store covered in the refrigerator and consume within 2 days for best texture
- Garnish with chocolate shavings or fresh berries before serving
How To Store It
Proper storage keeps your brownies tasting freshly made and prevents the mousse from weeping or the brownies from drying out. Follow these methods to maintain that indulgent texture and flavor:
- Refrigerate in an airtight container to keep the mousse layer firm and guard against fridge odors.
- Cover the pan with plastic wrap if storing the entire slab, ensuring the mousse surface stays moist.
- Freeze individual slices by wrapping each tightly in plastic wrap and placing in a freezer-safe bag—good for up to one month.
- Thaw frozen portions overnight in the refrigerator so the mousse remains silky and the brownie base stays fudgy.
Frequently Asked Questions
Got questions about these dreamy Chocolate Mousse Brownies? You’re not alone—check out these quick answers:
- How long does it take to prepare this recipe?
A: From start to finish you’ll need about 15 minutes of active prep time, 20 to 25 minutes for baking the brownie layer, 30 minutes to chill the brownies before adding the mousse, and at least 2 hours of refrigeration once the mousse is added. In total, plan for roughly 3 hours including chilling time, though much of that is hands-off waiting in the fridge.
- Why is it important to line the pan with parchment paper?
A: Lining the 8×8-inch pan with parchment paper ensures the brownies lift out cleanly once they’re fully chilled, giving you sharp edges and preventing any sticking. It also makes cleanup much easier since the melted chocolate and butter mixture won’t adhere to the pan surface.
- How can I tell when the brownie base is done baking?
A: Insert a toothpick into the center of the brownies after 20 minutes of baking. The brownies are ready when the toothpick comes out with a few moist crumbs attached but no wet batter. If it comes out too clean, the brownies may be overbaked and lose their fudgy texture.
- Why do the brownies need to be chilled before adding the mousse?
A: Chilling the brownies for at least 30 minutes prevents the warm base from melting the mousse layer when you spread it on. A fully cooled and slightly firm brownie layer creates a stable foundation so the whipped cream and chocolate mixture stays light and airy rather than turning into a gloopy mess.
- Can I use a different type of chocolate for the brownie base or mousse?
A: Yes, you can substitute semisweet chocolate with dark chocolate (60–70% cacao) for a richer flavor or milk chocolate for a sweeter, milder taste. If you swap chocolate types, adjust sugar levels slightly to maintain balance. White chocolate isn’t recommended for the brownie layer but can be used for a variation in the mousse if you reduce the powdered sugar to prevent over-sweetness.
- What’s the best way to achieve stiff peaks when whipping the cream?
A: Use cold heavy cream straight from the fridge and chill your mixing bowl and beaters for about 10 minutes beforehand. Start whipping at medium speed until the cream holds soft peaks, then increase to medium-high until stiff peaks form. Stop immediately to avoid overwhipping, which can turn the cream grainy or into butter.
- How should I store leftover Chocolate Mousse Brownies, and how long will they stay fresh?
A: Store any uneaten brownies in an airtight container or covered tightly with plastic wrap in the refrigerator. They will keep their best texture for up to 2 days. Beyond that, the mousse may begin to weep moisture and the brownie layer can dry out, so it’s best enjoyed within the first 48 hours.
What Makes This Special
What really sets these Chocolate Mousse Brownies apart is that heavenly contrast between the ultra-fudgy base and the cloud-like mousse—like a chocolate lover’s dream come true. This recipe hits every sweet spot: rich depth, creamy lightness, and just the right sweetness. Feel free to print this article and save it for later; it’s practically begging for a spot in your holiday baking lineup. Tried it? Let me know how your mousse spread turns out or share any questions you have about chocolate magic!

Chocolate Mousse Brownies
Description
Silky mousse nestles atop warm, fudgy brownies, blending deep chocolate notes with light, creamy sweetness. Each spoonful reveals tender crumbs and a fluffy topping that melts on your tongue.
Ingredients
Instructions
-
Preheat oven to 350°F and line an 8x8 inch baking pan with parchment paper.
-
In a heatproof bowl set over a saucepan of simmering water melt butter and 4 ounces of the chopped chocolate, stirring until smooth.
-
Remove from heat and stir in granulated sugar until well combined.
-
Beat in the eggs one at a time then stir in vanilla extract and salt.
-
Sift the flour and cocoa powder over the chocolate mixture and gently fold until just combined.
-
Pour the batter into the prepared pan and bake for 20 to 25 minutes or until a toothpick inserted in the center comes out with moist crumbs.
-
Let the brownies cool completely in the pan before transferring to the refrigerator to chill for 30 minutes.
-
Meanwhile heat 1/4 cup of the heavy cream until just simmering and pour over the remaining 4 ounces of chopped chocolate, stirring until melted and smooth.
-
Whip the remaining 3/4 cup heavy cream with powdered sugar to soft peaks, then gently fold in the melted chocolate mixture until smooth.
-
Spread the chocolate mousse evenly over the chilled brownie layer and refrigerate for at least 2 hours before slicing.
Note
- Use parchment paper for easy removal and clean edges
- Make sure the brownies are fully cooled before adding mousse to prevent melting
- Store covered in the refrigerator and consume within 2 days for best texture
- Garnish with chocolate shavings or fresh berries before serving

