

There’s something undeniably comforting about pulling a tray of warm chocolate chip cookies straight from the oven. The golden edges give way to a delightfully tender center, dotted with pools of gooey chocolate that beckon you to take that first, irresistible bite. These cookies aren’t just a dessert—they’re a hug on a plate, the kind of sweet treat you want to share with friends over a cozy afternoon chat or tuck away one (or two) for yourself after a long day. With simple pantry staples and minimal fuss, this classic recipe offers a beginner-friendly gateway into the world of baking, where every step—from creaming the butter and sugars until they’re light and fluffy to folding in velvety chocolate chips—feels like part of a delicious ritual.
As the dough comes together, you’ll notice how the robust scent of vanilla mingles with sweet brown sugar, hinting at the layers of flavor waiting to unfold. In roughly twenty minutes of preparation (and about twelve minutes in a 350°F oven), you’ll transform everyday ingredients into a batch of twenty-four cookies that boast the perfect balance of soft centers and crisp edges. Whether you’re whipping these up for a spontaneous backyard gathering, planning ahead for a bake sale, or simply treating yourself, each cookie carries 150 calories of pure joy. This easy, homemade cookies recipe is a timeless dessert that captures the essence of home baking: simple, satisfying, and endlessly customizable. So grab your electric mixer, line those baking sheets, and let’s dive into a baking adventure that will make your kitchen smell amazing!
KEY INGREDIENTS IN CHOCOLATE CHIP COOKIE
Before we dive into the step-by-step instructions, let’s chat about the real stars of this show—our ingredients. Each one plays a unique role, coming together to create that tender crumb, golden hue, and melty pockets of chocolate we all adore.
- All-Purpose Flour
The backbone of our cookies, all-purpose flour provides structure and chewiness. It helps the dough hold together while still allowing enough flexibility for the cookies to spread just the right amount.
- Baking Soda
Acting as a leavening agent, baking soda ensures our cookies rise slightly and develop those inviting cracks on the surface. It also contributes to the browning process, giving the edges a lovely golden color.
- Unsalted Butter
At room temperature, butter lends richness and flavor, creating a tender, melt-in-your-mouth texture. Creaming it with sugar traps air, which translates into light, fluffy cookies.
- Granulated Sugar
This fine sugar helps with overall sweetness and encourages crispness along the edges. It balances out the deeper caramel notes of the brown sugar.
- Light-Brown Sugar
With its hint of molasses, brown sugar adds moisture, chewiness, and a subtle depth of flavor. It’s what gives these cookies their signature, slightly caramelized undertones.
- Salt
Just a touch of salt heightens all the other flavors, balancing sweetness and preventing the cookies from tasting flat.
- Pure Vanilla Extract
Vanilla brings warmth and complexity, elevating every bite with its fragrant, floral notes. It’s the secret weapon that makes homemade cookies truly unforgettable.
- Eggs
Eggs act as a binding agent and contribute to the cookies’ structure. They also add moisture and help achieve that desirable soft center.
- Chocolate Chips
Whether you choose semisweet, milk chocolate, or a mix, these chips are the crowning glory. They melt into creamy pools, creating those irresistible bursts of chocolate magic in each cookie.
HOW TO MAKE CHOCOLATE CHIP COOKIE
Baking these cookies is like following a friendly recipe roadmap: each step builds on the last, guiding you toward perfectly baked disks of cookie heaven. From preheating the oven to cooling on a rack, let’s walk through the process together.
1. Preheat your oven to 350°F (180°C). Line two baking sheets with parchment paper to prevent sticking and ensure even baking. This simple prep step saves you from scrubbing trays later!
2. In a small bowl, whisk together the flour and baking soda until well combined. Setting this dry mixture aside for a moment helps you focus on creaming your wet ingredients without the extra clutter.
3. In a large mixing bowl, use an electric mixer to cream together the room temperature butter, granulated sugar, brown sugar, and salt. Continue beating for about 2–3 minutes, until the mixture is light, airy, and pale in color.
4. Add the vanilla extract and the eggs, one at a time. After each addition, beat well to ensure every drop is fully incorporated and the batter looks smooth and glossy.
5. Gradually add the flour mixture to the wet ingredients. Mix on low speed until just combined—stopping early helps avoid overworking the gluten, so your cookies stay tender.
6. Using a spatula or wooden spoon, fold in the chocolate chips until they’re evenly dispersed throughout the dough. Resist the urge to overmix so those chips stay intact and your dough remains delightfully soft.
7. Scoop tablespoon-sized portions of dough and place them onto the prepared baking sheets. Leave about 2 inches between each cookie to allow for proper spreading and even heat circulation.
8. Bake in the preheated oven for 10–12 minutes. You’re aiming for golden-brown edges and centers that still look slightly underdone—that’s the secret to a soft middle!
9. Remove from the oven and let the cookies cool on the baking sheets for 5 minutes. This resting period lets them finish setting up before you transfer them to a wire rack to cool completely.
SERVING SUGGESTIONS FOR CHOCOLATE CHIP COOKIE
Once you’ve baked these beauties, serving becomes a creative and joyful part of the process. Whether you’re hosting a party or indulging in a quiet night at home, the way you present and enjoy these cookies can elevate every bite. Let’s explore a few fun ideas to make your chocolate chip cookies shine.
- Warm and Gooey with a Glass of Milk
Serve the cookies straight off the cooling rack, still slightly warm, alongside a cold glass of milk. The contrast between the hot, melting chocolate and the frosty milk is pure nostalgia in every sip and bite.
- Ice Cream Sandwiches
Sandwich a generous scoop of your favorite ice cream between two cookies. Press gently, wrap each treat in parchment, and freeze for an hour. You’ll end up with delightful ice cream sandwiches that are perfect for summer treats.
- Cookie Platter with Dipping Sauces
Arrange cookies on a platter around small bowls of melted chocolate, caramel sauce, or brushed raspberry coulis. Invite guests to dip and drizzle for a whimsical dessert station at your next gathering.
- Crumbled Over Pudding or Parfait
Break a few cookies into large chunks and layer them into pudding cups or yogurt parfaits. The crunchy cookie bits add texture and sweetness, transforming a simple dessert into something truly special.
HOW TO STORE CHOCOLATE CHIP COOKIE
Keeping your cookies fresh and flavorful is key to enjoying them over several days or even weeks. Proper storage helps maintain that soft center and crisp edge, so each bite feels just as magical as when they first came out of the oven. Here are a few reliable methods to make sure your efforts don’t go to waste.
- Room Temperature in an Airtight Container
Store cooled cookies in a sealed cookie jar or airtight container at room temperature. Place a piece of white bread on top of the cookies to help retain moisture and keep them soft for up to five days.
- Layering with Parchment Paper
If you’re stacking cookies, layer them between sheets of parchment paper to prevent sticking and preserve their shape. Seal the container tightly to shield them from air and humidity.
- Freezing Baked Cookies
For long-term storage, arrange fully cooled cookies on a baking sheet and freeze until firm. Transfer frozen cookies to a zip-top freezer bag, remove excess air, and freeze for up to three months. Thaw at room temperature for perfect freshness.
- Freezing Cookie Dough
Scoop dough into individual balls, place on a parchment-lined sheet, and freeze until solid. Store the dough balls in a freezer-safe bag. When you’re ready, bake straight from frozen—just add a minute or two to the baking time for a freshly baked experience anytime.
CONCLUSION
We’ve journeyed through every detail of making the classic chocolate chip cookie—from whisking flour and baking soda to savoring that first blissful bite of warm, gooey chocolate. Along the way, we spotlighted essential ingredients, detailed each step of the baking process, and uncovered handy tips for serving and storing these beloved treats. Whether you’re a beginner baker or someone looking to refine your cookie game, this recipe offers everything you need: a straightforward method, room for personalization, and the promise of results that taste straight out of your sweetest dessert dreams.
Feel free to print this article or save it for later, because you’ll want to come back whenever that chocolate-chip craving strikes. Below you’ll find a handy FAQ section to answer any lingering questions, and of course, I’d love to hear how your cookies turn out. Drop your comments, questions, or fun variations you try in the notes—baking is always better when we share our experiences and learn from each other. If you need a hand tweaking baking times, experimenting with add-ins, or perfecting that balance between crisp edges and tender centers, I’m here to help. Happy baking, and may your kitchen always smell of sweet success!
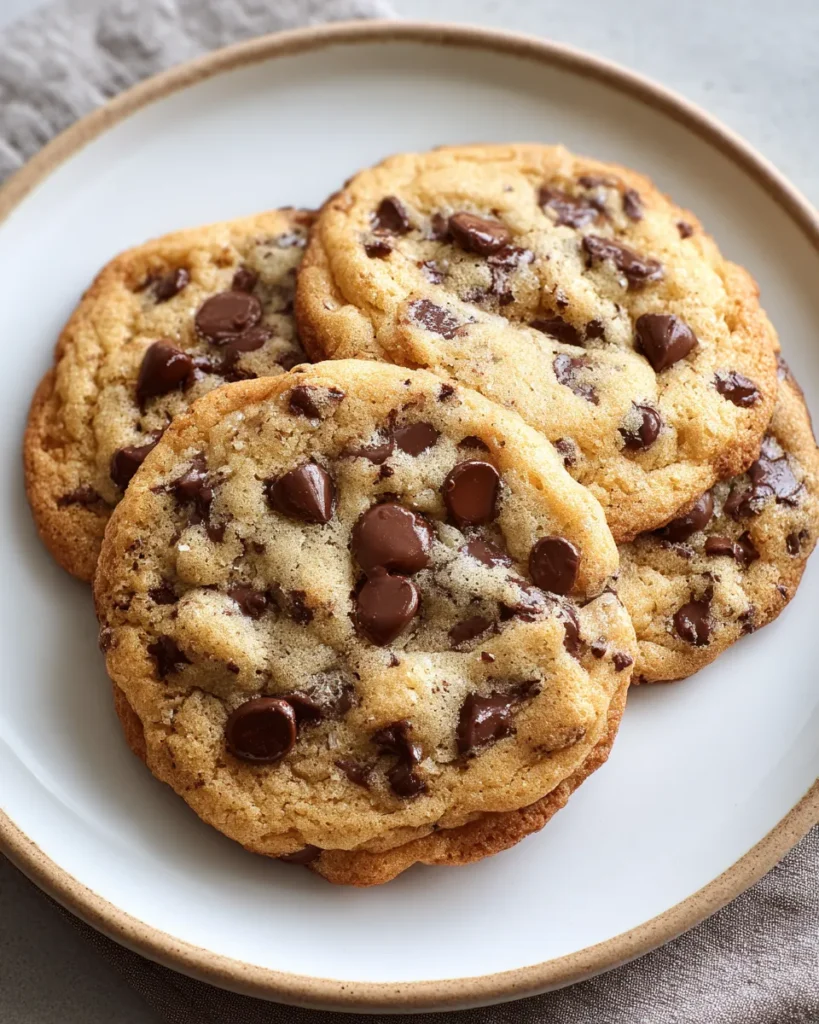

Chocolate Chip Cookie
Description
Savor the rich, buttery flavor of these classic chocolate chip cookies. With a perfect soft center and crunchy edges, they're a timeless treat everyone loves!
Ingredients
Instructions
-
Preheat your oven to 350°F (180°C). Line two baking sheets with parchment paper to prevent sticking.
-
In a small bowl, whisk together the flour and baking soda, then set aside.
-
In a large mixing bowl, use an electric mixer to cream together the room temperature butter, granulated sugar, brown sugar, and salt until the mixture is light and fluffy. This should take about 2-3 minutes.
-
Add the vanilla extract and the eggs, one at a time, beating well after each addition to ensure everything is fully incorporated.
-
Gradually add the flour mixture to the wet ingredients, mixing on low speed until just combined. Be careful not to overmix.
-
Fold in the chocolate chips using a spatula or wooden spoon until they are evenly distributed throughout the dough.
-
Scoop tablespoon-sized portions of dough and place them onto the prepared baking sheets, leaving enough space (about 2 inches) between each cookie to allow for spreading.
-
Bake in the preheated oven for 10-12 minutes, or until the edges are golden brown and the centers are still soft.
-
Remove from the oven and let the cookies cool on the baking sheets for 5 minutes before transferring them to a wire rack to cool completely.
Note
- For a variation, try adding chopped nuts like walnuts or pecans for added texture.
- If you prefer softer cookies, slightly underbake them by a minute or two.
- You can freeze leftover cookie dough for up to 3 months; simply scoop out balls of dough and freeze them on a baking sheet, then transfer to a zip-top bag.
- Experiment with different types of chocolate chips, like dark chocolate or white chocolate, for unique flavor profiles.

