

This treat is like a double-layered hug from your oven—a fudgy brownie base topped with a soft, gooey chocolate chip cookie layer that practically begs you to take just one more bite. Every forkful delivers a perfect balance of deep cocoa richness and sweet, buttery cookie dough, studded with pockets of melting chocolate chips. If you’ve ever wondered what would happen if two of your favorite desserts got together, this is the answer: Chocolate Chip Cookie Brownies, the ultimate dreamy dessert fusion! It’s a beginner-friendly recipe that takes just 20 minutes to prep and about 40 minutes to bake, plus a half-hour to rest, so you’ll be diving into dessert bliss in under an hour and a half.
On top of being an absolute crowd-pleaser, these squares clock in at around 350 calories each (based on 16 servings), making them an indulgent but entirely manageable treat for potlucks, family gatherings, or a cozy night in. Whether you’re a seasoned baker or someone who’s only ever mastered the art of toast, you’ll find the clear instructions here a breeze to follow. The layers work in harmony: the bottom brownie is rich and fudgy, while the cookie top is soft and chewy, offering a delightful textural contrast. Trust me—once you taste that first bite, with warm brownie and cookie melding together on your tongue, you’ll be hooked for life.
KEY INGREDIENTS IN CHOCOLATE CHIP COOKIE BROWNIES
Before diving into the mixing bowls, let’s get to know the stars of the show. Each ingredient plays a crucial role in creating that magical dual-layer effect—so you’ll want to use the best quality you can find for maximum taste and texture.
- Unsalted butter
Provides richness and moisture in both the brownie and cookie layers. Melting it for the brownies gives that dense, fudgy base, while softening it for the cookie layer ensures tender, chewy bites.
- Granulated sugar
Sweetens the batter and helps achieve a glossy brownie surface. It also contributes to the cookie’s tender crumb by interacting with the butter during creaming.
- Eggs
Act as a binding and leavening agent in both layers, giving structure to the brownie and lightness to the cookie dough.
- Vanilla extract
Adds warm, aromatic depth to both layers, enhancing the chocolate’s complexity and rounding out the buttery sweetness of the cookie.
- Unsweetened cocoa powder
Delivers intense chocolate flavor and a rich, dark color to the brownie layer. It’s the heart of the fudgy texture that makes each bite so dreamy.
- All-purpose flour
Provides structure to the brownie, preventing it from being too gooey, and forms the backbone of the cookie layer, giving it that iconic chew.
- Salt
A pinch in each layer sharpens flavors, balances sweetness, and brings out the full chocolate intensity.
- Baking powder
Gives just a little lift to the brownie so it’s tender but not cake-like, contributing to the perfect fudgy density.
- Brown sugar
Infuses the cookie layer with extra moisture and a hint of caramel flavor, creating those irresistible gooey edges.
- Baking soda
Helps the cookie layer spread and puff just enough, giving you soft centers and slightly crisped surfaces.
- Semi-sweet chocolate chips
The melty pockets of chocolate that stud the cookie topping, adding bursts of sweetness in every bite.
HOW TO MAKE CHOCOLATE CHIP COOKIE BROWNIES
Ready to bake this two-in-one masterpiece? Follow these steps carefully, and you’ll have bars that balance fudgy and chewy in every forkful.
1. Preheat your oven to 350°F (175°C). Grease an 8×8-inch baking pan or line it with parchment paper to ensure easy removal later.
2. Prepare the brownie layer: In a medium saucepan, gently melt the butter over low heat. Remove from heat and stir in the granulated sugar, eggs, and vanilla extract until smooth. Beat in the unsweetened cocoa powder, all-purpose flour, salt, and baking powder until just combined. Spread the batter evenly in the prepared pan.
3. Prepare the cookie layer: In a medium bowl, cream together the softened butter, granulated sugar, and brown sugar until light and fluffy. Beat in the egg and vanilla extract until well incorporated. In a separate bowl, whisk the flour, baking soda, and salt, then gradually add this dry mixture to the creamed butter mixture. Stir in the semi-sweet chocolate chips until just combined—avoid overmixing.
4. Drop spoonfuls of cookie dough over the brownie batter, leaving small gaps. Use the back of a spoon or your fingertips to gently press the dough into an even layer.
5. Bake in the preheated oven for 35 to 40 minutes, or until a toothpick inserted in the center comes out with a few moist crumbs—this ensures a fudgy brownie base without drying out.
6. Allow the Chocolate Chip Cookie Brownies to cool completely in the pan before cutting into squares. Serve warm, or store in an airtight container once fully cooled.
SERVING SUGGESTIONS FOR CHOCOLATE CHIP COOKIE BROWNIES
Now that you’ve mastered the baking, let’s talk about serving these beauties in ways that amplify their deliciousness. From simple scoops to festive sprinkles, these ideas will elevate your dessert table and have everyone reaching for seconds.
- Serve each warm brownie square with a scoop of vanilla ice cream nestled on top. As the ice cream melts, it seeps into cracks, creating a creamy swirl with every bite.
- Drizzle generously with homemade or store-bought caramel sauce. The buttery sweetness of caramel pairs perfectly with the deep chocolate layers, adding a luxuriously gooey finish.
- Garnish with a dollop of whipped cream and a handful of fresh berries like raspberries or strawberries. The fruity brightness cuts through the richness, making each mouthful feel light and balanced.
- For a festive twist, sprinkle with holiday-themed sprinkles or chopped toasted nuts just before baking. The color pop and added texture create a fun, celebratory vibe that’s perfect for parties or special occasions.
HOW TO STORE CHOCOLATE CHIP COOKIE BROWNIES
Whether you’re planning ahead for a party or just want to savor leftovers, proper storage keeps these bars tasting fresh and delicious. Here are a few methods to maintain their fudgy-chewy charm.
- At room temperature, place fully cooled brownies in an airtight container layered with parchment paper. Store for up to 3 days—this preserves the perfect chew.
- Refrigerate for up to 1 week by tightly wrapping the pan with plastic wrap or transferring squares to a sealed container. Chilling firms up the layers and makes slicing cleaner.
- Freeze individual squares by wrapping each piece in plastic wrap, then placing them in a labeled freezer bag. They’ll keep for up to 3 months—just thaw at room temperature or microwave briefly for a warm treat.
- For on-the-go snacks, freeze in small batches with parchment separators between pieces. Pull out the number you need, and the rest stay protected in the freezer.
CONCLUSION
What a journey—from melting butter to that first triumphant taste of warm brownie and cookie in perfect harmony! These Chocolate Chip Cookie Brownies are more than just bars; they’re a celebration of every baker’s dream: fudgy, rich brownies topped with a luxuriously soft cookie layer. You’ve learned how each ingredient contributes to texture and flavor, from the depth of unsweetened cocoa powder in the brownie to the caramel hint of brown sugar in the cookie. You’ve preheated, creamed, layered, and baked, and now you’re rewarded with golden-edged squares filled with pockets of melty chocolate chips. This recipe truly embodies dessert bliss and is beginner-friendly, requiring simple pantry staples and straightforward steps that guarantee success.
Feel free to print this article and save it for later—whether you’re hosting a gathering, surprising a loved one, or simply indulging a sweet tooth. And be sure to check out the FAQs below for tips on substitutions, troubleshooting, and advanced tweaks. If you try this recipe or have any comments, questions, or feedback, I’d love to hear from you. Let me know how your brownies turned out, any creative twists you added, or if you need a hand with a sticky gooey cookie issue. Happy baking, and here’s to many more delicious adventures in your kitchen!
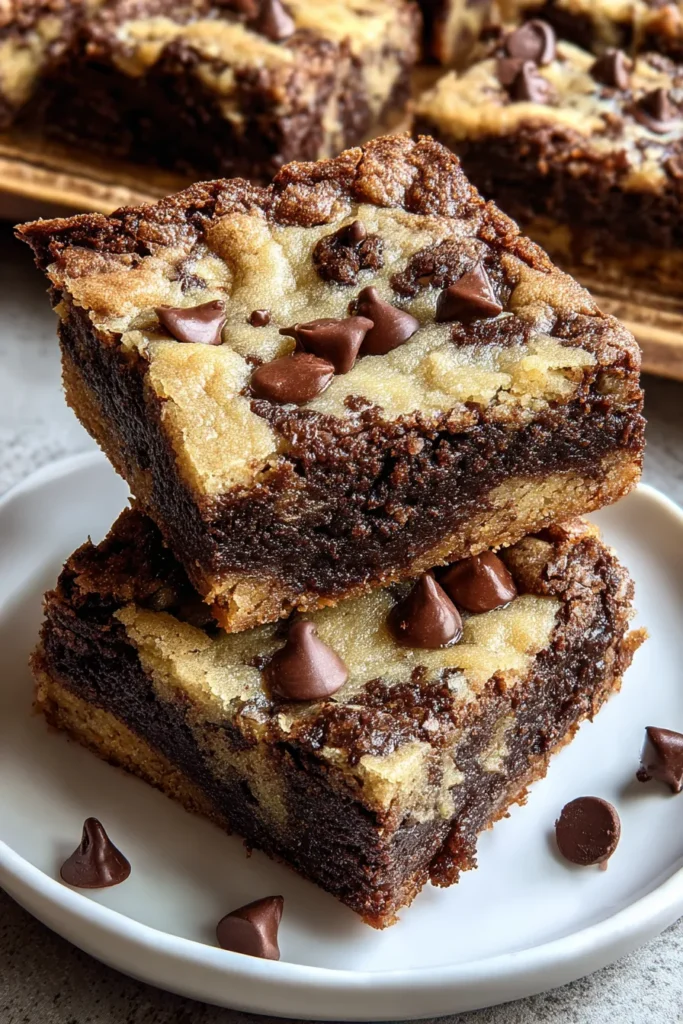

Chocolate Chip Cookie Brownies
Description
This decadent treat perfectly combines rich, fudgy brownies with a soft, gooey cookie layer, creating a heavenly bite that satisfies all cravings.
Ingredients
Instructions
-
Preheat your oven to 350°F (175°C). Grease an 8x8 inch baking pan or line it with parchment paper.
-
Prepare the brownie layer: In a medium saucepan, melt the butter. Remove from heat and stir in the sugar, eggs, and vanilla extract. Beat in cocoa powder, flour, salt, and baking powder. Spread the batter evenly in the prepared baking pan.
-
Prepare the cookie layer: In a medium bowl, cream together the softened butter, granulated sugar, and brown sugar. Beat in the egg and vanilla extract. Combine the flour, baking soda, and salt; gradually add to the creamed mixture. Stir in chocolate chips until just combined.
-
Drop spoonfuls of the cookie dough over the brownie batter in the baking pan, gently pressing the dough into an even layer.
-
Bake in preheated oven for 35 to 40 minutes, or until a toothpick inserted into the center comes out with a few moist crumbs. Be careful not to overbake.
-
Allow the chocolate chip cookie brownies to cool completely in the pan before cutting into squares. Enjoy warm or store in an airtight container.
Note
- You can add nuts such as walnuts or pecans to the brownie batter for additional texture.
- For a richer taste, consider using dark chocolate chips in the cookie layer.
- Serve with a scoop of vanilla ice cream or a drizzle of caramel sauce for an indulgent dessert.
- For a festive touch, sprinkle holiday-themed sprinkles on top before baking.

