

Cherry Pie Bars are the ultimate sweet bars that bring summer right to your kitchen. With a tender oat crust that gives way to a syrupy cherry filling and a buttery, golden crumb topping, each square bursts with bright fruit and a hint of lemon. These bars are simple enough for an afternoon bake yet impressive enough to share at any gathering—get ready to fall in love with every juicy pop!
Key Ingredients
To make these Cherry Pie Bars shine, you'll need a handful of pantry staples and a jar of sweet filling. Each component works together to create that perfect crumbly crust and juicy center.
- 2 cups all-purpose flour: Builds a sturdy yet tender base for the oat crust.
- 1 cup rolled oats: Adds chewiness and a rustic texture to the crumb mixture.
- 1/2 cup granulated sugar: Sweetens the dough and balances the tart cherries.
- 1/2 teaspoon salt: Enhances all the flavors in the crust and topping.
- 1 teaspoon baking powder: Gives the crumb layers a slight lift and lightness.
- 1 cup unsalted butter: Creates rich, buttery crumbs when cut into the dry ingredients.
- 1 egg: Binds the dough for a cohesive crust and topping.
- 1 teaspoon vanilla extract: Infuses a warm, aromatic note into the dough.
- 20 ounces cherry pie filling: Provides the vibrant, juicy fruit filling in the center.
- 1 tablespoon cornstarch: Thickens the filling to prevent a soggy base.
- 1 tablespoon granulated sugar: Sweetens the filling for just the right balance.
- 1 teaspoon lemon juice: Brightens the cherry flavor with a hint of fresh acidity.
How To Make Cherry Pie Bars
Baking these Cherry Pie Bars is straightforward and fun—perfect for home cooks of all levels. You’ll start by blending dry ingredients, incorporate cold butter for that crumbly texture, then divide the dough to create a firm base and a crunchy topping. After a quick pre-bake, you’ll top it with a sweet, slightly thickened cherry layer, crumble on the rest of the dough, and finish baking until golden. Ready to get your hands a little floury? Let’s dive in!
1. Preheat your oven to 350°F and line a 9×13-inch baking pan with parchment paper for easy removal.
2. In a large bowl, whisk together the flour, rolled oats, granulated sugar, salt, and baking powder until evenly combined.
3. Cut cold unsalted butter into the dry ingredients using a pastry cutter or fork until the mixture resembles coarse crumbs.
4. Stir in the egg and vanilla extract, mixing just until the dough begins to come together—reserve about one third for the topping.
5. Press two thirds of the dough evenly into the prepared pan and bake for 10 minutes, until the crust is set but not browned.
6. In a separate bowl, combine cherry pie filling, cornstarch, granulated sugar, and lemon juice, stirring until the sugar and cornstarch dissolve. Spread evenly over the pre-baked crust.
7. Crumble the reserved dough over the cherry filling, covering as much surface as possible, then bake for 25 to 30 minutes until the topping is golden brown.
8. Cool completely in the pan before lifting out the parchment and slicing into bars to ensure clean edges.
Serving Suggestions
These Cherry Pie Bars are as versatile as they are delicious! Whether you’re serving them at a picnic, a potluck, or as an after-dinner treat, they shine in any setting. Let your creativity flow with these fun serving ideas:
- Dust with powdered sugar: Lightly sprinkle the tops for an elegant, snowy finish.
- Serve warm with vanilla ice cream: The contrast of hot bars and melting ice cream is irresistible.
- Top with whipped cream and fresh cherries: Add a dollop of whipped cream and a few fresh berries for extra flair.
- Pair with a cup of coffee or tea: The tart-sweet bars balance perfectly with a steaming mug.
Tips For Perfect Cherry Pie Bars
Nailing that ideal crumb-to-filling ratio is easier than you think! A few friendly pointers will turn good bars into showstoppers:
- Ensure the bars are fully cooled before slicing to achieve clean edges.
- Cold butter creates better crumb texture for the crust and topping.
- You can substitute blueberry or apple pie filling for a different flavor.
- Store the bars in an airtight container at room temperature for up to three days.
How To Store It
Proper storage keeps your Cherry Pie Bars fresh, moist, and ready to enjoy for days. Here’s how to maintain that perfect texture and flavor:
- Room temperature: Place bars in an airtight container and store at room temperature for up to three days—no refrigeration needed.
- Refrigerator: If you prefer a firmer bar or live in a hot climate, keep them in an airtight container in the fridge for up to five days. Let them come to room temperature before serving for the best flavor.
- Freezer: Wrap individual bars tightly in plastic wrap or foil and freeze for up to one month.
- Thawing: Remove bars from the freezer and let them thaw in the refrigerator overnight, then bring to room temperature for that fresh-baked texture.
Frequently Asked Questions
Here are a few answers to common questions about Cherry Pie Bars:
- How do I ensure the crust has a crisp, crumbly texture?
A: Use cold unsalted butter straight from the refrigerator and cut it into the flour, oats, sugar, salt, and baking powder mixture with a pastry cutter or fork until it resembles coarse crumbs. Press two-thirds of this mixture firmly and evenly into the lined pan, then pre-bake for 10 minutes at 350°F. The cold butter and pre-bake set the base, giving you a sturdy yet tender crust that won’t become soggy.
- Can I substitute other pie fillings or adjust the sweetness?
A: Yes. For flavors like blueberry or apple, swap the cherry pie filling with an equal amount of your chosen filling. Taste the filling before using—if it’s extra sweet, reduce the added tablespoon of granulated sugar by half. If it’s more tart, you can keep the sugar or even add an extra pinch. The cornstarch and lemon juice help thicken and brighten any fruit filling, so use them as written.
- What’s the purpose of adding cornstarch to the cherry filling?
A: Cornstarch acts as a thickening agent, absorbing excess liquid released by the fruit during baking. This prevents the bars from becoming overly moist or collapsing when sliced. Mixing the cornstarch into the filling with sugar and lemon juice ensures even distribution and consistent texture.
- How can I achieve clean, neat slices when cutting the bars?
A: Allow the bars to cool completely in the pan at room temperature, at least 1½ to 2 hours. Cooling lets the filling set and the crust firm up. For extra precision, refrigerate the cooled bars for 30 minutes, then use a sharp knife wiped clean between cuts to slice into squares without crumbly edges.
- Is it possible to prepare these bars ahead of time or freeze them?
A: Yes. Bake and cool the bars fully, then store them in an airtight container at room temperature for up to three days. For longer storage, wrap individual bars tightly in plastic wrap and freeze for up to one month. Thaw overnight in the refrigerator before serving, then bring to room temperature for best texture.
- My topping didn’t brown evenly. How can I get a golden finish?
A: Ensure the reserved dough pieces are crumbled uniformly over the filling, so they bake at the same rate. Rotate the pan halfway through the 25–30 minute bake to account for hot spots in the oven. If the top is browning too quickly, loosely tent with foil for the remaining time to prevent overbrowning while the filling finishes setting.
- What adjustments are needed if I halve the recipe?
A: Use a smaller pan, such as an 8×8-inch square, and halve all ingredients exactly. Keep the same oven temperature at 350°F. The pre-bake time may shorten by 2–3 minutes—watch for the crust to set without turning brown. The final bake may require slightly less time, so begin checking at around 20 minutes.
What Makes This Special
With its buttery oat crust, glossy cherry center, and crumbly topping, Cherry Pie Bars bring together all the best parts of a classic pie—without the fuss of rolling dough. The pre-baked base prevents sogginess, while the cornstarch-thickened filling holds each bite together. Golden brown on top and bursting with bright cherry flavor, these bars are fun to bake and even more fun to share. Print this article and save it for cozy bake days, and let me know in the comments if you try them or have any questions!
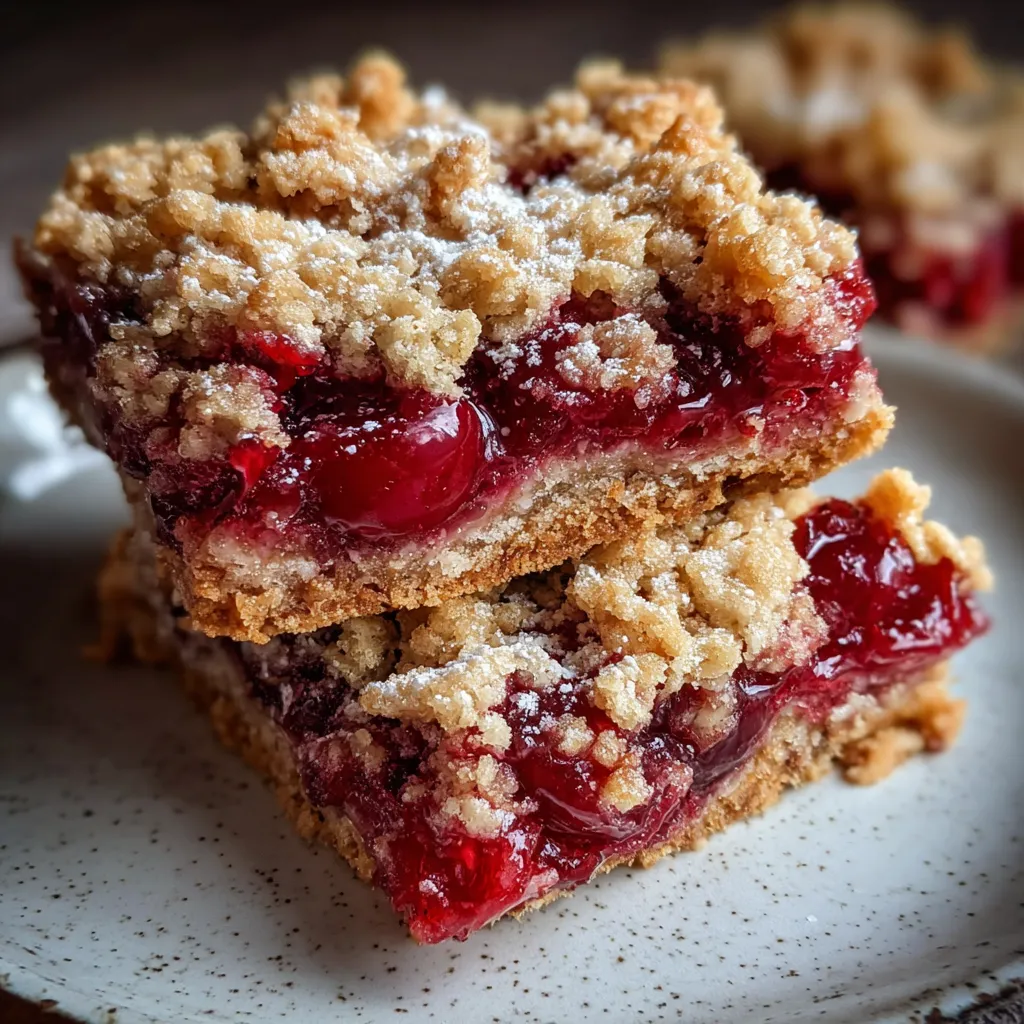

Cherry Pie Bars
Description
These cherry pie bars boast a tender oat crust that gives way to a syrupy cherry filling, all crowned with a buttery, crumbly topping. Bright pops of tart fruit and a hint of lemon make each square irresistible.
Ingredients
Instructions
-
Preheat oven to 350°F and line a 9x13 inch baking pan with parchment paper.
-
In a large bowl whisk together flour rolled oats granulated sugar salt and baking powder.
-
Cut cold unsalted butter into the dry ingredients using a pastry cutter or fork until mixture resembles coarse crumbs.
-
Stir in egg and vanilla extract until dough begins to come together reserving about one third for topping.
-
Press two thirds of the dough evenly into the prepared pan and bake for 10 minutes until set.
-
In a separate bowl combine cherry pie filling cornstarch granulated sugar and lemon juice then spread evenly over pre baked crust.
-
Crumble reserved dough over the cherry filling and bake for 25 to 30 minutes until golden brown on top.
-
Cool completely in the pan before slicing into bars.
Note
- Ensure the bars are fully cooled before slicing to achieve clean edges.
- Cold butter creates better crumb texture for the crust and topping.
- You can substitute blueberry or apple pie filling for a different flavor.
- Store the bars in an airtight container at room temperature for up to three days.

