

There’s something wickedly fun about transforming humble ingredients into a delightfully gory spectacle that tastes downright heavenly. These Bloody Zombie Brains Candied Walnuts marry the satisfying crunch of toasted walnut halves with a glossy, blood-red syrup that’s sweet, slightly spiced, and guaranteed to raise eyebrows (and pulses) at any Halloween gathering. Gory yet delicious, these candied walnuts will spice up your Halloween celebrations by adding a shocking pop of color and decadent flavor to your spread. With an intermediate difficulty level, this recipe gives you the perfect balance of hands-on fun and foolproof techniques—think crisping nuts in the oven, swirling them through a warm, shimmering sugar syrup, and letting them cool to a spectacularly sticky finish. Total preparation time clocks in at about 15 minutes, cooking time around 20 minutes, and then you’ll wait an eager 30 minutes for everything to set. At roughly 400 calories per serving, these crimson-coated walnuts walk the line between indulgence and creative showmanship, making them a standout appetizer or dessert that’s as hauntingly attractive as it is mouthwateringly delicious.
From the very first bite, you’ll notice the sweet whisper of vanilla and cinnamon weaving through the crunchy nutty backbone, with that pinch of salt heightening every nuance. I still remember the first time I whipped up this recipe for a small Halloween get-together: my friends eyed the jar of glowing red walnuts with playful trepidation, daring each other to pop one in their mouths. Their delighted gasps told me I was onto something special. These candied walnuts aren’t just a snack—they’re a conversation starter, a showpiece, and a tasty nod to all things spooky. Whether you’re garnishing a bowl of creamy dip, sprinkling them over a crisp autumn salad, or simply filling decorative jars as gifts, these Bloody Zombie Brains will have everyone coming back for more. So grab your apron, embrace the eerie hues, and let’s get ready to conjure up a snack that’s both frightfully festive and utterly irresistible.
KEY INGREDIENTS IN BLOODY ZOMBIE BRAINS CANDIED WALNUTS
Before we dive into the step-by-step magic, let’s break down the essential components that make these candied walnuts so addictive. Each ingredient works together to create that perfect balance of sweetness, color, spice, and crunch.
- Walnut halves
These form the crunchy foundation of the recipe. When toasted, they develop a warm, nutty aroma and a satisfying bite that holds up beautifully under the sticky syrup coating.
- Sugar
The backbone of the candy coating, sugar transforms into a luscious, glossy syrup that clings to every ridge and crevice of the nuts, providing that sweet “blood-like” sheen.
- Water
Combined with sugar, water helps create the syrup base. It ensures even dissolution of sugar crystals and controls the consistency as you bring the mixture to a gentle boil.
- Red food coloring
This gives the syrup its eerie, eye-catching hue. A small amount goes a long way, so you can adjust for a deeper red or a more subtle blush depending on your spooky vision.
- Vanilla extract
Adds a warm, fragrant undertone that rounds out the sweetness and complements the nuts’ natural flavors, preventing the syrup from tasting one-dimensional.
- Cinnamon
A hint of this spice introduces a cozy warmth and just a whisper of complexity, enhancing the overall depth of flavor without overpowering the nut’s character.
- Salt
Even a tiny pinch works wonders to elevate all the elements, balancing the sweetness and accentuating the nutty and spiced notes in every bite.
HOW TO MAKE BLOODY ZOMBIE BRAINS CANDIED WALNUTS
Ready to bring these sinister snacks to life? Follow these detailed steps, and you’ll have a batch of crimson-crusted walnuts in no time. The process is straightforward, turning basic pantry staples into a Halloween showstopper.
1. Preheat your oven to 350°F (175°C) and line a baking sheet with parchment paper. This ensures easy cleanup and prevents the nuts from sticking as they toast.
2. Spread the walnut halves in a single layer on the prepared sheet. Toast them in the oven for 8–10 minutes, giving the pan a gentle stir halfway through so each piece gets that golden, fragrant finish. Watch closely to avoid burning—those toasty aromas will tell you they’re ready.
3. While the nuts are toasting, combine sugar, water, red food coloring, vanilla extract, cinnamon, and a pinch of salt in a medium saucepan. This colorful mix is your sorcery sauce.
4. Place the saucepan over medium heat and stir constantly until the sugar dissolves fully. Once the mixture runs clear and smooth, resist the urge to stir further and let it come to a rolling boil.
5. Keep the syrup boiling for about 5–7 minutes, until it reaches a syrupy consistency that coats the back of a spoon. Stay vigilant—overcooking will turn the sugar from glossy to bitter in seconds.
6. Remove the pan from heat and immediately add the freshly toasted walnuts, stirring swiftly to ensure each half is thoroughly coated in that vivid red syrup. The heat will help the coating adhere perfectly.
7. Quickly return the coated walnuts to the parchment-lined baking sheet, using a fork or spoon to separate pieces and prevent clumping. Spaced-out nuts cool more evenly and achieve maximum crunch.
8. Let the candied walnuts cool completely at room temperature. This resting period of about 30 minutes allows the sugar glaze to harden into a crisp, crackly shell.
9. Once cooled, serve these spooky delights straight away, or use them to top salads, desserts, or even swirl into yogurt for a dramatic finish. When you’re ready to pause the mayhem, store leftovers in an airtight container at room temperature to preserve freshness.
SERVING SUGGESTIONS FOR BLOODY ZOMBIE BRAINS CANDIED WALNUTS
When it comes to showcasing these gory little nuts, the possibilities are both delicious and delightfully eerie. Whether you’re setting up a Halloween buffet or adding a twist to an everyday dish, these suggestions will ensure your guests are both spooked and impressed.
- Showstopper Dessert Table
Arrange the candied walnuts in a shallow bowl lined with dark fabric or fake spider webs. The contrast of the deep red nuts against a moody backdrop creates an irresistible focal point on your dessert spread.
- Gourmet Salad Topper
Scatter the cooled walnuts over a bed of mixed greens, crumbled goat cheese, and dried cranberries. The sweet crunch and subtle spice transform an ordinary salad into a hauntingly delightful starter.
- Spooky Gift Jars
Layer the candied walnuts in mini glass jars, add a festive label, and tie with twine. These make perfect party favors or neighborly treats—just let each recipient know to handle with “brain-y” caution!
- Sweet & Spicy Snack Mix
Combine the nuts with pretzel twists, popcorn, and a dash of cayenne pepper for a salty-sweet-spicy medley. Serve in a large punch bowl for guests to graze on throughout the evening.
HOW TO STORE BLOODY ZOMBIE BRAINS CANDIED WALNUTS
Proper storage is crucial to keep your candied walnuts as crunchy and vibrant as the day you made them. With just a few simple steps, you can preserve that signature snap and ensure they stay fresh for weeks.
For best results, start by making sure the walnuts are completely cool and the sugar coating has fully hardened. Any residual warmth or moisture can soften the glaze and invite stickiness.
- Airtight Container at Room Temperature
Transfer the cooled walnuts into an airtight container and seal tightly. Store them in a cool, dry place away from direct sunlight. This method maintains the crisp texture for up to two weeks.
- Decorative Mason Jars
If you’re gifting or displaying, use themed mason jars with rubber-sealed lids. Not only do they look festive, but they also lock in freshness while adding to the spook factor.
- Refrigeration for Longer Freshness
For an extra-long shelf life (up to a month), refrigerate the sealed container. Let the walnuts come to room temperature for about 10 minutes before serving to reclaim their full crunch.
- Freezing for Extended Storage
To keep them on hand for months, place the cooled nuts in a freezer-safe bag, remove as much air as possible, and freeze. Thaw in the fridge overnight and allow them to warm to room temperature before enjoying.
CONCLUSION
As you close the book on this spooky culinary adventure, you’ll have a clear winner for your Halloween festivities—Bloody Zombie Brains Candied Walnuts. Their glossy red coating, spicy-sweet depth, and irresistible crunch turn ordinary walnuts into a chillingly brilliant snack, appetizer, or dessert garnish. We’ve covered everything from the key ingredients you need—walnuts, sugar, a dash of cinnamon, and that ghoulish food coloring—to detailed instructions that guide you through to the perfect sugar syrup. You’ve learned to toast those nuts just right, whisk them through a bubbling red glaze without burning a drop, and let them rest until they’re crisp and shiny. Serving suggestions range from leveling up a simple salad to gifting them in decorative jars, while our storage tips ensure every last nut remains fresh, crunchy, and ready to spook your friends well after the party ends.
Feel free to print this article and tuck it into your recipe binder for future reference, or save it to your device so it’s always on hand when inspiration—and a yearning for something sweet, spicy, and spectacularly eerie—strikes. You’ll also find a FAQ section below to tackle any lingering questions, from adjusting spice levels to creative variations on this recipe. Whether you’re a seasoned home cook or a Halloween enthusiast on the hunt for show-stopping treats, these candied walnuts promise thrill, flavor, and applause. Have you tried this recipe? Share your triumphs, tweaks, or queries in the comments—your feedback could spark new ideas for everyone in our delightfully daring cooking community.
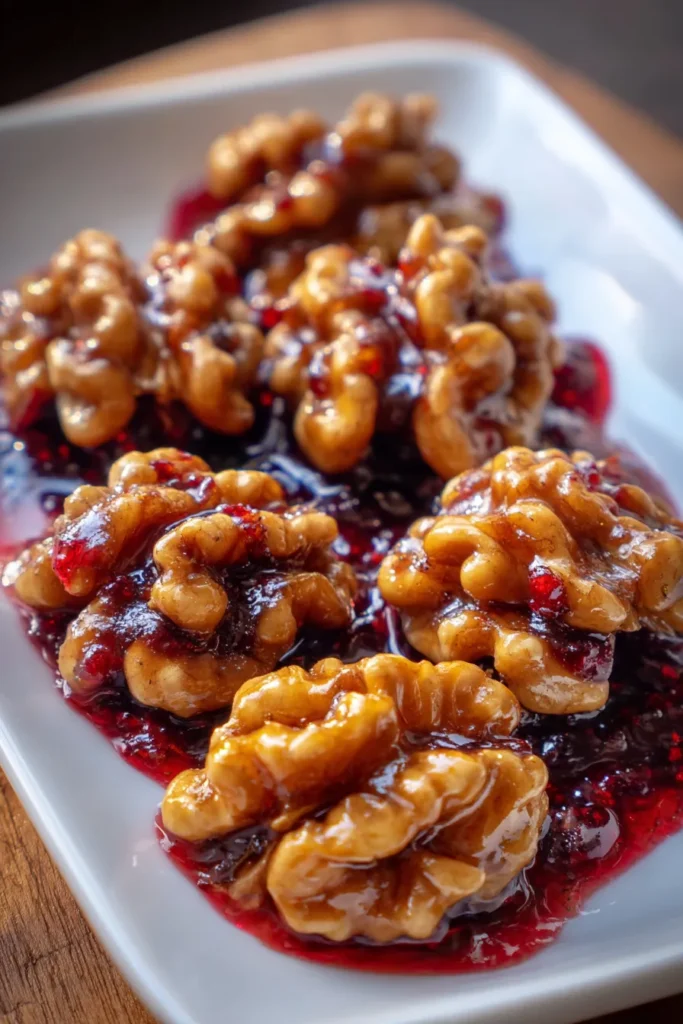

Bloody Zombie Brains Candied Walnuts
Description
Crunchy walnuts coated in a sweet, spook-tacular red syrup bring a hauntingly delightful twist to your festive gatherings. Perfect for snacking or decorating festive dishes!
Ingredients
Instructions
-
Preheat your oven to 350°F (175°C). Line a baking sheet with parchment paper.
-
Spread the walnut halves evenly on the baking sheet. Toast them in the preheated oven for about 8-10 minutes, stirring halfway through, until they are fragrant and lightly golden.
-
In a saucepan, combine sugar, water, red food coloring, vanilla extract, cinnamon, and a pinch of salt.
-
Heat the mixture over medium heat, stirring constantly until the sugar dissolves. Then, bring it to a boil without stirring.
-
Once the mixture is boiling, let it cook until it reaches a syrupy consistency, approximately 5-7 minutes. Be vigilant and avoid overcooking as the syrup can burn quickly.
-
Remove the saucepan from the heat and immediately add the toasted walnuts, stirring to coat them thoroughly with the syrup.
-
Quickly spread the syrup-coated walnuts back onto the parchment-lined baking sheet, separating them as much as possible using a fork or spoon.
-
Let the candied walnuts cool completely to allow the sugar coating to harden.
-
Once cooled, serve them as a spooky Halloween snack or use them to top salads and desserts. Store in an airtight container at room temperature.
Note
- These candied walnuts make for a fun and ghastly-themed treat for Halloween parties.
- Adjust the food coloring to achieve the desired red hue for a more dramatic effect.
- Try adding a pinch of cayenne pepper for a zesty kick to the candied nuts.
- Experiment with different nuts or even a mix for varied textures and flavors.
- These can be a perfect gift idea when packed in themed, decorative jars.

