

There’s something magical in the air when you think about a dessert that marries rich chocolate with the bright pop of cherries. Satisfy your sweet tooth with these delightful Black Forest Inspired Treats! These squares capture all the charm of the classic German gâteau within an easy, beginner-friendly format. A tender crumb, deep cocoa undertones, and bursts of juicy cherries come together in a single pan to deliver an unforgettable bite. With just 20 minutes of prep time, 30 minutes in the oven, and a brief 10-minute rest, you’ll be slicing 16 perfect portions—each clocking in at roughly 250 calories of pure, fudgy bliss. Whether you’re planning a small gathering or simply craving a solo treat, these little squares bring café vibes straight to your kitchen counter. The marriage of smooth chocolate, tangy fruit, and pillowy whipped cream makes every mouthful feel like a mini celebration.
Every component in this recipe plays its part, from the silky cocoa powder that gives the cake its dark, indulgent hue to the luscious swirl of whipped cream crowning each square. A sprinkle of powdered sugar adds a fairy-dust finish, while delicate dark chocolate shavings deliver that extra hint of luxury. The combination of all-purpose flour with a whisper of baking soda and baking powder ensures a light, tender crumb, and a splash of buttermilk keeps things decadently moist. I’ll never forget the first time I watched the cherry-speckled batter slide into a preheated oven—those few moments before the timer dings feel like delicious anticipation you can taste. Once cooled and sliced, these treats transform into elegant desserts that shine at brunch spreads, dinner parties, or a simple afternoon coffee break. As a busy home cook, I adore how this recipe feels elegant without any complicated steps, promising impressive results and plenty of smiles around the table.
KEY INGREDIENTS IN BLACK FOREST INSPIRED TREATS
Before we dive into the baking process, let’s take a closer look at the star players that make these treats so irresistible. Each ingredient brings its own personality to the mix, working in harmony to create tender, chocolatey squares dotted with fruity brightness and finished with a cloud of cream.
- All-purpose flour – Provides structure and stability, giving the cake its foundation and ensuring each square holds its shape when sliced.
- Unsweetened cocoa powder – Delivers deep chocolate flavor and rich color without added sweetness, balancing the cherries’ natural tang.
- Granulated sugar – Sweetens the batter and helps create a light, airy texture when creamed with butter.
- Baking powder – Acts as a gentle leavening agent, giving the cake a tender rise and soft crumb.
- Baking soda – Boosts the lift and adds tenderness, reacting with acidity in the buttermilk for subtle fluffiness.
- Salt – Enhances all flavors, cutting through sweetness and ensuring a well-rounded taste.
- Unsalted butter – Adds richness, moisture, and depth of flavor; creaming butter with sugar sets the stage for a light, aerated crumb.
- Eggs – Provide structure, richness, and natural binding, helping the cake hold together while staying moist.
- Vanilla extract – Infuses delicate warmth and aromatic notes that highlight the chocolate and cherries.
- Buttermilk – Offers a pleasant tang and extra moisture, tenderizing the crumb and reacting with leaveners for a perfect lift.
- Pitted cherries – Fresh or jarred, they bring juicy bursts of fruitiness and a vibrant contrast to the dark cake.
- Whipped cream – Topped on each square for a light, creamy finish that feels like a dreamy cloud.
- Powdered sugar – Dusts the whipped cream with a pretty, snowy look and adds a delicate sweetness.
- Dark chocolate shavings – Provide a final flourish of texture and bittersweet intensity, elevating each bite.
HOW TO MAKE BLACK FOREST INSPIRED TREATS
Let’s walk through the step-by-step process of turning these simple ingredients into decadent squares. From preparing the pan to adding those final chocolate shavings, each instruction is designed for straightforward, beginner-friendly success.
1. Preheat and prepare
Preheat your oven to 350°F (175°C) so it reaches temperature by the time the batter is ready. Grease the inside of an 8-inch square baking pan thoroughly with butter or nonstick spray, then flour it lightly to prevent sticking and achieve clean edges.
2. Combine dry ingredients
In a medium bowl, whisk together the all-purpose flour, unsweetened cocoa powder, baking powder, baking soda, and salt. Ensuring these are well blended helps distribute the leavening agents evenly. Set this bowl aside.
3. Cream butter and sugar
In a large mixing bowl or stand mixer, beat the softened unsalted butter with the granulated sugar on medium speed until the mixture is light and fluffy, about 3–4 minutes. This aeration is key to a tender, airy crumb.
4. Incorporate eggs and vanilla
Add the eggs one at a time, mixing well after each addition to maintain a smooth emulsion. Stir in the vanilla extract until fully combined, infusing the batter with warm aroma.
5. Alternate dry ingredients and buttermilk
Gradually add the dry ingredient mixture to the butter-sugar-egg base, alternating with the buttermilk. Begin and end with the dry ingredients, mixing just until combined—overmixing can make the cake dense.
6. Fold in cherries
Gently fold the pitted cherries into the batter using a spatula. Take care not to over-stir so the fruit remains intact and evenly distributed.
7. Transfer to pan
Pour the batter into your prepared baking pan, using a spatula to smooth the surface. Even batter distribution ensures uniform baking.
8. Bake and test
Place the pan in the preheated oven and bake for 25–30 minutes. Insert a toothpick into the center—if it comes out clean or with a few moist crumbs, the cake is done.
9. Cool and slice
Allow the cake to cool in the pan for 10 minutes to set. Then, carefully remove it and transfer to a wire rack to cool completely before slicing clean squares.
10. Garnish and serve
Top each cooled square with a generous dollop of whipped cream. Dust with powdered sugar and finish with dark chocolate shavings for an elegant touch.
SERVING SUGGESTIONS FOR BLACK FOREST INSPIRED TREATS
These Black Forest Inspired Treats shine brightest when served thoughtfully, turning a simple dessert into a memorable experience. Whether you’re plating for a special occasion or enjoying a casual afternoon snack, these serving ideas will help you present each square with flair and complement the cake’s flavors perfectly.
- Classic trio – Serve each square alongside a generous swirl of whipped cream and a handful of fresh cherries. The bright fruit pairs seamlessly with the chocolate base and adds a refreshing burst in every bite.
- Wine pairing – Pair these treats with a light-bodied red wine like Pinot Noir or a sparkling rosé. The berry and chocolate notes in the dessert will harmonize beautifully with the wine’s fruity undertones.
- Coffee companion – Offer as part of a coffee bar setup with espresso or a rich cappuccino. The bitterness of the coffee balances the cake’s sweetness, creating a perfect mid-afternoon pick-me-up.
- Dessert platter centerpiece – Arrange squares on an elevated cake stand or tiered tray, interspersed with dark chocolate curls and a dusting of powdered sugar. This makes for an inviting presentation at brunches or dinner parties.
HOW TO STORE BLACK FOREST INSPIRED TREATS
Proper storage ensures your Black Forest Inspired Treats retain their moist crumb, fruity burst, and fluffy topping for days to come. Whether you’re prepping ahead for a gathering or saving leftovers, follow these tips to maintain maximum freshness and flavor.
- Room temperature – After the whipped cream and chocolate garnish are added, store individual squares in an airtight container lined with parchment paper. Keep at room temperature for up to 24 hours to preserve the cake’s softness.
- Refrigeration – For longer life, place squares in a single layer inside an airtight container. Store in the refrigerator for up to 3 days. Chilling slightly firms the whipped cream and helps intensify flavors, but allow cake to warm briefly before serving.
- Freezing – To extend storage up to one month, pre-freeze un-topped squares on a baking sheet until firm. Transfer to a freezer-safe bag or container. Thaw in the refrigerator overnight, then top with fresh whipped cream, powdered sugar, and shavings just before serving.
- Transporting – When taking these treats on the go, use a sturdy box or container with dividers or cupcake liners between squares. Keep chilled until ready to serve, especially in warm climates, to prevent melting or sliding.
CONCLUSION
What began as a simple craving for something chocolaty and fruity has turned into an easy, fuss-free recipe that elevates any occasion. These Black Forest Inspired Treats capture the essence of a classic German dessert in bite-sized squares that even beginners can master. With just 20 minutes of prep, 30 minutes of baking, and a short 10-minute rest, you’ll create 16 decadent portions—each about 250 calories—that showcase a tender cocoa crumb, juicy cherries, and a cloud of whipped cream finished with powdered sugar and dark chocolate shavings. You can print this article, save it for later, or bookmark it on your device so you’re always ready to whip up these treats for brunch, a dinner party, or a cozy night in. You’ll also find an FAQ below to help answer common questions as you bake along.
I’d love to hear how these Black Forest squares turn out for you! If you have any questions about ingredients, need clarification on a step, or want to share your serving variations, please leave a comment. Your feedback not only helps me improve future recipes but also builds a supportive community of home bakers eager to learn and experiment. Happy baking, and here’s to many more sweet adventures!
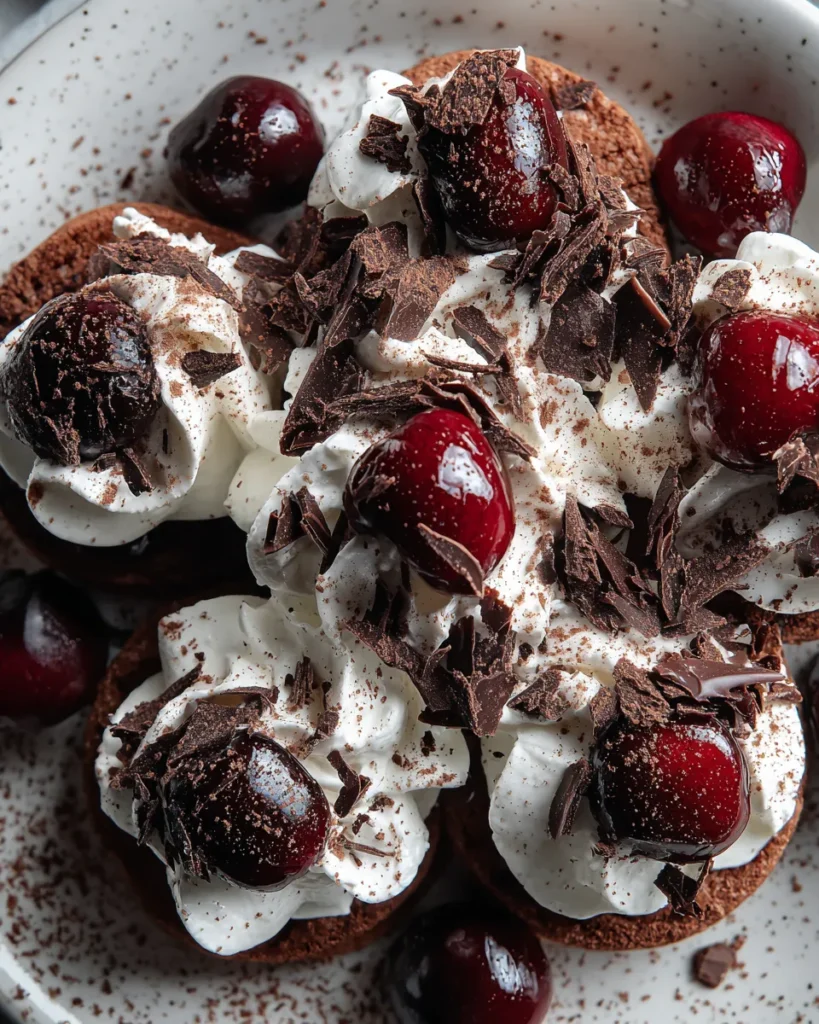

Black Forest Inspired Treats
Description
Experience the rich, chocolatey goodness paired with juicy cherries and a luscious cream topping, creating a dessert that’s utterly irresistible.
Ingredients
Instructions
-
Preheat your oven to 350°F (175°C). Grease and flour an 8-inch square baking pan.
-
In a medium mixing bowl, whisk together the flour, cocoa powder, baking powder, baking soda, and salt until well combined. Set aside.
-
In a large mixing bowl, beat the softened butter with the granulated sugar until light and fluffy, about 3-4 minutes.
-
Add the eggs, one at a time, to the butter mixture, mixing well after each addition. Then stir in the vanilla extract.
-
Gradually mix in the dry ingredients, alternating with the buttermilk, starting and ending with the dry ingredients. Mix until just combined—do not overmix.
-
Fold in the pitted cherries gently into the batter to evenly distribute them.
-
Pour the batter into the prepared baking pan, smoothing the top with a spatula.
-
Bake in the preheated oven for 25-30 minutes, or until a toothpick inserted into the center comes out clean. Let it cool in the pan for 10 minutes, then transfer to a wire rack to cool completely.
-
Once cooled, cut the cake into squares. Place each square on a serving plate.
-
Top each cake square with a dollop of whipped cream, dust with powdered sugar, and finish with dark chocolate shavings for garnish.
Note
- Feel free to substitute cherries with blueberries or raspberries for different flavor variations.
- For an extra indulgent touch, drizzle warm chocolate sauce over the treats before serving.
- These treats can be made ahead of time and stored in an airtight container for up to 3 days.

