

There’s something magical about a freshly baked scone, lightly golden on the edges and tender at the center. These bakery-style pumpkin scones capture that same irresistible charm, bursting with warm spices and velvety pumpkin flavor. Each bite yields a delicate crumb that melts in your mouth, and the subtle sweetness of brown sugar pairs perfectly with the rich pumpkin body. This recipe brings the cozy vibes of autumn right into your kitchen, even if it’s midwinter or early spring. As you roll out the dough and cut perfect wedges, you’re already partway to that moment when simple pantry staples transform into flaky, pillowy delights. And let’s not forget how satisfying it is to see those buttery cubes of cold butter disappear into a golden crumb before they even hit the oven. With a drizzle of sweet glaze that hardens just enough to crack under your fork, these scones remind you why fall baking feels like a warm hug on a crisp morning.
Sharing recipes feels like passing on a little piece of comfort, and these pumpkin scones are no exception. They’re beginner-friendly, so even if you’re new to baking, you’ll discover the joy of whisking dry spices, folding wet ingredients just so, and shaping dough into perfect wedges. In about 15 minutes of prep time, another 15 minutes in the oven, and a quick 10-minute rest, you’ll have eight wedges of autumn indulgence ready to enjoy. At around 200 calories per scone, these treats are a balanced breakfast or afternoon snack, equally at home next to a steaming cup of coffee or a teapot of spiced chai. Whether you’re planning a cozy weekend breakfast or an impromptu gathering, these bakery-style pumpkin scones bring warmth and flavor to the table with minimal effort and maximum smiles.
KEY INGREDIENTS IN BAKERY-STYLE PUMPKIN SCONES
Every ingredient in this recipe plays a starring role in creating scones that are moist, tender, and bursting with fall flavor. From the backbone of all-purpose flour to the aromatic spices that give these treats their signature warmth, each component works in harmony to deliver bakery-quality results at home.
- All-purpose flour
Provides the necessary structure and base for the scones, ensuring they hold their shape while still staying tender inside.
- Granulated sugar
Adds sweetness and helps tenderize the crumb by interacting with the flour and fats during baking.
- Light brown sugar
Contributes moisture and a hint of caramel complexity, enriching the overall flavor profile of the scones.
- Baking powder
Acts as the leavening agent, creating lift and those lovely flaky layers when it reacts with the wet ingredients.
- Salt
Balances sweetness and enhances the natural flavors of the pumpkin and spices.
- Ground cinnamon
Brings a warm, comforting aroma that’s quintessentially autumnal.
- Ground nutmeg
Adds a slightly sweet and nutty depth, complementing the cinnamon and pumpkin.
- Ground ginger
Introduces a gentle zing that brightens the overall spice blend.
- Ground cloves
Offers a rich, earthy note to round out the spice mix.
- Cold unsalted butter
Cut into cubes and incorporated cold, it creates pockets of steam in the dough, yielding a flaky, tender texture.
- Pumpkin puree
Provides moisture, color, and that unmistakable pumpkin flavor that makes these scones shine.
- Heavy cream
Adds richness and helps bind the dough, resulting in a tender crumb.
- Large egg
Contributes structure and moisture, ensuring the scones hold together beautifully.
- Vanilla extract
Enhances all the flavors with a sweet, fragrant note.
- Powdered sugar
Forms the base of the glaze, adding a smooth sweetness.
- Milk
Thins the glaze to just the right consistency for drizzling.
- Vanilla extract (for glaze)
Infuses the glaze with extra depth and aroma, tying it back to the scone’s interior flavors.
HOW TO MAKE BAKERY-STYLE PUMPKIN SCONES
Baking these pumpkin scones is a joyfully straightforward process that highlights simple techniques—whisking, cutting in butter, and folding—to transform ingredients into tender, flaky wedges. Follow these steps closely and you’ll end up with bakery-quality scones ready for glazing and savoring.
1. Preheat the oven to 400°F (200°C) and line a baking sheet with parchment paper to prevent sticking and ensure even browning.
2. In a large bowl, whisk together the all-purpose flour, granulated sugar, light brown sugar, baking powder, salt, cinnamon, nutmeg, ginger, and cloves until the mixture is uniform and fragrant.
3. Add the cold butter cubes to the flour mixture. Use a pastry cutter or two forks to cut the butter into the flour until the texture resembles coarse crumbs with pea-sized bits of butter.
4. In a separate bowl, whisk together the pumpkin puree, heavy cream, large egg, and vanilla extract until smooth and well combined.
5. Pour the wet ingredients over the dry ingredients and gently fold with a spatula until a soft dough forms, taking care not to overmix and toughen the scones.
6. Transfer the dough to a lightly floured surface and gently pat it into an 8-inch circle about 1 inch thick, maintaining even thickness for uniform baking.
7. Using a sharp knife or bench scraper, cut the circle into 8 equally sized wedges, wiping the blade clean between cuts for neat edges.
8. Place the scones on the prepared baking sheet, leaving space between each wedge for proper air circulation.
9. Bake for 12–15 minutes, or until the edges are lightly golden and the tops feel firm to the touch. Rotate the pan halfway through if your oven has hot spots.
10. Remove the scones from the oven and transfer to a wire rack to cool briefly while you prepare the glaze.
11. In a small bowl, whisk together the powdered sugar, milk, and vanilla extract until the glaze is smooth and pourable.
12. Drizzle the glaze over the cooled scones with a spoon, allowing it to set before serving for that perfect crackle.
SERVING SUGGESTIONS FOR BAKERY-STYLE PUMPKIN SCONES
Once your pumpkin scones are baked and glazed, it’s time to elevate each bite with creative serving ideas. These suggestions will help you turn a simple batch of scones into a memorable treat for yourself, family, or guests. From pairing beverages to adding fresh or savory accompaniments, you’ll discover new ways to showcase these moist, spice-filled wedges. Grab your favorite mug or platter, and let each serving suggestion guide you to the perfect cozy moment.
- Serve warm with a steaming cup of coffee or latte, letting the bitterness of the brew balance the sweetness of the scones.
- Pair with a spiced chai tea or a cinnamon-infused hot apple cider, enhancing the autumnal spice notes in every bite.
- Present alongside a bowl of fresh berries or sliced pears, adding a bright, juicy contrast to the rich pumpkin flavor.
- Create mini scone sandwiches by slicing each wedge in half and filling them with whipped cream cheese mixed with a hint of honey and a sprinkle of cinnamon.
HOW TO STORE BAKERY-STYLE PUMPKIN SCONES
Proper storage ensures your pumpkin scones stay as tender and flavorful as the day you baked them. Whether you’re saving leftovers for the next morning or preparing batches ahead of time, these methods will help maintain that bakery-fresh quality. Keep in mind that moisture and air exposure can affect texture, so use airtight containers or wraps for best results. Here are some options to consider:
- Room-Temperature Storage: Place cooled scones in an airtight container or wrap individually in plastic wrap. Store on the countertop for up to 2 days—perfect for enjoying warm scones fresh from home.
- Refrigeration: Layer scones between pieces of parchment paper in an airtight container and refrigerate for up to 5 days. Bring to room temperature or warm briefly in a low oven before serving.
- Freezing Unbaked: Arrange shaped scones on a baking sheet and freeze until firm. Transfer to a zip-top bag, freeze for up to 1 month, and bake from frozen—adding a few extra minutes to the baking time.
- Freezing Baked: Once fully cooled, wrap each scone in plastic wrap, then place in a freezer-safe container. Freeze for up to 1 month, and reheat in a warm oven or toaster oven to revive that just-baked texture.
CONCLUSION
From gathering simple pantry staples to savoring that first gooey bite, these bakery-style pumpkin scones offer both ease and delight for home bakers of all skill levels. You’ve learned how to marry warm spices, rich pumpkin, and buttery flakes into wedges of pure comfort, sprinkled with just the right amount of sweet glaze. Whether you serve them alongside your morning coffee, package them for a friend, or enjoy a quiet moment on the porch, these scones are a testament to the joy of baking. Keep this article handy—feel free to print it out or save it somewhere easy to find whenever you need that quick fall-inspired treat. And remember, below you’ll find a handy FAQ if you’re curious about substitutions or troubleshooting tips.
Thank you for allowing me to share this recipe with you. I hope you feel inspired to roll up your sleeves and bake a batch of these pumpkin scones soon. If you have any questions, comments, or feedback, please let me know—I’d love to hear how your scones turned out or help you troubleshoot any step along the way. Happy baking!
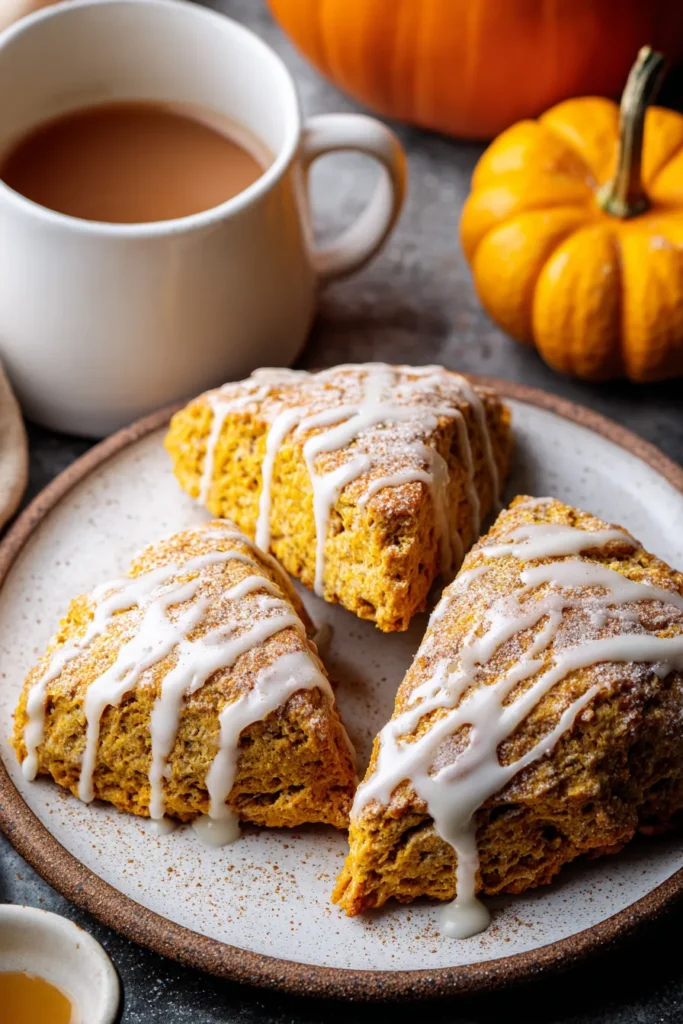

Bakery-Style Pumpkin Scones
Description
These bakery-style pumpkin scones are bursting with warm spices and rich pumpkin flavor, topped with a sweet glaze. Perfect for cozy mornings or an afternoon treat!
Ingredients
Instructions
-
Preheat the oven to 400°F (200°C) and line a baking sheet with parchment paper.
-
In a large bowl, whisk together the flour, granulated sugar, light brown sugar, baking powder, salt, cinnamon, nutmeg, ginger, and cloves.
-
Add the cold butter cubes to the flour mixture. Use a pastry cutter or two forks to cut the butter into the flour until the mixture resembles coarse crumbs.
-
In a separate bowl, whisk together the pumpkin puree, heavy cream, egg, and vanilla extract.
-
Pour the wet ingredients over the dry ingredients and gently fold together until a dough forms. Be careful not to overmix.
-
Transfer the dough to a lightly floured surface and gently pat it into an 8-inch circle, about 1 inch thick.
-
Using a sharp knife or a bench scraper, cut the circle into 8 equally-sized wedges.
-
Place the scones on the prepared baking sheet, leaving space between each one.
-
Bake in the preheated oven for 12-15 minutes, or until the scones are lightly golden and firm to the touch.
-
Remove from the oven and allow the scones to cool on a wire rack.
-
While they cool, make the glaze by whisking together the powdered sugar, milk, and vanilla extract in a small bowl.
-
Drizzle the glaze over the cooled scones with a spoon, allowing it to set before serving.
Note
- These scones pair wonderfully with a cup of tea or coffee for a cozy breakfast or snack.
- You can freeze the scones before baking for up to 1 month; just bake them straight from the freezer, adding a few minutes to the baking time.
- Adjust the spices to your taste, and feel free to add a pinch of cardamom for an additional layer of flavor.
- For a dairy-free option, substitute the butter and cream with coconut oil and coconut milk, respectively.

