

Authentic Italian Tiramisu combines velvety mascarpone and bold espresso-soaked ladyfingers into a luscious dessert that feels like a hug in every bite. This Intermediate-level dessert layers a silky custard made from egg yolks and sugar, whipped cream, coffee-dipped biscuits, and a dusting of cocoa powder for the perfect balance. Whether you’re impressing guests or treating yourself, this recipe’s all about simple techniques and big flavors. Ready to dive into a classic Italian indulgence? Let’s get started!
Key Ingredients
Before you begin assembling this dreamy tiramisu, here’s a quick rundown of what you’ll need and why each component matters:
- 6 egg yolks: Provide richness and structure to the creamy custard base.
- 100 grams granulated sugar: Sweetens and helps stabilize the egg yolk mixture when heated.
- 500 grams mascarpone cheese: Delivers that signature tangy, luxurious texture.
- 1 cup heavy cream: Whips into soft peaks to lighten the custard and add airiness.
- 200 ml strong brewed espresso, cooled: Infuses each ladyfinger with robust coffee flavor.
- 2 tablespoons Marsala wine: Adds subtle sweetness and depth to the coffee bath.
- 200 grams ladyfinger biscuits: Sponge-like base that soaks up espresso and provides delicate structure.
- Cocoa powder for dusting: Finishes with a bittersweet contrast and classic presentation.
How To Make Authentic Italian Tiramisu
Crafting this tiramisu is all about gentle techniques and careful layering. You’ll start by making a classic zabaglione custard over a bain-marie, blend in mascarpone and whipped cream, then assemble alternating layers of coffee-dipped ladyfingers and creamy filling. Follow each step closely to ensure custard silkiness and perfectly soaked biscuits, and you’ll be rewarded with a dessert that sets beautifully and melts on the tongue.
1. In a heatproof bowl, whisk the egg yolks and granulated sugar until pale and creamy, about 3–4 minutes of vigorous mixing.
2. Place the bowl over a pot of simmering water (creating a bain-marie) and continue whisking until the mixture thickens and ribbons form when the whisk is lifted.
3. Remove from heat and allow the zabaglione to cool slightly, ensuring it doesn’t scramble.
4. In a separate bowl, whip the heavy cream to soft peaks, lifting the whisk to check for gentle folds.
5. Gently fold the mascarpone cheese into the cooled egg yolk mixture until completely smooth and lump-free.
6. Carefully fold the whipped cream into the mascarpone mixture, using a spatula to maintain airiness and prevent deflation.
7. Combine the cooled espresso and Marsala wine in a shallow dish to create the coffee dipping bath.
8. Quickly dip each ladyfinger into the coffee mixture (1–2 seconds per side) and arrange a single layer in a rectangular serving dish.
9. Spread half of the mascarpone mixture evenly over the layer of dipped ladyfingers, smoothing the top with a spatula.
10. Repeat with another layer of dipped ladyfingers and the remaining mascarpone mixture for a two-tiered structure.
11. Cover the tiramisu with plastic wrap and refrigerate for at least 4 hours or overnight to let the flavors meld and the layers set.
12. Just before serving, dust the top generously with cocoa powder for that classic finishing touch.
Serving Suggestions
Tiramisu shines when presented thoughtfully—whether you’re hosting a dinner party or enjoying a cozy night in. These ideas will help you serve each slice like a pro:
- Serve in individual ramekins for an elegant, single-portion presentation that highlights each creamy layer.
- Pair with a shot of espresso or cappuccino to echo the dessert’s coffee notes and enhance the overall experience.
- Garnish each slice with fresh berries (strawberries or raspberries) for a pop of color and bright acidity.
- Add a few chocolate shavings on top of the cocoa dusting for an extra touch of decadence and texture.
Tips For Perfect Authentic Italian Tiramisu
Mastering tiramisu is all about precision and patience. Here are some friendly pointers to take your dessert from great to unforgettable:
- It’s essential to whisk the egg yolks over simmering water to avoid cooking them too quickly and achieve that silky custard consistency.
- Use full-fat mascarpone cheese for the richest and creamiest texture—lower-fat versions can make the filling overly loose.
- Allow the tiramisu to chill thoroughly so the flavors can meld and the layers firm up; rushed chilling can lead to sliding layers.
- Best enjoyed within two days for optimal freshness and taste, as the delicate ladyfingers can become too soft if stored longer.
How To Store It
Proper storage ensures your tiramisu remains luscious and flavorful even after making it ahead of time. Follow these methods to maintain its creamy texture and layered structure:
- Refrigerate in an airtight container or covered dish to keep moisture in and prevent fridge odors from seeping in.
- Seal Tightly by pressing plastic wrap directly onto the cocoa-dusted surface to avoid a dry top layer.
- Consume Within Two Days for the best balance of firmness and flavor; beyond that, the ladyfingers can turn overly soggy.
- Avoid Freezing as ice crystals can damage the delicate mascarpone and whipped cream, leading to a grainy texture upon thawing.
Frequently Asked Questions
Here are quick answers to common tiramisu queries:
- How long does it take to prepare this recipe?
The active preparation time is about 30 minutes, which covers whisking the egg yolks over simmering water, whipping the cream, folding in the mascarpone, dipping ladyfingers, and layering. After assembly, the tiramisu must chill in the refrigerator for at least 4 hours (ideally overnight) so the flavors meld and the layers set properly.
- What is the purpose of whisking the egg yolks over simmering water?
Gently whisking the egg yolk and sugar mixture over simmering water, known as a bain-marie, heats the mixture slowly to the point where it thickens and forms ribbons without scrambling the eggs. This creates a safe, silky custard base and ensures the sugar fully dissolves.
- Why is it important to use full-fat mascarpone cheese?
Full-fat mascarpone has a higher butterfat content, which yields the richest, creamiest texture and helps the tiramisu hold its shape. Lower-fat alternatives contain more water and can cause the filling to become runny and less stable when you cut into it.
- How can I prevent the ladyfingers from becoming too soggy?
Quickly dip each ladyfinger into the espresso-Marsala mixture for just one or two seconds per side, allowing it to absorb flavor without becoming oversaturated. Arrange them promptly in the dish—overly soaked biscuits will lose structure and make the dessert too wet.
- Can I make the tiramisu a day in advance?
Yes. After assembling, cover the tiramisu tightly with plastic wrap and refrigerate it for up to two days. Chilling overnight gives the best flavor and texture, but consuming within two days ensures optimal freshness and prevents the ladyfingers from becoming overly softened.
- How should I store any leftovers, and can I freeze tiramisu?
Store leftovers covered in the refrigerator and consume within two days for peak taste. Freezing is not recommended, as ice crystals can alter the creamy texture of the mascarpone and whipped cream, leading to a grainy consistency when thawed.
What Makes This Special
This Authentic Italian Tiramisu is special because it marries creamy mascarpone and bold espresso-soaked ladyfingers into a melt-in-your-mouth experience that’s both timeless and indulgent. The velvety layers of custard and coffee-laced biscuits, finished with a perfectly balanced cocoa dusting, showcase why this Italian classic endures. Feel free to print and save this article for your next gathering or cozy night in. I’d love to hear your comments, questions, or any tweaks you discovered—let’s keep the conversation going!
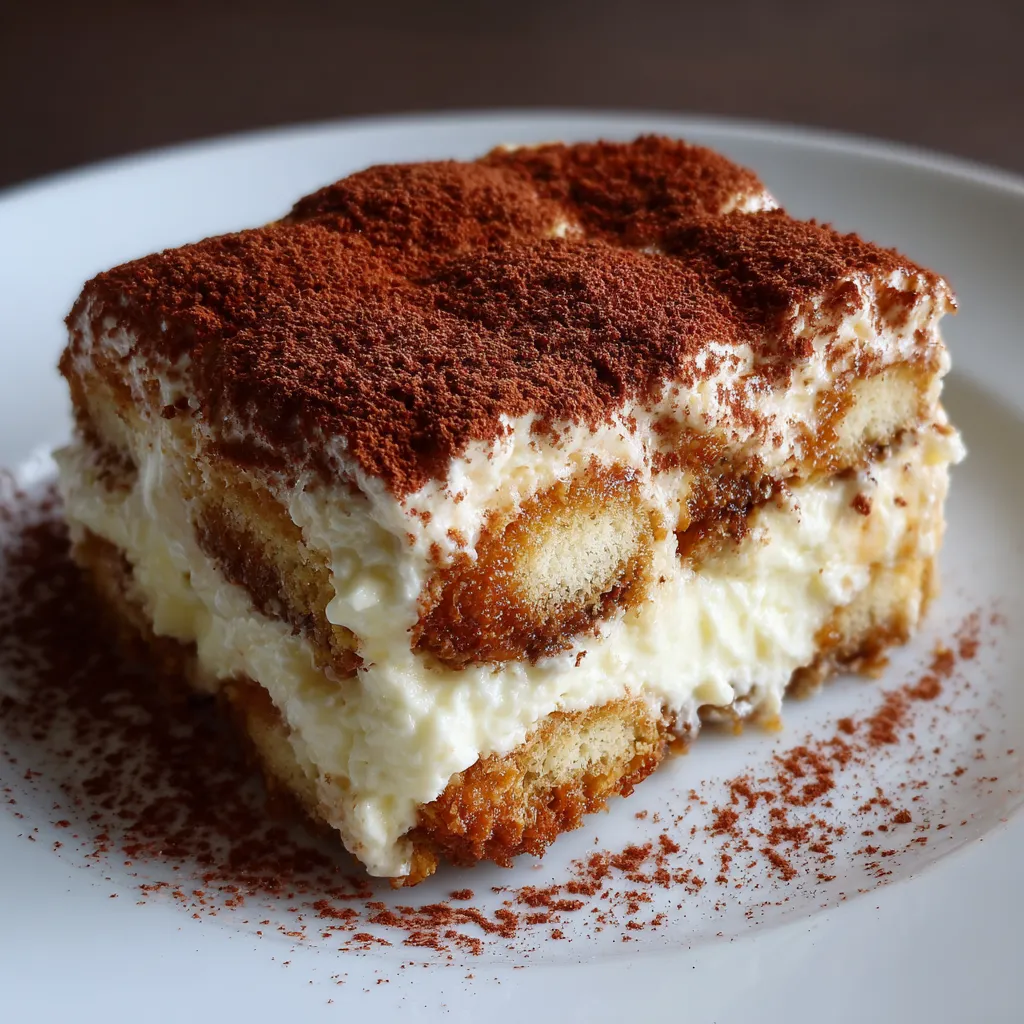

Authentic Italian Tiramisu
Description
Layers of creamy mascarpone and espresso-soaked ladyfingers meld into a plush, aromatic dessert crowned by a cocoa dusting for a perfectly balanced finish.
Ingredients
Instructions
-
In a heatproof bowl whisk the egg yolks and granulated sugar until pale and creamy.
-
Place the bowl over a pot of simmering water and continue whisking until the mixture thickens and ribbons form when the whisk is lifted.
-
Remove from heat and allow the mixture to cool slightly.
-
In a separate bowl whip the heavy cream to soft peaks.
-
Gently fold the mascarpone cheese into the cooled egg yolk mixture until smooth.
-
Carefully fold the whipped cream into the mascarpone mixture until fully combined.
-
Combine the cooled espresso and Marsala wine in a shallow dish.
-
Quickly dip each ladyfinger into the coffee mixture and arrange a single layer in a rectangular serving dish.
-
Spread half of the mascarpone mixture evenly over the layer of dipped ladyfingers.
-
Repeat with another layer of dipped ladyfingers and the remaining mascarpone mixture.
-
Cover the tiramisu and refrigerate for at least 4 hours or overnight to set.
-
Just before serving dust the top generously with cocoa powder.
Note
- It’s essential to whisk the egg yolks over simmering water to avoid cooking them too quickly.
- Use full-fat mascarpone cheese for the richest and creamiest texture.
- Allow the tiramisu to chill thoroughly so the flavors can meld and the layers hold.
- Best enjoyed within two days for optimal freshness and taste.

