

A warm, golden snack that feels like a hug in pastry form is waiting for you in these Apple Pie Cups. Tender, diced apples are tossed with a blend of sugar, cinnamon, nutmeg, and a hint of flour, creating a luscious, spiced filling that practically melts in your mouth. As you bite into the buttery crescent dough shell, you’ll discover pockets of sweet apple goodness drizzled with a brown sugar–butter glaze that adds the perfect caramel-like finish. These bite-sized treats are perfectly portable—ideal for lunchboxes, picnics, or simply sneaking one (or three) when nobody’s watching.
Whether you’re an experienced baker or just getting started, this recipe is a breeze. It takes less than half an hour of hands-on time, and the results look as impressive as they taste. I still remember the first time I whipped these up on a crisp fall afternoon: my kitchen turned into a cozy haven, filled with hints of fruity sweetness and comforting spice. Before I knew it, friends and family were crowding around the counter, plates in hand, eager to try that first warm, flaky cup. Trust me, this is the kind of recipe that becomes part of your regular rotation—because who doesn’t want a little slice of apple pie without the fuss of rolling out a full crust?
KEY INGREDIENTS IN APPLE PIE CUPS
Before we dive into the baking fun, let’s talk about the stars of the show. Each ingredient plays its part in building that irresistible combination of flavors and textures.
- Apples
Juicy and slightly tart, these peeled and diced fruits provide the tender filling. Their natural sweetness and firmness hold up beautifully when baked, giving you perfectly soft bites.
- Lemon juice
A splash of lemon juice brightens the apple filling and prevents oxidation, keeping the fruit vibrant and fresh-looking until it’s time to bake.
- Granulated sugar
This classic sweetener balances the tartness of the apples and helps draw out their juices, creating a saucy interior that’s rich and flavorful.
- Cinnamon
Warm and aromatic, cinnamon infuses each bite with that signature fall spice, complementing the apple’s natural flavor.
- Nutmeg
Just a whisper of nutmeg adds complexity and depth, enhancing the overall spice profile without overpowering the sweetness.
- All-purpose flour
A light dusting of flour helps thicken the apple juices as they bake, ensuring a non-runny filling that holds its shape inside the crescent shell.
- Crescent roll dough
This buttery dough forms the crispy, flaky cup that cradles the apple filling. Its convenience speeds up the process—no rolling pin required!
- Melted butter
Brushed over the dough, the butter melts into the crust during baking, adding richness and that irresistible golden sheen.
- Brown sugar
Mixed with the butter, brown sugar creates a caramel-like drizzle that bakes into a sticky, sweet topping, giving a perfect finishing touch.
- Vanilla extract
A hint of vanilla rounds out the flavors, bringing a subtle floral note that ties the sweet and spicy elements together.
HOW TO MAKE APPLE PIE CUPS
Let’s walk through the steps to assemble these delightful cups. You’ll see how simple techniques and a few pantry staples come together to create a homemade dessert that feels anything but ordinary.
1. Preheat your oven to 375°F (190°C) and lightly grease a muffin tin to prevent sticking. Getting the temperature right ensures a crisp, golden crust.
2. In a medium bowl, combine the diced apples and lemon juice to prevent browning. This step keeps the fruit looking fresh and vibrant.
3. Add the granulated sugar, cinnamon, nutmeg, and flour to the apple mixture. Stir until every piece of apple is evenly coated in the spiced mixture.
4. Roll out the crescent roll dough on a clean surface and cut each sheet into squares slightly larger than the muffin openings. This creates just enough overhang to form a sturdy cup.
5. Press each dough square gently into the muffin tin, molding it into a cup shape with your fingers, making sure the edges are snug against the sides.
6. In a small bowl, mix the melted butter, brown sugar, and vanilla extract until smooth, creating a rich, caramel-like drizzle.
7. Spoon the apple mixture into each dough-lined cup, filling them almost to the brim for a generous portion of filling.
8. Drizzle the butter and brown sugar mixture evenly over the apple filling in each cup, ensuring every bite has that sweet glaze.
9. Bake in the preheated oven for 15–18 minutes, or until the dough is a deep golden brown and the filling is bubbling around the edges.
10. Allow the cups to cool in the pan for a few minutes before transferring them to a wire rack to cool completely, so they set up nicely without falling apart.
SERVING SUGGESTIONS FOR APPLE PIE CUPS
When it comes to serving these apple pie cups, presentation and accompaniments can elevate them from simple treats to showstopping desserts. Whether you’re hosting a brunch, packing a picnic, or just treating yourself, here are some delightful ways to enjoy them:
- Top each cup with a scoop of vanilla ice cream right before serving. The contrast between warm pastry and cold, creamy ice cream creates a dreamy texture and temperature play.
- Add a dollop of homemade whipped cream flavored with a hint of cinnamon or maple syrup. The light, airy cream balances the dense, spiced filling.
- Sprinkle chopped walnuts or pecans over the glaze for a crunchy twist. Toast the nuts lightly beforehand to bring out their natural oils and deepen the flavor.
- Serve alongside a steaming mug of hot apple cider or coffee. The cozy drink complements the sweet-spicy notes and makes for a comforting pairing on a chilly day.
HOW TO STORE APPLE PIE CUPS
Storing your apple pie cups properly ensures they stay just as delicious the next day—or even a few days later. Whether you’ve made a big batch for a party or simply want to enjoy leftovers, follow these tips to maintain their texture and flavor:
- Refrigerate in an airtight container once completely cooled. Chilling prevents moisture loss and keeps the filling from getting soggy. They’ll stay fresh for up to three days.
- For longer storage, freeze the cups on a baking sheet until firm, then transfer them to a freezer bag. Freeze for up to one month, and thaw in the fridge before reheating.
- To reheat, place the cups on a baking sheet and warm at 350°F (175°C) for 5–7 minutes. This restores their fresh-baked crispiness without drying out the filling.
- If you plan to enjoy them within a few hours of baking, keep the cups covered with plastic wrap at room temperature. This short-term method preserves the buttery crust and juicy filling.
CONCLUSION
Thank you for joining me on this cozy baking adventure! We’ve covered everything from the simple yet flavorful ingredients to the step-by-step method for creating these charming Apple Pie Cups. Along the way, I’ve shared tips for preventing apple browning, glaze techniques for that irresistible caramel finish, and clever storage tricks to keep your treats tasting fresh. You can print this article and save it for later, whether you’re planning a fall fête or craving a sweet snack on a quiet afternoon. Be sure to check out the FAQ below for answers to common questions and troubleshooting pointers.
I hope this recipe inspires you to roll up your sleeves and dive into the joy of home baking. If you give these Apple Pie Cups a try, I’d love to hear how they turned out: Did you add your favorite nuts? How did the ice cream pairing go? Drop your comments, questions, or feedback below—whether you need help along the way or simply want to share your delicious results. Happy baking, and may every bite bring a bit of warmth and sweetness to your day!
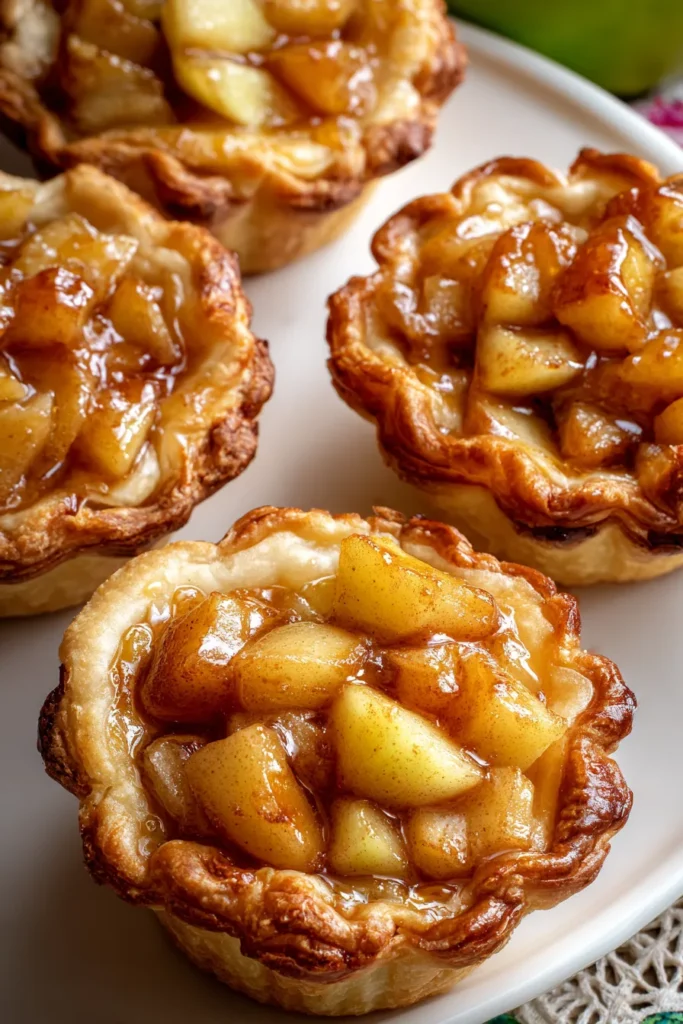

Apple Pie Cups
Description
These scrumptious Apple Pie Cups combine tender, spiced apples with a buttery crescent dough shell, making them an irresistible treat anytime. Just the right size for sharing or enjoying solo!
Ingredients
Instructions
-
Preheat your oven to 375°F (190°C) and lightly grease a muffin tin.
-
In a medium bowl, combine the diced apples and lemon juice to prevent them from browning.
-
Add the granulated sugar, cinnamon, nutmeg, and flour to the apple mixture. Stir until the apples are well-coated.
-
Roll out the crescent roll dough and cut each sheet into squares slightly larger than the muffin openings.
-
Press each dough square gently into the muffin tin, forming a cup shape.
-
In a small bowl, mix the melted butter, brown sugar, and vanilla extract until smooth.
-
Spoon apple mixture into each dough-lined cup, filling them almost to the brim.
-
Drizzle the butter and brown sugar mixture evenly over the apple filling in each cup.
-
Bake in the preheated oven for 15-18 minutes, or until the dough is golden brown.
-
Allow to cool in the pan for a few minutes before transferring to a wire rack to cool completely.
Note
- You can sprinkle chopped walnuts or pecans on top for added crunch.
- Serve with vanilla ice cream or whipped cream for an extra treat.
- Experiment with different apple types for varied flavors and textures.
- Store leftovers in an airtight container in the refrigerator for up to 3 days.
- Reheat in the oven for a few minutes to regain their fresh-baked texture.

