

This creamy mint-infused fudge marries smooth semisweet chocolate with refreshing pops of chopped Andes mints, creating a bite-sized treat that's impossible to resist. Velvety condensed milk blends seamlessly with melted chocolate, while just a hint of vanilla rounds out the flavors. Whether you need a holiday showstopper or a quick weekday pick-me-up, this fudge comes together in minutes and chills to perfection, with no baking required. Stick around, and I’ll guide you step by step through making, serving, and storing this delicious mint-chocolate delight.
Key Ingredients
Before diving in, here’s a quick look at the simple ingredients that make this fudge so irresistible and minty-fresh.
- 2 cups semisweet chocolate chips: Provides a rich, smooth chocolate base that melts into a creamy fudge foundation.
- 1 can (14 ounces) sweetened condensed milk: Adds sweetness and helps achieve that velvety, fudgy texture with no graininess.
- 2 tablespoons butter: Enriches the fudge, giving it a glossy finish and improved mouthfeel.
- 1 teaspoon vanilla extract: Enhances the chocolate flavor and adds aromatic depth.
- 1 cup chopped Andes mints or chocolate mint candies: Delivers cooling mint bursts throughout every square.
- 1/4 teaspoon salt: Balances the sweetness and intensifies the chocolate notes.
- Optional: Additional Andes mints for garnish: Offers extra color and crunch while showcasing the minty theme.
How To Make Andes Mint Fudge
Crafting this mint-chocolate delight is as easy as melting, stirring, folding, and chilling—no oven required. You’ll see how low heat, constant stirring, and careful folding ensure a smooth, glossy fudge with evenly distributed mint pieces. Ready to turn these simple ingredients into melt-in-your-mouth squares? Follow each step below for flawless results.
1. Prepare the pan: Line a 9×9-inch baking dish with parchment paper, leaving a 1–2-inch overhang on all sides for easy removal later, then set aside.
2. Melt the base: In a medium saucepan, combine semisweet chocolate chips, sweetened condensed milk, and butter. Place over low heat and stir frequently for 5–7 minutes, until the mixture is smooth and fully combined.
3. Add flavorings: Remove the saucepan from heat and whisk in vanilla extract and salt until evenly incorporated.
4. Fold in mints: Gently fold in the chopped Andes mints with a spatula, making sure the mint pieces are evenly distributed throughout the chocolate.
5. Transfer to pan: Pour the fudge mixture into the prepared baking dish. Use a spatula to spread it evenly and smooth out the top.
6. Garnish (optional): Sprinkle additional chopped Andes mints over the surface, pressing them lightly into the fudge for a decorative finish.
7. Chill: Cover the dish with plastic wrap and refrigerate for at least 2 hours, or until the fudge is set and firm to the touch.
8. Cut and serve: Lift the fudge from the pan using the parchment overhang, place on a cutting board, and cut into bite-sized squares.
9. Store: Serve immediately or keep in an airtight container in the refrigerator for up to two weeks.
Serving Suggestions
While this fudge is delicious on its own, serving it with a few simple touches can take it to the next level. Whether you’re hosting a holiday party, gifting treats to neighbors, or just enjoying a cozy night in, these ideas will help you present your Andes Mint Fudge beautifully and enhance its minty-chocolate charm. Here are a few favorite ways to serve and showcase this crowd-pleasing dessert:
- Festive dessert platter: Arrange fudge squares on a decorative plate with fresh mint sprigs and a dusting of cocoa powder for an elegant holiday display.
- Gifting packs: Layer pieces in small cello bags tied with a ribbon and include a sprig of mint or a custom tag for a thoughtful homemade gift.
- Hot beverage pairing: Serve alongside mugs of hot cocoa or coffee—let guests dunk a square for an extra mint-chocolate boost.
- Elegant dessert bar: Mix fudge squares with a selection of chocolates, candies, and nuts on a tiered stand to create a DIY treat station at gatherings.
Tips For Perfect Andes Mint Fudge
With these tips in hand, your Andes Mint Fudge will come out flawlessly every time. The beauty of this recipe lies in its versatility and ease—whether you’re planning ahead for a holiday, seeking textural contrast, or aiming to impress with homemade gifts, a few simple tweaks can make a world of difference. Read on for smart ways to extend shelf life, experiment with mix-ins, scale up the batch, and package your mint-chocolate squares stylishly.
- Freezer-friendly prep: Freeze fudge squares in a sealed container for up to three months, then thaw in the fridge for a quick make-ahead dessert.
- Texture twists: Stir in crushed nuts or drizzle melted white chocolate over the top to add crunch and visual contrast.
- Easy doubling: Double all ingredients and spread in a larger (9×13-inch) pan—chill and cut times remain the same.
- Gorgeous gifting: Cut into smaller bites, layer between parchment sheets, and package in boxes or mason jars for thoughtful presents.
How To Store It
Keeping your Andes Mint Fudge fresh and flavorful is straightforward, and a few best practices will preserve that creamy texture and minty snap. Proper wrapping and container selection not only prevent drying out but also avoid absorbing unwanted fridge odors. Whether you plan to enjoy it over the next week or freeze for later, these storage methods will ensure every bite tastes as good as freshly made:
- Airtight container in the fridge: Store fudge squares in a single layer or place parchment paper between layers to prevent sticking, then seal an airtight container; keeps fresh for up to two weeks.
- Freezer storage: Individually wrap squares in plastic wrap, then place in a sealed freezer bag or container; fudge will last up to three months and can be thawed in the refrigerator.
- Parchment-lined layers: Alternate fudge pieces and parchment paper in your storage container to maintain square integrity and simplify serving.
- Room temperature (short term): For the first day, keep covered at room temperature away from heat sources; ideal for party displays but use chilled storage afterward.
Frequently Asked Questions
Got questions? Here are some quick answers to the most common queries about making and storing your Andes Mint Fudge:
- How long does it take to prepare and set Andes Mint Fudge?
A: Active preparation time is about 10–15 minutes, which includes melting the chocolate mixture and folding in the mints. After pouring into the pan, allow at least 2 hours in the refrigerator for the fudge to firm up before cutting and serving.
- Can I use a different type of mint chocolate or adjust the mint flavor intensity?
A: Yes. You can substitute peppermint chocolate chips or chopped York peppermint patties for Andes mints. If you prefer a more subtle mint flavor, reduce the chopped mints by 2–3 tablespoons. For extra mintiness, swirl in a quarter cup of melted white chocolate mixed with a few drops of peppermint extract before chilling.
- How do I ensure a smooth, creamy texture without graininess?
A: Melt the chocolate chips, condensed milk, and butter over low heat, stirring constantly to prevent scorching. Remove from heat as soon as it’s smooth, then stir in vanilla and salt off the burner. Avoid overheating, which can cause the chocolate to seize or become grainy.
- What is the best way to store and how long will the fudge stay fresh?
A: Store the fudge in an airtight container in the refrigerator for up to two weeks. To prevent sticking, place parchment or wax paper between layers. For longer storage, freeze the fudge squares in a sealed freezer bag for up to three months; thaw in the refrigerator before serving.
- Can I double the recipe, and what adjustments are needed?
A: You can double all ingredients and use a larger pan (such as a 9×13-inch dish). Keep the layering and chilling time the same, but allow a few extra minutes for the melted mixture to combine fully. Cutting time may increase slightly once set.
- Are there any variations or add‐ins I can try?
A: Yes. Stir in up to ½ cup of chopped nuts (like pistachios or almonds) for crunch, or drizzle melted white or dark chocolate over the top for contrast. You can also fold in dried cranberries for a festive twist or sprinkle sea salt on top before chilling.
- How should I prepare the pan to make removing the fudge easier?
A: Line the pan with parchment paper, leaving a 1–2-inch overhang on all sides. After the fudge is fully set, use the overhang to lift it from the pan in one piece. Place it on a cutting board, trim edges if desired, and cut into squares.
What Makes This Special
There’s a reason this Andes Mint Fudge has become a go-to no-fuss dessert: it combines velvety chocolate, refreshing mint, and effortless prep in one bite. The secret lies in the creamy, sweetened condensed milk base, the bold mint crunch, and the foolproof chilling method that even baking novices can master. Feel free to print this article and save it for holiday seasons or last-minute gatherings—your future self will thank you. If you give it a whirl, leave a comment below sharing your favorite twist, or drop any questions you might have. I can’t wait to hear how it turns out!
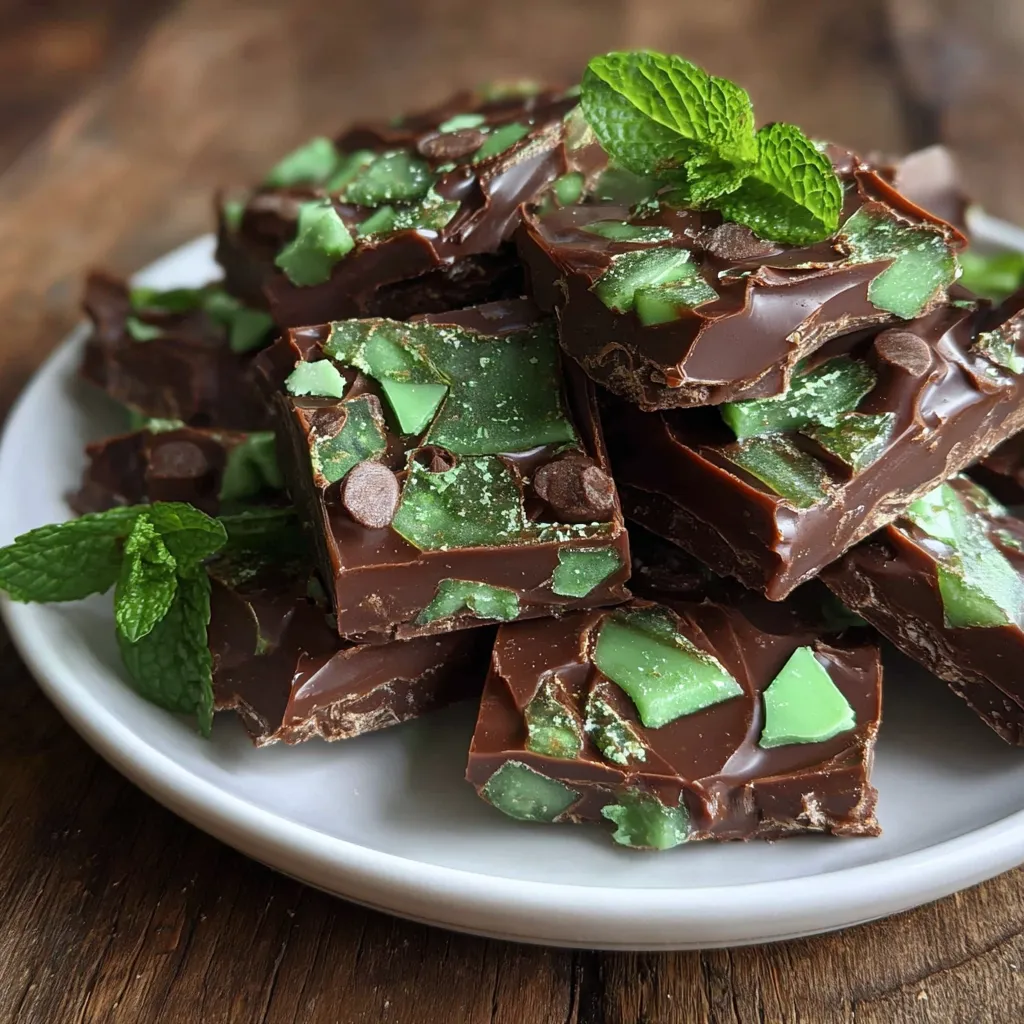

Andes Mint Fudge
Description
A rich, velvety fudge base swirled with chopped Andes mints, offering a cooling mint burst in every bite. Smooth chocolate, a hint of vanilla, and a satisfying snap make this treat impossible to resist.
Ingredients
Instructions
-
Line a 9x9-inch baking dish with parchment paper, leaving some overhang for easy removal later. Set aside.
-
In a medium saucepan, combine the semisweet chocolate chips, sweetened condensed milk, and butter. Place the saucepan over low heat and stir frequently until the mixture is smooth and fully combined. This should take about 5-7 minutes.
-
Remove the saucepan from heat and stir in the vanilla extract and salt. Mix well.
-
Gently fold in the chopped Andes mints, making sure they are evenly distributed throughout the chocolate mixture.
-
Pour the fudge mixture into the prepared baking dish. Use a spatula to spread it evenly, smoothing out the top.
-
If desired, add additional chopped Andes mints on top for garnish, pressing them slightly into the fudge.
-
Cover the dish with plastic wrap and refrigerate for at least 2 hours, or until the fudge is set and firm to the touch.
-
Once set, lift the fudge from the pan using the overhanging parchment paper and transfer it to a cutting board. Cut it into bite-sized squares.
-
Serve immediately or store the fudge in an airtight container in the refrigerator for up to two weeks.
Note
- The fudge can be frozen for longer storage, making it a great make-ahead treat for special occasions.
- Experiment by adding crushed nuts or a drizzle of white chocolate for added texture and flavor.
- This recipe can be easily doubled; just use a larger baking dish for the increased quantity.
- Perfect for gifting, the fudge can be cut into smaller pieces and packaged beautifully to share with friends and family.

