
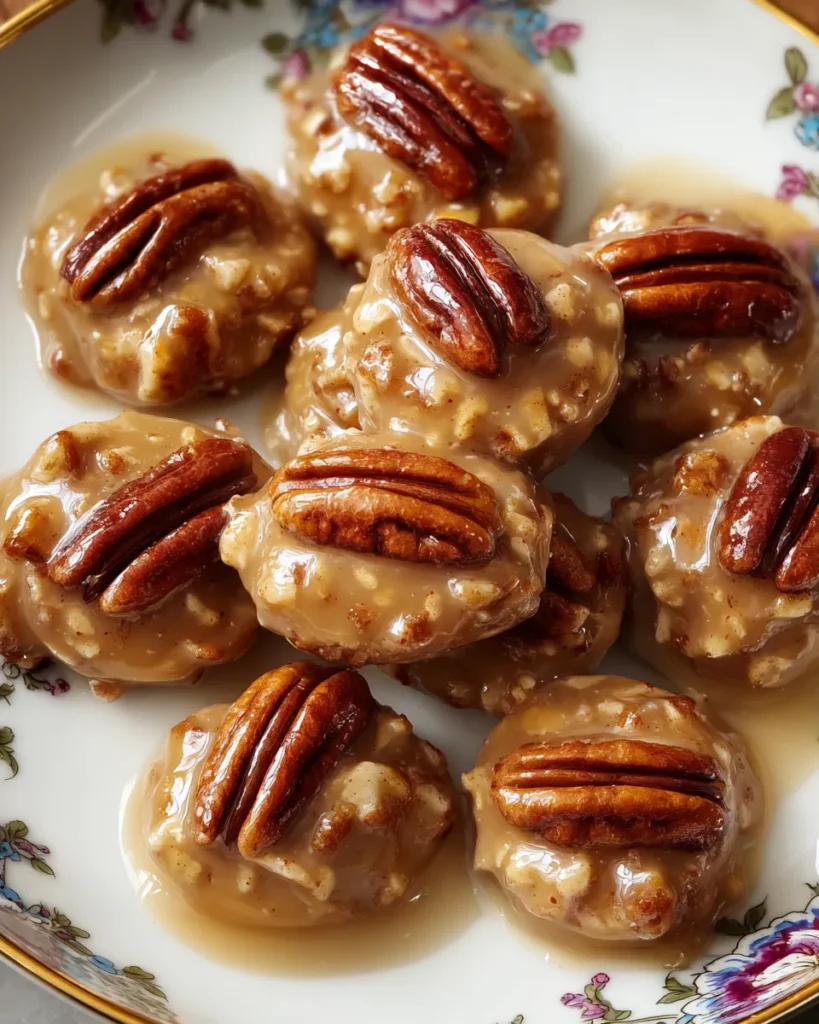
Vanilla pecan pralines are a celebration of sugar, spice, and everything nice, all rolled into one sweet, crunchy bite. These treats take you on a journey straight to the heart of Southern kitchens, where afternoon chats and warm smiles go hand in hand with homemade candy. Each praline starts as a golden, bubbling pot of caramelized sugars, rich butter, and creamy heavy cream. The moment you stir in pure vanilla extract, the scent unfolds like a gentle hug, inviting you in to savor every nuance of that sweet, floral aroma. Then come the pecans—roasted, earthy, and ready to provide a satisfying crunch that contrasts beautifully with the melt-in-your-mouth caramel. It’s the ultimate marriage of textures and tastes, where silky sweetness meets toasty nuttiness in perfect harmony.
Beyond the ingredients, making vanilla pecan pralines is an experience that connects you to generations of candy makers who perfected this confection long before temperature-controlled ovens and fancy gadgets existed. You’ll feel that same sense of wonder as you watch the mixture transform—first bubbling gently, then thickening into ribbons of glossy caramel. Adding baking soda creates tiny air pockets that give each praline a lighter, creamy texture as it sets. And when you spoon out individual mounds of the mixture onto a baking sheet, you’re not just forming candy; you’re crafting moments to share. Whether you’re teaching a friend to stir without stirring too much or simply enjoying the comforting hum of sugar cooking on the stovetop, these pralines are more than a dessert—they’re a memory in the making.
Before diving into the cooking process, let’s appreciate the magic each ingredient brings. Every element in this recipe plays a vital role in flavor, texture, and appearance. From the foundational sweetness of sugar to the nutty crunch of pecans, here’s how these ingredients come together to create heavenly homemade pralines.
The backbone of our candy, providing the crystalline sweetness and structure. As it melts and caramelizes, it forms the golden base that holds the praline together.
Adds a buttery depth with its molasses content, enhancing the caramel notes and contributing moisture for a chewier texture in each bite.
Introduces rich creaminess and helps slow the crystallization of sugars, ensuring your pralines end up smooth rather than grainy.
Lends a silky mouthfeel and prevents the sugar mixture from sticking to the pan. It also enriches the flavor without overwhelming the vanilla.
Balances the sweetness, sharpening flavors and making that vanilla pop. Even a hint of salt turns this treat from overly sweet to perfectly balanced.
The signature crunch. Their natural, toasty flavor pairs impeccably with the sweet, creamy caramel and adds satisfying texture.
Imparts warm, floral notes that elevate the caramel from ordinary to extraordinary, weaving complexity into every bite.
Reacts to create tiny air bubbles, giving the pralines a light, slightly porous structure once set, making them irresistibly tender.
Crafting these pralines is a joyful process that invites you to pay attention and savor every step. From carefully measuring ingredients to watching the sugar mixture bubble to the perfect stage, this recipe transforms simple pantry staples into elegant homemade candy. Follow each step closely, and you’ll end up with batches of gleaming, vanilla-scented pralines that are as delightful to look at as they are to eat.
1. Gather all ingredients and utensils needed for the recipe to ensure a smooth cooking process. Lay out measuring cups, a heavy saucepan, a candy thermometer, and a lined baking sheet so you’re ready for each rapid change in texture and temperature.
2. In a medium-sized heavy saucepan, combine the granulated sugar, brown sugar, heavy cream, unsalted butter, and salt. Use a wooden spoon or heatproof spatula to gently mix until the dry ingredients are evenly coated.
3. Place the saucepan over medium heat and stir the mixture until the sugars dissolve and the butter is completely melted. This gentle stirring prevents scorching and ensures a uniform caramel base.
4. Bring the mixture to a gentle boil, then reduce heat to medium-low and allow it to simmer without stirring for about 5–7 minutes, or until the mixture reaches the soft ball stage (235°F–240°F on a candy thermometer). This stage is critical for achieving the correct set and texture.
5. Carefully add the pecan halves to the mixture and stir to combine, making sure each nut is coated in the glossy caramel.
6. Remove the saucepan from heat and quickly stir in the vanilla extract and baking soda. The mixture may bubble up when you add the baking soda, so be cautious and stir briskly to distribute the ingredients evenly.
7. Allow the mixture to cool for about 5–10 minutes until it thickens slightly but remains pourable. This resting time helps the pralines hold their shape without sticking excessively.
8. Spoon dollops of the mixture onto the lined baking sheet, spacing them a couple of inches apart as they will spread a bit. For uniform pralines, use a cookie scoop or two spoons for each mound.
9. Let the pralines sit at room temperature until they cool and harden completely, which may take about 30 minutes. Avoid moving the sheet during this time to prevent misshapen candies.
10. Once hardened, gently lift the pralines off the baking sheet and store in an airtight container for up to a week, ensuring they stay crisp and fresh.
Serving these rich, creamy pralines is a chance to showcase your creativity and highlight their irresistible flavor. Whether you’re enjoying them solo with a warm beverage or presenting them to guests, these ideas will help you elevate the experience and create beautiful displays that match the praline’s charm.
Proper storage ensures your pralines remain perfectly crisp and retain their full flavor long after you’ve made them. Considering their high sugar content, these candies can attract moisture if not stored correctly, which may soften their texture. Follow these guidelines to maintain that signature crunch and buttery sweetness.
There you have it: a complete guide to creating utterly delicious vanilla pecan pralines that will quickly become a favorite in your dessert lineup. From the first stirring of granulated and brown sugar in a heavy saucepan to the final dollop on a lined baking sheet, you’ve learned how each ingredient and technique plays a vital role in building flavor, texture, and visual appeal. These pralines capture the essence of Southern hospitality—warmth, sweetness, and a touch of indulgence—offering a treat that’s perfect for gifting, sharing, or savoring all by yourself. Feel free to toast the pecans for a richer nuttiness, experiment with spices like cinnamon, or even add a drizzle of melted chocolate to make the presentation pop.
This article is designed to stand the test of time, so go ahead and print it out or save it in your recipe collection for whenever a sweet craving strikes. You’ll also find a FAQ section below to address any lingering questions about temperature stages, ingredient substitutions, or troubleshooting tips. If you try this recipe, please leave a comment with your experience! Whether you nailed the perfect soft ball stage on your first go or you tweaked the flavors to make it uniquely yours, I’d love to hear how it turned out. Questions, suggestions, or stories from your kitchen adventures are always welcome—let’s keep the conversation sweet!
Experience the exquisite crunch of pecans enveloped in a creamy, caramelized vanilla blend. These pralines are a delightful treat that's hard to resist!

Ciao, beautiful souls! I'm Isabella Romano, and welcome to my kitchen where comfort meets creativity, and every recipe is designed to make your everyday cooking feel a little more special.