
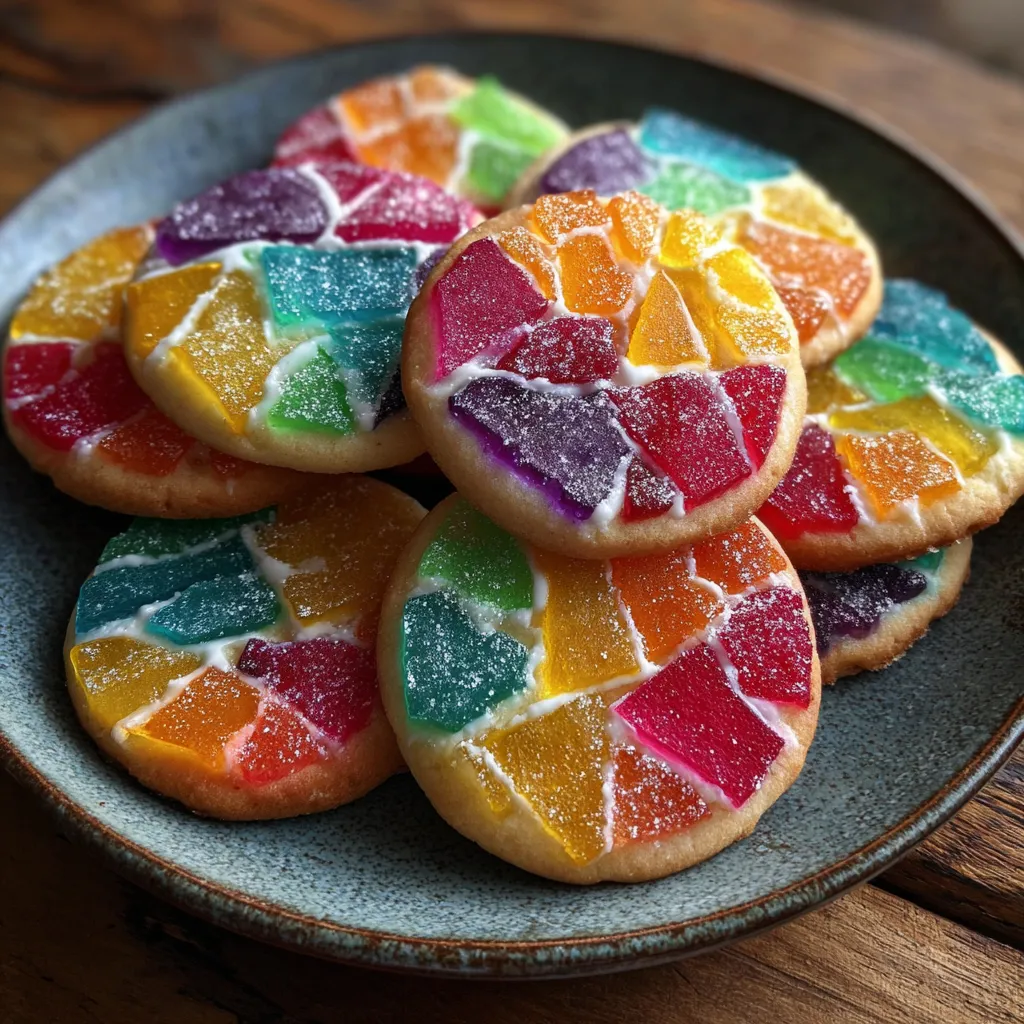
Bright shards of melted candy fill delicate sugar-cookie cutouts, creating translucent, jewel-like centers that shimmer in holiday lights. Crisp edges give way to buttery dough, and the vibrant panes glow like miniature stained-glass windows. Whether you’re looking to impress at a cookie swap or add a festive flair to your baking repertoire, these candy-filled delights are as fun to make as they are to eat—grab your cutters and let’s get decorating!
To build these colorful cutouts, you’ll need classic cookie staples and a handful of hard candies for the magical stained-glass effect:
Creating these enchanting cookies is all about a smooth dough, careful chilling, precise cutting, and a dazzling candy fill. First you’ll whip up a velvety sugar-cookie base, then let it rest in the fridge until firm. After rolling and cutting your favorite shapes, you carve little windows and fill them with finely crushed candy. A quick bake in a hot oven transforms shards into glossy, jewel-like panes. Gather your tools and let’s turn simple sugar cookie dough into holiday showstoppers!
1. In a large mixing bowl, cream the softened butter and granulated sugar with an electric mixer on medium speed for about 2–3 minutes, until the mixture is light and fluffy.
2. Beat in the egg and vanilla extract on low speed until the dough is smooth and fully combined.
3. In a separate bowl, whisk together the all-purpose flour, baking powder, and salt to ensure even leavening.
4. Gradually add the dry ingredients to the wet mixture, mixing on low just until the dough comes together—avoid overmixing.
5. Divide the dough into two equal portions, flatten each into a disk, wrap tightly in plastic wrap, and refrigerate for at least 1 hour until firm.
6. Preheat your oven to 350°F (175°C) and line baking sheets with parchment paper for easy cleanup.
7. On a lightly floured surface, roll out one dough disk to about ¼-inch thickness using a rolling pin.
8. Use cookie cutters (stars, hearts, or Christmas trees) to cut out shapes and place them on the prepared baking sheets.
9. In each cut-out, use a smaller cutter or a sharp knife to carve a window, then remove the inner piece.
10. Fill each window with finely crushed hard candies, adding just enough to cover the bottom without overflowing.
11. Repeat rolling, cutting, and candy filling with the second dough disk.
12. Bake for 8–10 minutes, until edges are lightly golden and the candy has melted into a smooth, glass-like pane.
13. Let the cookies rest on the baking sheets for 5 minutes to allow the candy to set, then transfer to wire racks to cool completely.
14. If you like extra sparkle, sprinkle colored sugar over the warm cookies for a festive finish.
These glowing cookies are a feast for the eyes and taste buds. Whether you’re hosting a gathering or gifting neighbors, presentation takes them from charming to unforgettable. Mix shapes and colors, and consider pairing with warm drinks or assembling a DIY decorating station. Here are four fun ways to showcase your handiwork:
Mastering stained glass cookies is easier than you think—just follow a few simple tricks for flawless results. Make sure your dough is well-chilled so the shapes hold crisp edges, and crush candies to a uniform size for smooth melting. Thicker window borders keep melted candy contained, while a dusting of colored sugar or a swirl of icing adds holiday flair. Below are key pointers to help you bake like a pro:
After all that sparkle, you’ll want to keep these cookies looking and tasting fresh. Proper storage prevents the candy centers from sweating and the edges from softening. Whether you’re prepping gifts in advance or saving leftovers, here’s how to maintain the magic:
Got questions? We’ve got answers to common curveballs so your cookies turn out perfect every time.
From start to finish, you’ll need about 1 hour and 45 minutes. That includes 15–20 minutes to cream the butter and sugar, mix the dough, and roll it out, 1 hour to chill the dough, 10–15 minutes to cut shapes and fill them with crushed candy, and 8–10 minutes per batch in the oven. Cooling on the baking sheets takes another 5 minutes, plus about 10 minutes on wire racks.
Place the candies in a heavy-duty resealable plastic bag and wrap it in a kitchen towel. Use a rolling pin or meat mallet to gently pound the candies until they form a mix of fine granules and small pieces. Aim for uniformly small bits so they melt evenly and don’t overflow the cookie windows. Sifting the crushed candy through a fine mesh sieve helps separate any oversized chunks.
First, make sure your dough window edges are thick enough (about 1/8 inch) so they act as barriers. Fill each opening with just enough candy to cover the bottom without piling above the dough level. Bake on a flat, level baking sheet so the candy stays in its window. If you want multiple candy colors in a single shape, mix them sparingly and keep different colors slightly apart to reduce bleeding.
Yes. For the dough, shape it into disks, wrap tightly in plastic wrap, and freeze for up to 2 months. Thaw overnight in the refrigerator before rolling out. Baked cookies can be stored in an airtight container at room temperature for up to 5 days or frozen for up to 3 months; to freeze, layer them between sheets of parchment in a freezer-safe container. Thaw at room temperature before serving.
Store completely cooled cookies in an airtight container at room temperature. If you stack them, place parchment or wax paper between layers to protect the stained glass panels. They remain fresh for up to 5 days. To maintain crisp edges, avoid storing in humid conditions or the refrigerator.
Lower your oven rack to the center or just below center so heat distributes evenly. If the cookie edges are browning too quickly, reduce the oven temperature by 10–15°F and extend the baking time by 1–2 minutes. Keeping a close eye during the last few minutes of bake time will help you pull them out when edges are just lightly golden.
Absolutely. You can use any cookie cutter shapes—snowflakes, pumpkins, or even letters. Substitute almond or peppermint extract for vanilla to complement the candy flavors. Once cooled, you can pipe royal icing around the edges for extra detail or sprinkle colored sanding sugar on warm cookies for sparkle. Just be sure your decorative additions don’t cover the candy windows completely.
This recipe shines because it combines a buttery sugar-cookie base with luminous, candy-filled centers that captivate both kids and grown-ups. The simple dough freezes well, the crushed candies melt to a jewel-like finish, and decorating is half the fun. Print and save this guide for your next holiday bake, then share your triumphs (or troubleshooting tales) in the comments—questions and feedback are always welcome!
Bright shards of melted candy fill delicate sugar-cookie cutouts, creating translucent, jewel-like centers. Crisp edges give way to buttery dough, while colorful glassy panes shimmer in holiday lights.

Ciao, beautiful souls! I'm Isabella Romano, and welcome to my kitchen where comfort meets creativity, and every recipe is designed to make your everyday cooking feel a little more special.