
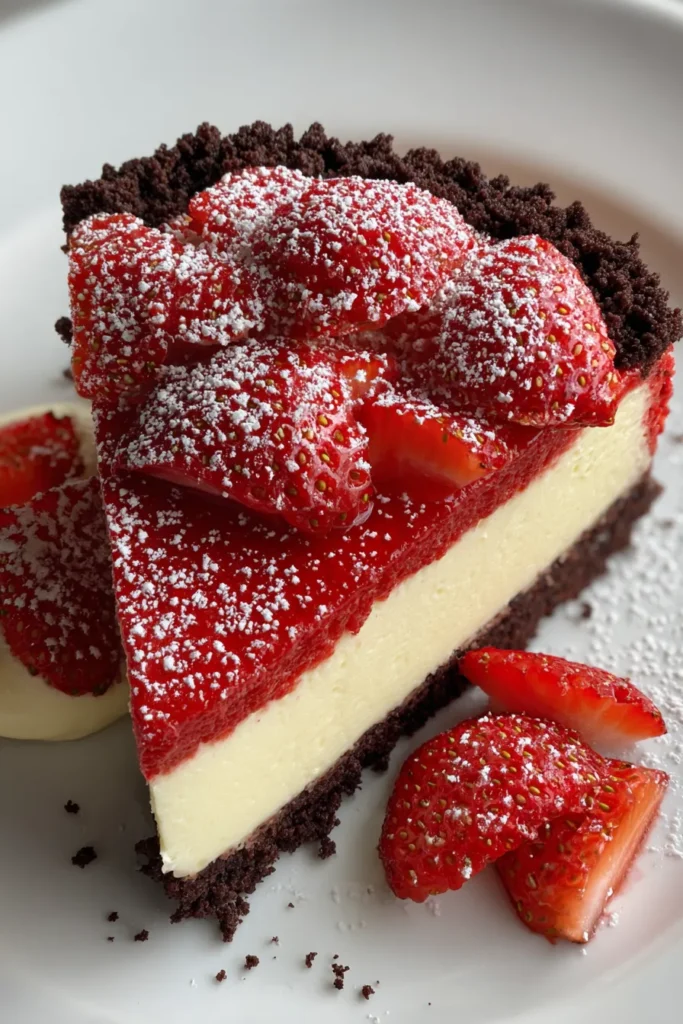
There’s something irresistibly enchanting about a dessert that blends the indulgence of cheesecake with the vibrant hues of red velvet and the fresh sweetness of strawberries. Every slice of this Red Velvet Strawberry Cheesecake tells a story: velvety cream cheese whispering hints of cocoa, a delicate tang dancing on your tongue, and a brilliant red swirl that makes your heart skip a beat. As home cooks, we know that desserts are more than just food—they’re memories in the making. Whether you’re celebrating a birthday, marking an anniversary, or simply treating yourself after a long week, this cheesecake stands center stage, dressed in a chocolate cookie crust and crowned with ruby-red berries.
Pull up a chair and let’s dive into why this recipe is a must-try. With an intermediate difficulty level and a total rest time of about 7 hours (1 hour of gentle oven cooling plus at least 6 hours of chilling), you’ll plan ahead, but the payoff is monumental. Preparation takes around 30 minutes, baking about an hour at 325°F (163°C), and yields a spectacular dessert that serves 12 slices at roughly 450 calories each. This is a dessert course masterpiece that combines classic cheesecake techniques with the fun twist of red velvet. I still remember the first time I watched the filling jiggle just right as I cracked the oven door—I felt like a pastry magician revealing a masterpiece. Now it’s your turn to bring this beauty into your kitchen and into the hearts of your friends and family.
Before you get your hands dirty, let’s meet the cast of characters that make this dessert shine. Each ingredient plays a vital role, from building a sturdy base to adding that pop of freshness on top.
Crafting this stunning dessert is easier than it looks. Follow these detailed steps and you’ll be rewarded with a cheesecake that’s as delicious as it is gorgeous.
1. Preheat your oven to 325°F (163°C). Grease a 9-inch springform pan thoroughly and line the bottom with parchment paper to ensure easy release.
2. In a small bowl, combine the chocolate cookie crumbs, melted butter, and 3 tablespoons of granulated sugar. Stir until every crumb is coated and the mixture holds together when pressed.
3. Press the crumb mixture firmly and evenly onto the bottom of the prepared pan, creating a solid crust layer. Transfer the pan to the refrigerator to firm up.
4. In a large mixing bowl, beat the softened cream cheese with 1¼ cups of granulated sugar until the mixture is completely smooth and creamy, scraping down the sides as needed.
5. Add the unsweetened cocoa powder and mix until fully incorporated, ensuring no streaks remain.
6. Crack in the eggs one at a time, beating well after each addition to maintain a silky, lump-free batter.
7. Gently fold in the sour cream, buttermilk, vanilla extract, white vinegar, and red food coloring, stirring just until the batter is evenly colored and smooth.
8. Pour the cheesecake filling over the chilled crust, then use a spatula to smooth the top into an even layer.
9. Bake for 60 to 70 minutes, or until the edges are set and the center still jiggles slightly when the pan is gently shaken.
10. Once done, turn the oven off and crack the door open. Let the cheesecake cool in the oven for 1 hour—this gradual approach helps prevent cracks.
11. After cooling, refrigerate the cheesecake for at least 6 hours or ideally overnight to achieve that perfect, sliceable texture.
12. Before serving, whip the heavy cream and confectioners’ sugar together until stiff peaks form, taking care not to overbeat.
13. Spread or pipe the whipped cream over the top of the chilled cheesecake, creating a cloud-like layer of sweetness.
14. Arrange the fresh sliced strawberries artfully over the whipped cream, covering the surface or creating patterns as you prefer.
15. Carefully release the springform pan and transfer your masterpiece to a serving plate. Slice with a warm knife for clean edges.
When it comes to presenting this dessert, a little extra flair goes a long way. Whether you’re hosting a cozy gathering or celebrating a milestone, these serving ideas will elevate your cheesecake to gourmet status and make every slice look like it came from a fancy bakery.
Proper storage is key to preserving both the flavor and texture of your cheesecake. With its creamy filling and delicate whipped cream topping, you’ll want to keep it cold and protected to maintain that fresh-out-of-the-oven taste.
Thanks for joining me on this sweet adventure through the layers of Red Velvet Strawberry Cheesecake. We’ve explored everything from the rich, chocolatey cookie crust to the vibrant red filling, and finally that cloud of whipped cream dotted with fresh berries. This dessert is a true celebration—combining the classic richness of cream cheese, the subtle depth of cocoa, and the bright tang of strawberries. Whether you’re baking for a special occasion or simply craving a slice of something extraordinary, this recipe promises to deliver a show-stopping centerpiece that tastes as incredible as it looks. Feel free to print this article or save it for later reference; it’s the perfect guide to revisit whenever you’re in the mood for some red velvet magic during your baking journey.
I can’t wait to hear how your cheesecake turns out! If you try this recipe, have questions about the process, or just want to share a story of that first glorious slice, please leave a comment below. Your feedback fuels my kitchen experiments and helps fellow home bakers create delicious memories, one slice at a time. And don’t forget—you can find a helpful FAQ section just below this article to answer any last-minute curiosities. Happy baking, and here’s to many more moments of joy sprinkled with strawberries and swirls of red velvet indulgence!
This Red Velvet Strawberry Cheesecake combines the rich flavors of cream cheese and cocoa, beautifully balanced by a hint of tanginess and luscious strawberries on top.

Ciao, beautiful souls! I'm Isabella Romano, and welcome to my kitchen where comfort meets creativity, and every recipe is designed to make your everyday cooking feel a little more special.