
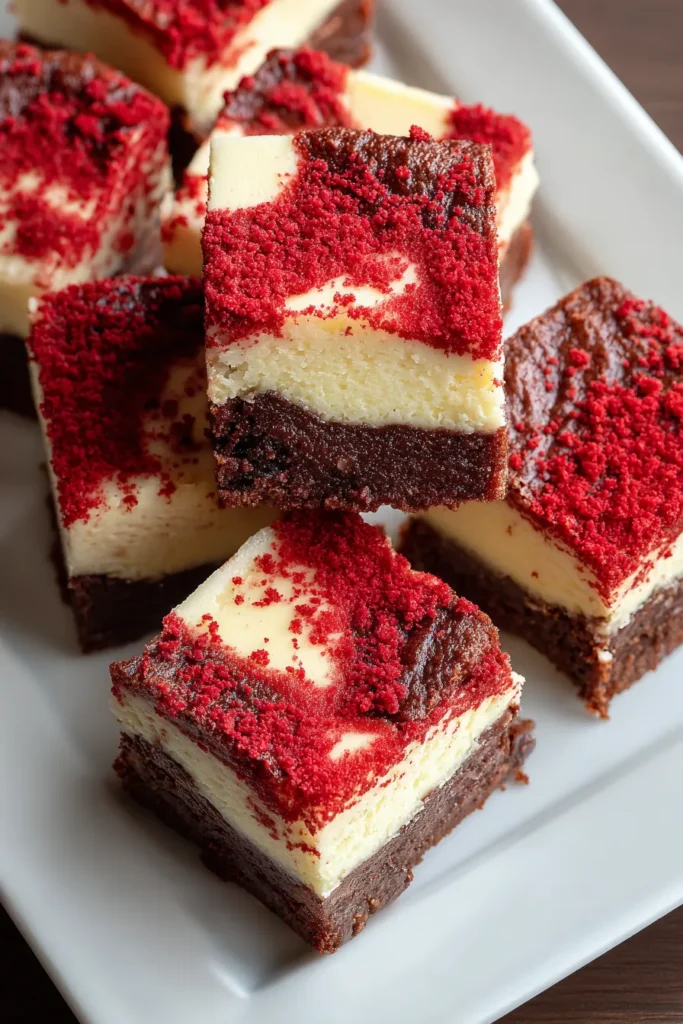
Craving a dessert that combines the tender crumb of red velvet with the tangy creaminess of cheesecake? These Red Velvet Bottom Cheesecake Mini Brownies are exactly that—bite-sized pieces of indulgence that marry two classic treats in one irresistible package. With their vibrant scarlet hue peeking through a luscious marble of cheesecake, each little brownie delivers a perfect balance of sweet, tangy, and chocolatey notes. Whether you're looking for an eye-catching addition to your holiday spread or simply want to spoil yourself after a long day, these mini brownies rise to the occasion with flair and flavor.
Beyond their stunning appearance, the real magic happens in every forkful: a soft, slightly tangy red velvet base that cushions a creamy swirl of rich cheesecake. The whisper of cocoa and the subtle lift from apple cider vinegar give the red velvet layer a unique depth, while the smooth cheesecake topping brings a melt-in-your-mouth contrast that keeps you coming back for more. Fun to make and even more fun to share, these treats turn baking into a joyful experiment and dessert time into a celebration of textures and colors.
When it comes to whipping up something special, knowing your ingredients is half the battle. In the next section, we’ll break down exactly what you need to create these mini masterpieces, along with tips on why each component matters in achieving that dreamy red velvet-cheesecake union.
Before you start measuring and mixing, let’s talk about the essentials that give these brownies their signature flavor and texture:
Provides a rich, creamy fat that helps create a tender crumb. Melting the butter ensures a smooth base and even distribution of fat, which is key for moist brownies.
Sweetens both layers and helps with the structure. In the red velvet layer, it crests the butter for a tender crumb, while in the cheesecake filling, it yields a silky, sweet swirl.
Act as a binder and add moisture. Two eggs in the red velvet layer give it lift and stability, and one egg in the cheesecake layer helps that smooth mixture set just right.
Delivers warm, aromatic notes that deepen the overall flavor profile and complement both the cocoa in the red velvet and the tang of the cheesecake.
Gives the brownies their signature, velvety crimson appearance. A little goes a long way toward that dramatic red hue.
Introduces a mild chocolate undertone without overpowering the red velvet’s distinctive taste. Sifting it helps maintain a smooth batter.
Provides the structure for the red velvet base. Measure carefully to avoid a dense brownie.
Enhances the sweetness and balances the flavors in both the red velvet and cheesecake layers.
Adds a slight tang and reacts with the cocoa powder to gently lift and redden the batter, intensifying that classic red velvet taste.
Creates the creamy, tangy topping. Soften it first for a lump-free, luxurious swirl that contrasts the dense brownie below.
Ready to dive into the kitchen? Follow these steps carefully to build layers of flavor and texture. From melting butter to swirling that cheesecake topping, each move brings you closer to perfectly marbled mini brownies.
1. Preheat your oven to 350°F (175°C) and line a muffin tin with paper liners. This ensures even baking and makes removal a breeze.
2. In a medium saucepan over low heat, melt the butter until just liquefied. Remove from heat and whisk in the sugar until fully combined and slightly glossy.
3. Quickly whisk in the eggs, one at a time, making sure each is fully incorporated before adding the next. This creates a smooth, cohesive batter.
4. Stir in the vanilla extract and red food coloring until the hue is evenly distributed—no streaks of white or pale pink here.
5. Sift in the cocoa powder, flour, and salt to avoid lumps. Stir gently until the dry ingredients are just incorporated, then add the apple cider vinegar and mix until the batter is silky.
6. Spoon about a tablespoon of the red velvet batter into each liner, smoothing it out into an even layer using the back of the spoon.
7. In a separate bowl, beat the cream cheese and sugar until smooth and creamy, scraping down the sides as needed for a lump-free texture.
8. Add the remaining egg to the cream cheese mixture and beat until fully incorporated, creating a rich, velvety filling.
9. Drop a tablespoon of the cheesecake mixture over the red velvet layer in each muffin cup, centering it as best you can.
10. Using a toothpick or skewer, gently swirl the cheesecake filling with the red velvet layer below to form a beautiful marbled effect.
11. Bake in the preheated oven for 18–20 minutes, or until a toothpick inserted into the center comes out with just a few moist crumbs clinging to it.
12. Allow the mini brownies to cool in the pan for 10 minutes before transferring them to a wire rack to cool completely.
After all that effort, it’s time to showcase your mini brownies in style. Whether you’re hosting a festive gathering or enjoying a quiet treat at home, the way you present these bites can elevate the entire experience. Here are some fun, creative ideas to make each morsel look as exciting as it tastes:
Lightly sift powdered sugar over the cooled brownies for a snowy effect. Add a few raspberries or strawberries on the side to heighten the color contrast and introduce a juicy pop.
Melt dark or white chocolate until smooth and use a fork or piping bag to create thin streams across the tops. This adds a professional finish and extra richness.
Dollop a spoonful of whipped cream next to each brownie and garnish with a small mint leaf. The cool cream and aromatic mint balance the richness beautifully.
Pop the brownies in a warm oven for a few minutes, then top each with a small scoop of ice cream. The contrast of warm brownie and cold ice cream is utterly irresistible.
Keeping these mini brownies fresh and flavorful ensures you can enjoy them days—or even weeks—after baking. With the right storage methods, you’ll preserve that creamy swirl and tender crumb every time. Here are some trusted techniques to maintain their quality:
Place cooled brownies in an airtight container and layer with parchment paper to prevent sticking. Store in the fridge for up to one week; the cheesecake topping will stay stable, and the red velvet layer will remain moist.
Arrange cooled brownies on a baking sheet and freeze until firm. Transfer to a zip-top freezer bag, removing as much air as possible. They’ll keep for up to two months—just thaw in the fridge before serving.
If you plan to eat them within 2–3 days, keep the brownies in an airtight container at room temperature, away from direct sunlight or heat sources. They’ll stay soft and ready to snack on.
For grab-and-go treats, wrap each brownie in plastic wrap or parchment, then store in a sealed container or bag. This method is perfect for lunchboxes or snacks on the fly.
From the moment you whisk butter and sugar together to the final swirl of cheesecake over scarlet batter, these Red Velvet Bottom Cheesecake Mini Brownies deliver a sensory experience you won’t forget. We’ve covered every detail—from the key ingredients that build flavor to step-by-step instructions that guide you through melting, sifting, and swirling. Along the way, you’ve learned serving suggestions that turn simple mini brownies into an elegant dessert centerpiece and storage tips to keep them tasting freshly baked days or even weeks later. With a total preparation time of just over 30 minutes (including rest time) and an intermediate difficulty level, this recipe strikes the perfect balance between achievable and impressive.
Feel free to print this article or save it for your next baking session, and scroll down to find a handy FAQ section for troubleshooting and extra tips. If you give these mini brownies a try, I’d love to hear how they turned out! Leave a comment with your questions, feedback, or favorite twist on the recipe. Happy baking!
These mini brownies feature a rich red velvet base topped with a creamy cheesecake swirl, creating a delightful blend of flavors that’s sure to impress at any gathering!

Ciao, beautiful souls! I'm Isabella Romano, and welcome to my kitchen where comfort meets creativity, and every recipe is designed to make your everyday cooking feel a little more special.