
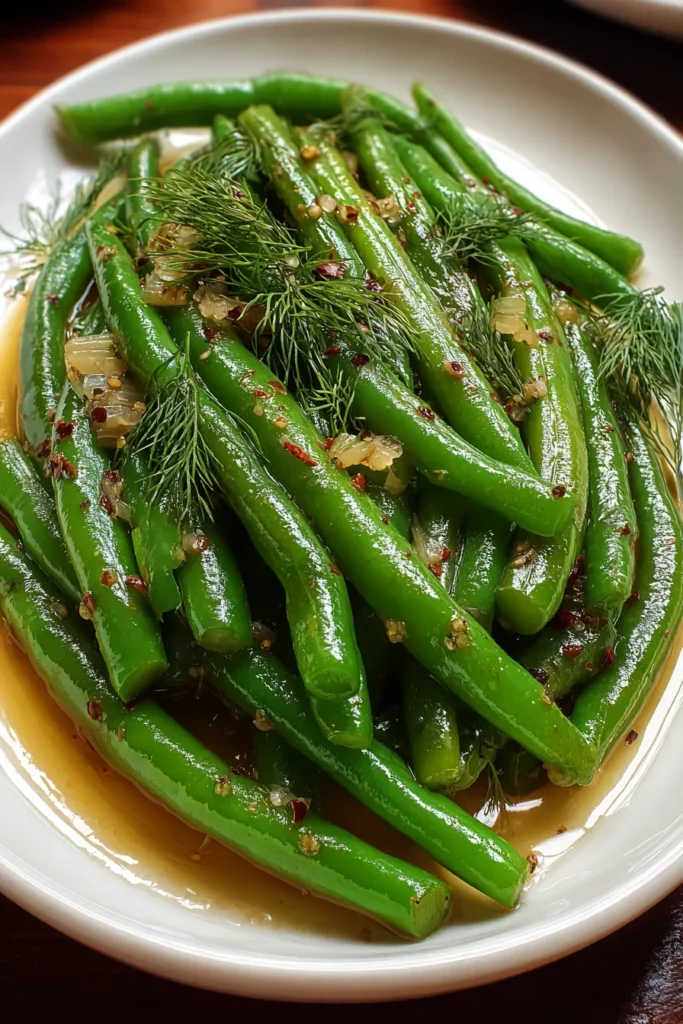
Green beans take on a whole new life when they’re pickled in a bracing bath of vinegar, spices, and fresh dill. These crunchy, tangy, and garlicky strips are the perfect way to brighten up any meal, whether you’re looking for a zesty snack, a charming garnish, or a delightful side dish. With just a handful of simple pantry staples—white vinegar, kosher salt, garlic, and mustard seeds—you can transform your garden vegetables or grocery finds into something truly special. This easy pickling project clocks in at a beginner-friendly difficulty level, requiring only 30 minutes of active prep time and another 30 minutes of gentle cooking, followed by a 2-week rest as the flavors deepen. Each pint jar delivers around 320 calories of wholesome, vibrant flavor that livens up sandwiches, salads, and cocktails alike, while also checking all the boxes for homemade pickles, canning recipes, and healthy snacks.
As someone who can’t resist tangy crunch, I love the way these pickled green beans complement a creamy chicken salad or add a lively kick to a classic Bloody Mary. The first time I tried this recipe, the bold bite of garlic and the subtle warmth of red pepper flakes had me hooked from the very first jar. It’s always such a thrill to grab one off the shelf two weeks later and hear that signature “pop” as I open the lid—proof that a proper seal has formed. Whether you’re crafting a grazing board for friends or simply indulging in a solo snacking session, these pickled green beans deliver that satisfying snap and bright zing that homemade pickles are all about. So roll up your sleeves, embrace the canning spirit, and get ready to savor the ultimate garden-to-table treat!
Before we dive into the step-by-step canning process, let’s get acquainted with the key ingredients that make these pickled green beans shine. Each element brings its own personality to the jar, creating a harmonious balance of crunch, tang, heat, and herbal freshness. Gathering the freshest ingredients will ensure you end up with crisp beans and vibrant flavors that will keep you reaching into the pantry for more.
Crisp and vibrant, freshly trimmed green beans provide the main vehicle for absorbing all those delicious pickling flavors. Their naturally firm texture holds up beautifully during the canning process, ensuring each bite stays satisfyingly crunchy.
This clear, clean-tasting vinegar delivers the essential tang that defines pickles. It acts as a natural preservative, helping to keep the beans safe and perfectly tart over weeks of storage.
Diluting the vinegar just enough, water balances the acidity so the brine isn’t overwhelmingly sharp. It also helps the salt and sugar dissolve evenly to season the beans.
A coarse-grained salt that dissolves well in brine, kosher salt amplifies flavors and helps draw out moisture from the beans, ensuring they pickle evenly and remain crisp.
Just a touch of sweetness rounds out the sharpness of the vinegar, creating a more nuanced brine that enhances the garlic and spice notes without overpowering them.
Peeled and gently smashed, garlic infuses the brine with a rich, savory depth. As it steeps, it adds aromatic complexity that complements the tang of the vinegar.
A teaspoon of these flakes delivers a subtle, lingering heat that warms the palate without drowning out the other flavors, perfect for those who enjoy a little spice.
Tiny but mighty, mustard seeds pop and release a nutty, pungent edge when they meet the hot vinegar brine, adding a gentle bite to the overall flavor profile.
Bright, grassy dill sprigs impart their classic herbaceous aroma, lending that unmistakable pickle character that pairs so well with crunchy green beans.
Whole peppercorns add bursts of warmth and a peppery aroma, elevating each jar with subtle spice notes that play off the garlic and mustard.
Now that our ingredients are prepped, let’s talk through the canning adventure you’re about to embark on. From prepping those hardy green beans to sealing the jars just right, this process is surprisingly straightforward and yields jars packed with delicious tang. Follow each detailed step below, and soon you’ll be savoring your very own crunchy, homemade pickles.
1. Wash and trim the green beans
Start by thoroughly rinsing the green beans under cool running water to remove any dirt or debris. Using a sharp knife or kitchen shears, trim the stem ends so each bean fits neatly into your pint-sized jars. This ensures even pickling and makes packing a breeze.
2. Sterilize the jars and lids
Place four clean pint jars and their matching lids into a large pot of boiling water. Let them boil gently for at least 10 minutes to sterilize. Carefully remove the jars with jar tongs and set them upside-down on a clean towel to air dry—no need to rinse.
3. Make the pickling brine
In a large saucepan, combine the white vinegar, water, kosher salt, and sugar. Heat over medium-high, stirring occasionally until the salt and sugar have fully dissolved. Bring the mixture just to a boil, then remove from heat—this hot brine will infuse your beans with flavor.
4. Divide spices and aromatics
Evenly distribute the peeled, smashed garlic cloves, red pepper flakes, mustard seeds, fresh dill sprigs, and black peppercorns into each sterilized jar. These aromatics create layers of flavor that will infuse the beans.
5. Pack the green beans
Stand the trimmed beans vertically in the jars, packing them snugly but leaving about half an inch of space at the top. This headspace ensures the brine can circulate fully around every bean.
6. Add the hot brine
Carefully pour the steaming vinegar mixture over the beans, filling each jar right up to the ½-inch headspace marker. The heat helps release flavors from the spices while ensuring the jars seal correctly.
7. Remove air bubbles and seal
Gently tap each jar on the counter or insert a clean, non-metallic utensil around the sides to coax out any trapped air bubbles. Then wipe the jar rims clean and secure on the sterilized lids, tightening them firmly.
8. Process in a boiling water bath
Submerge the sealed jars in a large pot of simmering water, ensuring the water covers the lids by at least an inch. Boil for 10 minutes to create a proper vacuum seal, which preserves your pickles safely.
9. Cool and store
Remove the jars carefully and set them upright on a towel to cool undisturbed at room temperature. You’ll hear that satisfying “pop” as each lid seals. Once cooled, transfer the jars to a cool, dark pantry or cupboard.
10. Wait for full flavor
Patience pays off here: allow the green beans to pickle for a minimum of 2 weeks before opening. This resting time lets all the flavors meld into that signature crunchy, tangy, garlicky delight you crave.
When those jars have ripened to perfection, it’s time to show off your crunchy creation. Whether you’re plating up a casual lunch or impressing at a backyard gathering, these versatile pickled green beans can shine in countless ways. Here are a few fun and delicious ideas to get you started:
Elevate your brunch cocktail by skewering several pickled green beans on a toothpick. The sturdy crunch and garlicky tang add a gourmet twist and a burst of flavor with every sip of your spicy tomato juice.
Layer a few beans atop a deli meat or veggie sandwich for an unexpected zesty crunch. Their bright acidity cuts through creamy spreads like mayo or avocado, creating an irresistible contrast.
Scatter whole beans across a cheese and meat platter for a pop of vibrant color and lively texture. Pair with sharp cheddar, prosciutto, and crusty bread to balance savory and tangy bites.
Sometimes, nothing beats popping open a jar and enjoying a handful of pickled beans as a healthy, low-calorie snack. Their satisfying snap makes them perfect for anytime munching.
Proper storage ensures your pickled green beans stay crisp, flavorful, and safe to eat for months on end. With just a few simple guidelines, you can maintain that fresh-picked taste and vibrant texture until you’re ready for your next craving. Follow these tips to keep every jar in optimal condition:
Store sealed jars in a pantry or cupboard away from direct sunlight and heat sources. Consistent, moderate temperatures preserve the vinegar’s acidity and prevent spoilage.
Once you crack open a jar, transfer any unused beans to the fridge promptly. The cold environment slows bacterial growth and maintains the beans’ signature crunch.
Always inspect lids for a proper vacuum seal before shelving. If a lid springs back when pressed, refrigerate and consume the contents quickly rather than long-term storing.
When removing beans from the jar, opt for tongs or a fork rather than your fingers to avoid introducing contaminants. This keeps the brine clear and glass free from bacteria.
This pickled green bean recipe brings together the best of crunchy garden goodness, bright tang, and warm spice for an appetizer or snack that’s as versatile as it is delicious. We’ve covered every detail—from choosing the crispest beans and preparing a perfectly balanced vinegar brine to sealing jars in a boiling water bath and waiting patiently for that quintessential two-week rest. With only a handful of ingredients and basic kitchen tools, even a beginner can achieve professional-quality canned pickles. Remember that each pint jar yields about 320 calories and pairs effortlessly with everything from sandwiches and salads to cocktails like a classic Bloody Mary.
Feel free to print this article and tuck it into your recipe binder for easy reference next time you’re in the mood for homemade pickles. You can also jot down your own notes or tweaks in the margins—maybe you’ll experiment with extra red pepper flakes for a spicier kick or swap coriander seeds in place of mustard seeds for a unique twist. Below, you’ll find a handy FAQ section to answer any lingering questions. If you give this recipe a try or if you run into any hiccups along the way, please leave your comments, questions, or feedback. I love hearing how home cooks make the recipe their own, and I’m here to help with tips or troubleshooting. Happy pickling!
These pickled green beans combine vibrant crunch with a tangy, garlicky kick. Perfect as a zesty snack, a charming garnish, or a delightful side dish!

Ciao, beautiful souls! I'm Isabella Romano, and welcome to my kitchen where comfort meets creativity, and every recipe is designed to make your everyday cooking feel a little more special.