
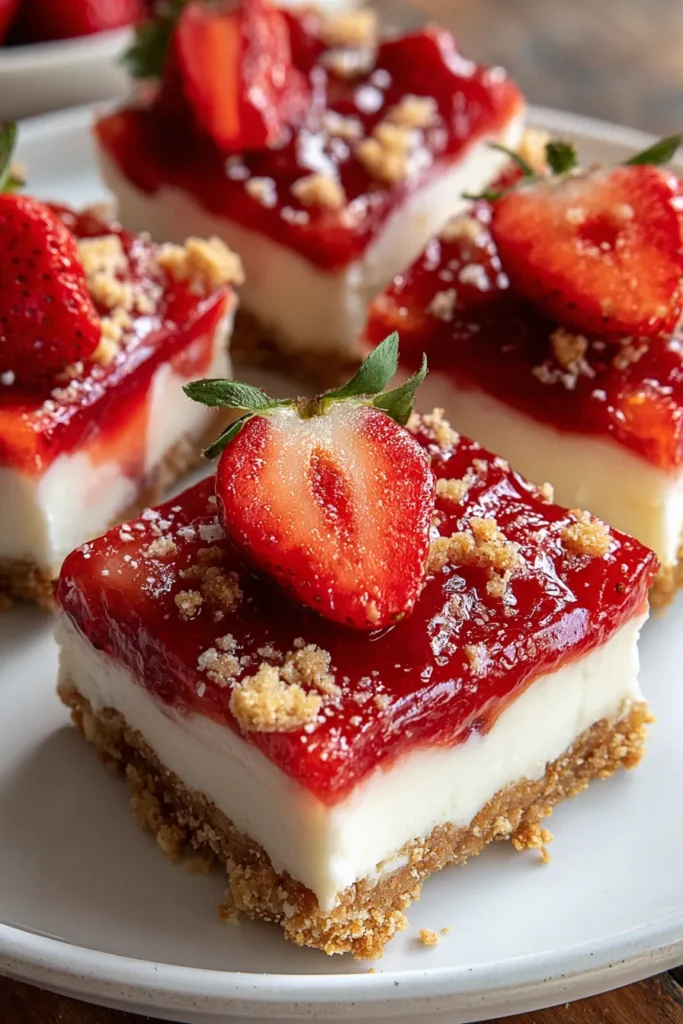
There’s something truly magical about sinking your fork into a dessert that feels like a sun-drenched afternoon wrapped up in every bite. These No-Bake Strawberry Cheesecake Bars come together so effortlessly that you’ll wonder why you ever bothered with a hot oven. The buttery graham cracker crust is the perfect foundation, offering a satisfyingly crisp texture that contrasts beautifully with the pillowy cream cheese layer. Then comes the pièce de résistance: a vibrant strawberry topping that’s cooked until it’s just the right balance of sweet and tart, releasing those ruby-hued juices that cascade over the creamy filling. It’s a symphony of flavors and textures—each mouthful is refreshing, indulgent, and bursting with the bright essence of fresh strawberries.
This beginner-friendly dessert takes only about 20 minutes of hands-on prep time and a brief 10-minute cook for the strawberry compote, yet it rewards your patience with at least four hours (or ideally overnight) of chilling time. That means you can whip it up in the morning, pop it in the fridge, and have a showstopping treat ready for guests or for your own weekend indulgence. At roughly 250 calories per bar (when cut into 12 pieces), it’s a delightful mid-afternoon pick-me-up or an elegant finish to any meal. Serve these creamy bars at summer picnics, backyard barbecues, afternoon tea parties, or even on cozy Sunday brunch spreads—this no-bake dessert truly shines whenever you crave an easy recipe that doubles as a crowd-pleasing summer treat. Keep reading and let’s dive into the details of how you can recreate this creamy, fruity delight in your own kitchen.
Every unforgettable dessert starts with high-quality ingredients, and these cheesecake bars are no exception. Below, you’ll find the essentials that work in harmony to give you that luscious texture, sweet tang, and irresistible strawberry flavor.
The foundation of the crust—these finely crushed crumbs bind perfectly with melted butter and sugar to create a crumbly, yet sturdy base.
A versatile sweetener used both in the crust for added crispness and in the strawberry topping to balance out the tang of the fruit.
Melted and mixed into the graham crumbs, it adds richness and helps the crust hold its shape once chilled.
The heart of the bars, whipped until velvety smooth. Its tangy profile pairs beautifully with sweet berries.
Provides a delicate sweetness without grittiness, ensuring your cream cheese layer remains perfectly silky.
A splash of pure vanilla brightens the cream cheese filling, elevating its flavor with warm, aromatic notes.
Chopped and cooked down to form a dazzling sauce—this fruit gives your bars that signature pink hue and juicy mouthfeel.
A hint of citrus lifts the strawberry topping, cutting through sweetness with a fresh, zesty bite.
Acts as a thickening agent, transforming strawberry juices into a glossy, spoonable compote.
Combined with cornstarch to create a slurry that ensures a smooth and lump-free topping.
Optional, but highly recommended for a beautiful finishing touch and extra burst of color.
Let’s roll up our sleeves and walk through each step of this no-bake masterpiece. From crafting the perfect crust to layering on that gleaming strawberry topping, you’ll see just how straightforward—and fun—this process can be.
1. Begin by preparing the crust. In a medium bowl, combine graham cracker crumbs and 1/4 cup granulated sugar, tossing gently until evenly mixed.
2. Add the melted unsalted butter to the bowl and stir thoroughly, using a spatula to work until the mixture resembles wet sand with no dry pockets.
3. Press the crumb mixture firmly into the bottom of a greased 9x9 inch square pan, smoothing with the back of a spoon or your fingertips to form an even layer. Place the pan in the refrigerator to chill while you move on to the filling.
4. In a large bowl, beat the softened cream cheese with an electric mixer on medium speed until smooth and creamy, scraping down the sides as needed.
5. Add the powdered sugar and vanilla extract, then continue to beat until the mixture is fully blended and silky.
6. Spread the cream cheese mixture evenly over the chilled crust, using an offset spatula for neat edges. Return the pan to the refrigerator so the filling can set.
7. To make the strawberry topping, combine chopped strawberries, 1/4 cup granulated sugar, and lemon juice in a small saucepan.
8. Cook over medium heat, stirring occasionally, until the berries begin to soften and release their juices—about 5 minutes.
9. In a small bowl, whisk together cornstarch and water to form a slurry. Pour this into the bubbling strawberry mixture.
10. Stir constantly until the sauce thickens and turns glossy, roughly 2 minutes. Remove from heat and let the topping cool to room temperature.
11. Once cooled, spread the strawberry topping evenly over the cream cheese layer in the pan, creating a smooth, lustrous finish.
12. Refrigerate the assembled bars for at least 4 hours, or ideally overnight, until fully firm.
13. Before serving, use a sharp knife (wiping the blade between cuts) to slice into neat bars. Garnish with fresh strawberry halves or slices if you like.
When it’s time to share your strawberry cheesecake bars, presentation and pairing can turn a simple dessert into an unforgettable experience. Whether you’re hosting a backyard gathering or simply enjoying a quiet treat at home, these serving ideas will help you showcase each creamy, fruity square in style.
Ensuring these bars stay as fresh and delicious as the moment you first slice them takes just a little planning. Proper storage will keep the crust crisp, the filling creamy, and the strawberry topping perfectly glossy—ready for whenever a craving strikes.
Refrigeration is your best friend here. After the bars have fully set, cover the pan tightly with plastic wrap or transfer individual slices into an airtight container. Store in the refrigerator for up to 4–5 days, ensuring they remain cool and firm.
What began as a simple idea—combining buttery graham cracker crumbs, a lusciously creamy filling, and fresh strawberry compote—has transformed into a stunning no-bake dessert bar that’s as easy to make as it is delightful to devour. Whether you’re new to the world of cheesecake or a seasoned baker looking for a quick fix, these No-Bake Strawberry Cheesecake Bars hit every mark: they’re beginner-friendly, bursting with summery vibes, and made entirely without an oven. The recipe requires a mere 20 minutes of active prep time, a brief cooking step for the topping, and a few hours of chilling, making it a breeze to fit into even the busiest of schedules. Once your bars have set to perfection, they’re ready to be sliced, garnished, and proudly presented at gatherings, brunches, or simple afternoons at home. Feel free to print this article, save it for your baking archives, and revisit it whenever that strawberry craving strikes. You’ll find a handy FAQ section below to answer any extra questions, from ingredient swaps to troubleshooting tips.
I hope you’ve enjoyed this deep dive into the world of no-bake strawberry cheesecake bars. If you give this recipe a try—or if you have any questions, tweaks, or personal twists you’re curious about—please let me know in the comments. I love hearing how these bars come to life in your kitchen, and I’m always around to help if you need guidance on slicing, storing, or flavor variations. Your feedback, questions, and shared experiences make this space feel like a cozy chat with friends. Happy baking (or chilling!), and here’s to countless moments made sweeter with a slice of strawberry cheesecake bliss.
These luscious strawberry cheesecake bars boast a buttery graham cracker crust topped with a velvety cream cheese layer and fresh strawberry sauce, making every bite a refreshing delight.

Ciao, beautiful souls! I'm Isabella Romano, and welcome to my kitchen where comfort meets creativity, and every recipe is designed to make your everyday cooking feel a little more special.