
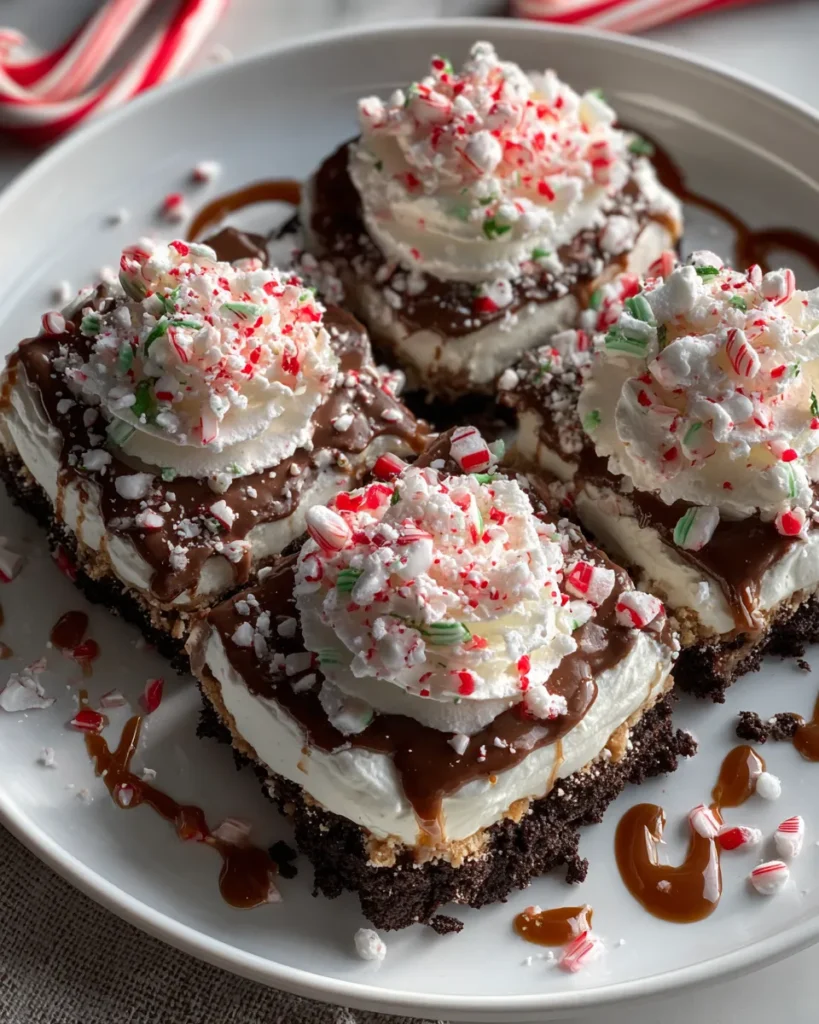
There’s something truly enchanting about a holiday dessert that comes together in a flash yet tastes like you slaved away all day. This No Bake Christmas Cookie Lush checks all the boxes: a buttery chocolate crust, a tangy cream cheese layer, pillowy vanilla pudding, and whipped topping crowned with festive peppermint crunch. Whether you’re gifting a sweet treat at your holiday potluck or simply craving a less-stress approach to Christmas baking, this lush dessert delivers decadent flavor and delightful texture without ever firing up the oven. Savor the sweet layers of this festive No Bake Christmas Cookie Lush – a delightful treat that’s easy to make!
As a beginner-friendly recipe with just 30 minutes of hands-on prep and no actual cooking, it’s perfect for cooks of any skill level. You’ll press crushed chocolate sandwich cookies into a pan, whip up a creamy but light cheese layer, and whisk silky vanilla pudding before topping it all off with dreamy whipped topping and crunchy peppermint bites. Then, after 4 hours (or overnight) in the fridge, you’ve created about 12 generous servings at roughly 300 calories each—ideal for sharing with family, gifting to neighbors, or indulging in a quiet moment by yourself.
I still remember the first time I brought this dish to a holiday gathering. It was a hectic December afternoon filled with wrapping paper scraps and carols playing on a loop, but friends’ faces lit up as soon as I uncovered that tray. One cousin exclaimed, “It tastes like Christmas in a spoon!” and another dove in for seconds before I could blink. The juxtaposition of the rich chocolate crust, the velvety vanilla pudding, and the bright crunch of peppermint made every bite joyful and comforting. Since then, it’s become my go-to festive offering when I want fuss-free holiday magic.
Every standout recipe starts with the right components—this no-bake dessert is no exception! From the base that gives a satisfying crunch to the vibrant pops of peppermint on top, each ingredient plays a crucial role. Let’s break down what you’ll need and why these pantry staples transform into a sensational, make-ahead holiday treat.
Crushed to create a rich, chocolaty base, these cookies bring that familiar Oreo-like flavor and a slightly gritty texture that mimics a scrumptious “wet sand” crust once mixed with butter.
Melted and stirred into the cookie crumbs, this fat binds everything together, ensuring your crust stays firm yet tender, making every forkful easy to slice and serve.
Softened to room temperature, cream cheese offers a tangy, luscious foundation for the first layer. Its creamy consistency balances the sweetness of the powdered sugar and whipped topping.
Also known as confectioners’ sugar, this fine sweetener dissolves effortlessly into the cream cheese, creating a silky-smooth filling without any graininess.
A splash of pure vanilla elevates every layer with warm, aromatic notes that complement both the cookie crust and the vanilla pudding, bringing the whole dessert together.
Light and airy, whipped topping folded into the cream cheese adds cloud-like fluffiness, while the remaining portion smooths over the pudding for an elegant finish.
Instant pudding thickens quickly when whisked with milk, forming that dreamy, custard-like second layer—no cooking required, yet all the creamy satisfaction of a classic pudding.
Mixed with the pudding powder, milk provides the necessary liquid to thicken the filling, making it silky and rich without overwhelming heaviness.
Sprinkled on top, these add festive flair, a cool minty burst, and crunchy contrast to the soft layers below—truly the hallmark of Christmas Cookie Lush.
For garnish, dollop on a bit more whipped topping right before serving to resemble snow-capped peaks and add extra decadence.
A light drizzle of sauce offers an extra layer of sweetness and visual appeal—choose whichever suits your crowd or simply leave it out.
Scattered over the top adds rustic charm and reinforces that beloved chocolate crunch in every slice.
Ready to assemble your festive masterpiece? These straightforward steps will guide you through creating each luscious layer of this no-bake wonder. Grab your favorite electric mixer, a spatula, and a 9x13-inch dish, and let’s get building!
1. In a medium bowl, combine the crushed chocolate sandwich cookies with the melted butter. Mix thoroughly until every crumb is coated and the texture resembles wet sand, ensuring the crust binds together when pressed.
2. Transfer the crumb mixture into a 9x13-inch baking dish. Use the back of a measuring cup or your hands to press it firmly and evenly across the bottom. This tight packing guarantees a sturdy base.
3. In a large mixing bowl, beat the softened cream cheese with an electric mixer on medium speed until smooth and creamy. Scrape down the sides as needed to avoid lumps.
4. With the mixer running, gradually add the powdered sugar and vanilla extract. Continue beating until the mixture is fully combined, sweet, and luxuriously smooth.
5. Gently fold in 1 cup of the whipped topping using a spatula, mixing just until there are no streaks of cream cheese—this ensures a fluffy first layer.
6. Spread the cream cheese mixture evenly over the cookie crust, smoothing the surface with a spatula for a neat finish.
7. In another large bowl, whisk together the vanilla pudding mix and milk. Keep whisking for 2–3 minutes until the pudding thickens to a custard-like consistency.
8. Pour the thickened pudding over the cream cheese layer. Use a spatula to spread it uniformly, covering every corner of the dish.
9. Dollop the remaining whipped topping over the pudding layer and smooth it out into an even blanket of white.
10. Sprinkle the crushed peppermint candies or candy canes generously over the top for that signature holiday crunch and festive color pop.
11. If you’d like extra decadence, drizzle chocolate or caramel sauce and scatter extra crushed cookies on top. These embellishments are optional but make it feel even more celebratory.
12. Cover the dish tightly with plastic wrap. Refrigerate for at least 4 hours—or ideally overnight—to let all the layers set and meld their flavors perfectly.
Once your lush has chilled to perfection, it’s time to delight friends and family with an unforgettable presentation. Serving this dessert is as joyful as making it: you can slice it into perfect squares, spoon it into individual cups, or even fashion a stunning trifle. Here are four festive ideas to elevate your dessert moment:
Use a sharp, warm knife (run it under hot water, then wipe dry) to slice neat 2-inch squares. Arrange them on a decorative platter, spacing them evenly to showcase the layered colors, and garnish each square with a tiny mint leaf or a sprinkle of crushed candy cane.
Spoon each layer—cookie crust, cream cheese, pudding, whipped topping—into clear glasses or mason jars. This single-serving style lets everyone admire the stripes of chocolate brown, creamy white, and peppermint pink. Finish each cup with a mini candy cane hook.
Layer larger chunks of cookie crust with dollops of cream cheese mixture and pudding in a glass trifle bowl. Alternate layers until the bowl is full, then crown the top with whipped cream, crushed peppermint, and chocolate drizzle. Scoop out generous helpings for a dramatic holiday table centerpiece.
For a twist, swap out the chocolate sandwich cookies crust with gingerbread cookie crumbs. The warm spices of ginger and cinnamon pair delightfully with the vanilla layers, and you can serve it alongside spiced hot cocoa or mulled cider for a cozy winter experience.
Proper storage ensures your Cookie Lush stays fresh, creamy, and irresistibly festive until you’re ready to enjoy—or share—it. Since this is a chilled dessert with dairy components, refrigeration and careful covering are key. Here are the best methods to maintain its texture and flavor:
Keep the dish in the fridge, tightly wrapped with plastic wrap to prevent the whipped topping from absorbing odors or drying out. Stored this way, it will stay perfectly creamy for up to 4 days.
If you’ve portioned the dessert into cups or jars, seal each container with a lid and refrigerate. These make-ahead treats stay fresh for 3–4 days and are perfect for quick grabs or bag lunches during the festive season.
While this dessert is best fresh, you can freeze it for up to one week. Cover tightly with plastic wrap and an additional layer of foil. Thaw in the refrigerator overnight before serving, then refresh the top with a piped swirl of whipped topping.
If you want extra-crisp peppermint bits, store them separately in an airtight bag at room temperature. Sprinkle them on just before serving to preserve that delightful crack.
This No Bake Christmas Cookie Lush has everything you need for a stress-free yet unforgettable holiday dessert. From the initial buttery, chocolatey crust to the mellow sweet bliss of vanilla pudding and the airy cloud of whipped topping dotted with peppermint magic, each layer brings joy and warmth to your celebration. With only 30 minutes of active prep, a beginner-friendly process, and no oven heat to battle, you can spend less time stressing in the kitchen and more time making memories with your loved ones. Don’t forget that this recipe yields about 12 generous servings, each around 300 calories, and benefits from at least 4 hours of chilling (or overnight) so flavors meld beautifully.
Feel free to print or save this article for your holiday recipe collection—having it on hand helps you relax, knowing the dessert is sorted. You’ll find a FAQ section below to answer any lingering questions you might have, from ingredient swaps to troubleshooting tips. I’d love to hear how your Cookie Lush turns out! If you try it or have questions, drop a comment, share your tweaks, or let me know what festive spin you added. Your feedback helps me keep the conversation alive and the holiday spirit bright. Happy layering, chilling, and indulging!
Experience the bliss of creamy layers, crunchy chocolate cookies, and festive peppermint goodness in this delightful no-bake dessert that’s perfect for any holiday gathering.

Ciao, beautiful souls! I'm Isabella Romano, and welcome to my kitchen where comfort meets creativity, and every recipe is designed to make your everyday cooking feel a little more special.