
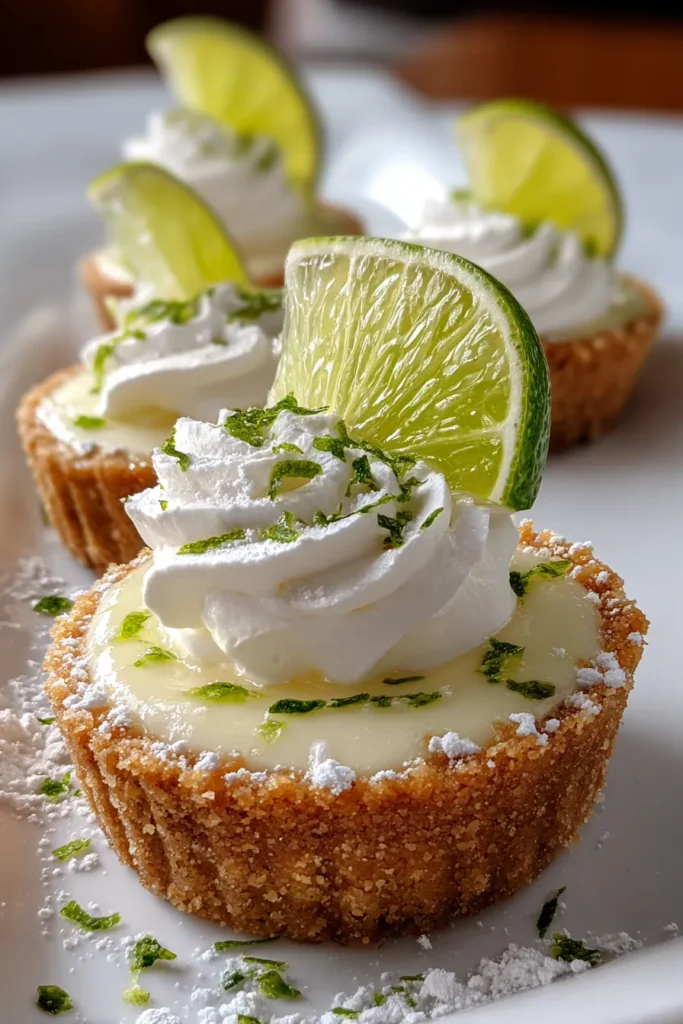
There’s something about the bright punch of citrus wrapped up in a buttery graham cracker shell that can instantly transport you to sunlit porches and breezy afternoons. When I first experimented with turning the classic Key Lime Pie into bite-sized delights, I was blown away by how a small, zesty burst could deliver the same luscious experience as a full-sized slice. These mini desserts pack a tangy swirl of fresh key lime juice and velvety sweetened condensed milk, balanced to perfection by rich egg yolks and a hint of floral zest. Each perfectly formed morsel sits in a crisp crust that snaps beneath your teeth, giving way to a creamy, slightly tart filling that dances on the tongue. I remember serving these at a summer gathering last year—I couldn’t make them fast enough! My friends kept going back for seconds, delighting in how these petite pies felt so indulgent yet refreshingly light.
When you take a bite of one of these Key Lime Pie Mini Desserts, you’ll notice how the zest in the filling brightens every forkful, and how the sweetened condensed milk provides a dreamy, pillowy texture. The contrast between the crumbly base and the silky topping always brings smiles, and it’s such a versatile treat—you can whip them up ahead of time, stash them in the fridge, and pull them out when guests arrive. What I love most is that this recipe proves you don’t need complicated techniques or fancy ingredients to impress a crowd. Whether you’re a seasoned baker or a curious beginner, these miniature marvels will give you plenty of reasons to celebrate citrus in all its glory.
Before diving into the step-by-step magic, let’s get acquainted with the heroes of our mini pies. Each component plays its part in building layers of flavor and texture, resulting in a dessert that’s as balanced as it is irresistible.
These finely ground crumbs form the crunchy foundation of the crust, offering a subtle sweetness and perfect texture for holding the filling.
Added to the graham cracker base, this sugar enhances the natural honeyed notes of the crumbs and helps them caramelize slightly during baking.
Melted and poured over the crumbs, this butter binds everything together and provides a rich, golden hue to the crust.
The star of the filling, imparting a bright, tangy profile that cuts through the sweetness and awakens the palate.
Packed with essential oils, the zest delivers concentrated citrus aroma and a burst of flavor with every spoonful.
These give the filling its creamy richness and help it set perfectly, creating that classic custard-like consistency.
Thick, sweet, and creamy, this pantry staple offers both smooth texture and balanced sweetness without the need for extra sugar.
Whipped into stiff peaks, the cream becomes an airy, cloud-like topping that complements the tangy filling.
Lightly sweetens the whipped cream and helps stabilize it, ensuring those dollops stay firm and elegant.
A splash of this extract adds warmth and depth, rounding out the bright citrus notes with a hint of comforting sweetness.
Let’s roll up our sleeves and bring these little bursts of sunshine to life. You’ll walk through preparing the crust, mixing a luscious lime filling, and finishing with a fluffy whipped cream topping.
1. Preheat your oven to 350°F (175°C). Ensuring your oven is fully heated sets the stage for perfectly baked crusts that hold their shape.
2. In a mixing bowl, combine the graham cracker crumbs and granulated sugar. Stir until the grains of sugar are fully dispersed among the crumbs, forming an even base.
3. Pour the melted butter over the crumb mixture and stir until each crumb is lightly coated and slightly glossy—this is what binds the crust together.
4. Press about 1 tablespoon of the mixture firmly into the bottom of each mini muffin cup to form crusts. Use the back of a measuring spoon for an even, compact layer. Set the tray aside.
5. In another bowl, whisk together the key lime juice, key lime zest, egg yolks, and sweetened condensed milk until smooth and uniform, ensuring no streaks of yolk remain.
6. Pour the key lime filling into the prepared crusts, filling each cup about 3/4 full so there’s room for slight expansion during baking.
7. Bake in the preheated oven for 12–15 minutes, or until the edges are set and the centers remain just a bit jiggly—this guarantees a creamy interior.
8. Remove from the oven and let them cool at room temperature for 10 minutes, then transfer the pan to the refrigerator for at least 2 hours to set completely.
9. In a large, chilled bowl, beat the heavy cream, powdered sugar, and vanilla extract together until stiff peaks form—this whipped cream should hold its shape when you lift the whisk.
10. Once the mini pies are fully set, top each with a generous dollop of whipped cream and an extra sprinkle of lime zest just before serving.
These mini pies are such crowd-pleasers, they practically ask for a little flair in presentation. Whether you’re hosting a backyard barbecue or treating yourself after a long day, these suggestions will help you showcase their bright, creamy deliciousness.
Sprinkle a pinch of fresh lime zest on top of the whipped cream and perch a thin lime wheel at the edge. The extra zing and pop of green make each mini pie look like a work of art.
Chill a metal tray or platter in the freezer for 10 minutes, then arrange the pies on it. The frosted background keeps them cool and enhances that refreshing vibe.
Scatter a handful of raspberries or blueberries around the minis. Their natural sweetness creates a delightful contrast, and the vivid colors are stunning against the creamy white tops.
For a rustic-chic twist, layer crust and filling in tiny Mason jars. Finish with whipped cream and a mini wooden spoon tied with twine—it’s perfect for outdoor parties.
Keeping these little delights fresh and flavorful is easier than you might think. With the right approach, you can prepare them ahead of time, store them safely, and enjoy their zesty charm days later.
When it comes to short-term storage, refrigeration is your best friend. The cool environment helps the custard filling maintain its silky texture while the whipped cream topping stays firm. For longer-term preservation, freezing is an option, though you’ll want to skip the final whipped cream layer until you’re ready to serve. Proper packaging and labeling ensure that every bite tastes as vibrant as the day you made them.
Place the mini pies in a single layer inside a container that seals tightly. Keep them refrigerated for up to 3 days—this will preserve their creamy filling and crisp crust.
Once the pies have cooled and set, arrange them on a baking sheet and freeze for 2 hours. Transfer to a freezer-safe container, separating layers with parchment paper. Thaw overnight in the fridge before adding whipped cream.
Whip extra cream with powdered sugar and vanilla, then pipe it into a sealed pastry bag. Keep it refrigerated for up to 24 hours and pipe fresh peaks onto each mini pie just before serving.
Whether freezing or refrigerating, label containers with the date and contents. This simple habit helps you rotate treats efficiently and enjoy them at their peak.
From the first tangy bite of the lime-infused filling to the satisfying crunch of the buttery graham crust, these Key Lime Pie Mini Desserts capture the essence of summer in every spoonful. We’ve walked through each step, from gathering the core ingredients—like zesty lime juice, creamy condensed milk, and flaky crumbs—to mastering the art of stiff peaks in whipped cream. You’ve seen how each element contributes to the overall flavor profile, and how simple techniques like whisking and pressing can transform everyday ingredients into show-stopping party treats. Whether you’re a beginner exploring the joys of baking or hosting a casual get-together, these bite-sized pies are foolproof, fun, and endlessly adaptable. Feel free to print or save this article for quick access in your recipe arsenal, and rest easy knowing you can find a FAQ below to troubleshoot any lingering questions that might pop up.
I sincerely hope this mini dessert adventure inspires you to bring a little zest and brightness into your kitchen. If you give this recipe a whirl, I’d love to hear how it turned out! Did the crust hold firm? Did your guests ask for seconds? Share your experiences, questions, or any personal twists you tried in the comments. Your feedback helps me continue crafting recipes that resonate with home cooks like you. Happy baking—and here’s to many more citrusy creations!
These Key Lime Pie Mini Desserts are a delightful burst of citrusy goodness, featuring a buttery graham cracker crust and luscious filling, all topped with airy whipped cream.

Ciao, beautiful souls! I'm Isabella Romano, and welcome to my kitchen where comfort meets creativity, and every recipe is designed to make your everyday cooking feel a little more special.