
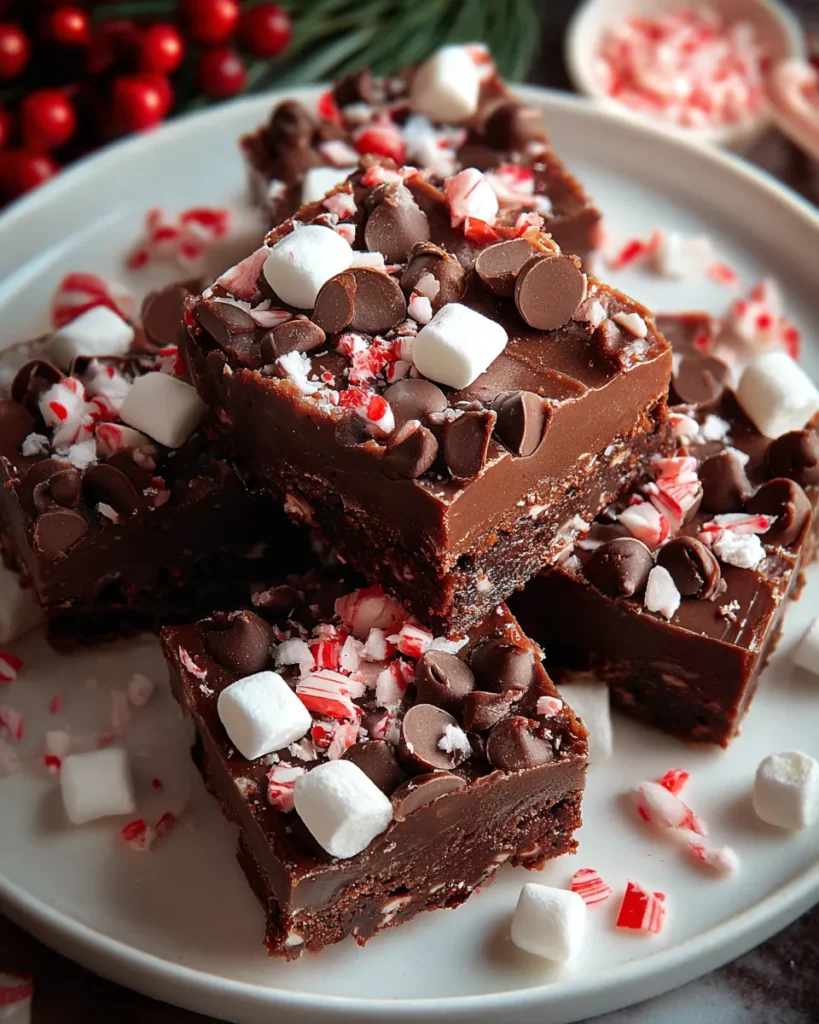
Hot Chocolate Peppermint Fudge is the cozy, festive treat that seems to wrap the warmth of a steaming mug of cocoa and the crisp zing of peppermint into one dreamy, bite-sized square. I still remember the first time I tried a peppermint-studded fudge—my kitchen smelled like a holiday market as the rich cocoa melted into buttery swirls, and that first nibble was pure magic. You get a velvet-smooth chocolate base that practically melts on your tongue, punctuated by tiny shards of peppermint candy that crackle and pop. It feels like sipping on hot chocolate, but in fudge form, and it’s exactly the kind of sweet comfort food that makes you want to curl up by the fire.
Whether you’re a fudge fanatic or a chocolate-mint newbie, this recipe is blissfully simple and beginner-friendly. In just a few steps, you’ll whisk together sugar, cocoa, milk, and butter, then fold in silky chocolate chips and fragrant peppermint extract. From there it takes a little patience to let the squares set, but don’t worry—while the fudge chills, you can be decking the halls or wrapping gifts. When it’s finally time to cut, you’ll be rewarded with perfectly clean edges and that satisfying “snap” as you bite in. Serve these luscious morsels at your next holiday gathering, package them as sweet gifts, or simply stash a handful in the freezer for an instant pick-me-up. Trust me, once you get a taste, you’ll want to save this recipe forever.
Before we dive into the saucepan and watch this fudge come together, let’s meet the lineup of ingredients that make this holiday confection so downright irresistible.
The backbone of any classic fudge, granulated sugar provides sweetness and helps achieve that iconic firm-yet-creamy texture when boiled to just the right stage.
Deeply chocolatey with no added sugar, cocoa powder delivers intense flavor and a beautiful dark hue. It’s the essence of hot chocolate woven into every bite.
Creamy and rich, whole milk adds moisture and tenderness, ensuring the fudge isn’t dry or crumbly. It helps dissolve the sugar and cocoa for a silky base.
Butter brings lush fat and a satisfyingly smooth mouthfeel, while a touch of salt enhances all the sweet and chocolate notes.
These morsels melt into extra-velvety ribbons of chocolate throughout the fudge, reinforcing that classic hot chocolate taste and structure.
A splash of vanilla adds warmth and depth, balancing out the richness and rounding out the flavors for a more complex, bakery-style fudge.
Just a small amount gives a cool, refreshing lift that’s reminiscent of candy canes. It’s the signature “peppermint” in our fudge.
More than just seasoning, a pinch of salt heightens the chocolate’s natural flavors and keeps the sweetness from feeling one-dimensional.
These crunchy bits provide a festive pop of color and texture. Some go into the fudge itself, while extra pieces become a pretty decorative topping.
These soft, pillowy clouds add another playful texture. They toast up slightly against the cool fudge surface, evoking that nostalgic hot-cocoa vibe.
Let’s roll up our sleeves and craft this dreamy peppermint fudge step by step. Each instruction is designed to guide you through the process smoothly so you end up with perfect, uniform squares every single time.
1. Prepare a 9x9-inch square baking dish by lining it with parchment paper, leaving some overhang on the sides. This simple trick ensures your fudge won’t stick, and you’ll be able to lift it out effortlessly once it’s set.
2. In a medium saucepan, combine the granulated sugar, unsweetened cocoa powder, whole milk, and salted butter. Place the pan over medium heat and stir continuously until the butter melts and the mixture comes to a gentle boil, making sure no dry pockets of cocoa remain.
3. Once the mixture reaches a rolling boil, reduce to a simmer and continue cooking for about 5 minutes, stirring constantly. You’re looking for the mixture to thicken slightly and become glossy—it should coat the back of your spoon.
4. Remove the saucepan from the heat and immediately stir in the semisweet chocolate chips. The residual heat will melt the chips; keep stirring until they’re completely incorporated and the mixture is luxuriously smooth.
5. Add the vanilla extract, peppermint extract, and salt, then mix well to ensure every drop of fudge carries that full spectrum of flavor.
6. Gently fold in the crushed peppermint candies or candy canes, reserving a small amount for the top. This step infuses the fudge with crunchy minty surprises.
7. Pour the warm fudge mixture into your prepared baking dish and spread it out evenly using a spatula. Smooth the surface and then sprinkle the reserved crushed peppermint candies for a festive finish.
8. If you’re using mini marshmallows, scatter them over the top now, gently pressing them in slightly so they nestle into the fudge before it sets.
9. Allow the fudge to cool at room temperature for about 2 hours, or speed up the process by placing it in the refrigerator for 1 hour. It should feel solid to the touch when ready.
10. Once set, use the parchment overhang to lift the entire slab out of the dish. Transfer to a cutting board and slice into 16 neat squares using a sharp knife (wipe the blade between cuts for the cleanest edges).
After all that delightful prep and setting time, serving your Hot Chocolate Peppermint Fudge is where the real fun begins. Whether you’re hosting a holiday buffet, sending seasonal care packages, or simply craving an afternoon treat, these suggestions will help you present and enjoy your fudge in style.
Once you’ve poured your heart into making the fluffiest, creamiest fudge, you’ll want to keep it tasting its absolute best. Proper storage ensures the squares retain their soft texture, minty crunch, and balanced sweetness for days (or weeks) to come. Whether you’re stashing leftovers for snacking or prepping in advance for holiday gifting, follow these tips to maintain that just-made quality.
What a journey—from mixing that simple quartet of sugar, cocoa powder, milk, and butter to slicing into a slab of gleaming, peppermint-studded perfection! We’ve explored every corner of this recipe: the key ingredients that build depth and creaminess, the step-by-step method to coax each flavor out just right, and the many ways you can serve and store your fudge to share with friends, family, or your own sweetest cravings. This Hot Chocolate Peppermint Fudge truly captures everything we love about holiday gatherings. With minimal prep time (just 15 minutes of hands-on work) and an easy 10 minutes of bubbling action on the stove, you’ll end up with 16 gorgeous squares, each about 200 calories of pure festive indulgence.
I hope you’ll print out this guide and tuck it safely into your recipe binder, or pin it to a holiday board for quick reference when the cookie cravings hit. You can save it for the next big party, slip it into a lunchbox surprise, or simply keep a plateful on your counter for moments when you need a minty-chocolate hug. Below this article, you’ll find a handy FAQ section to troubleshoot any fudge-making questions that might come up.
If you decide to try this recipe, I’d love to hear how it turns out! Leave a comment with your favorite peppermint candy swap, or ask any questions if you need extra tips on getting that perfect glossy finish. Your feedback, stories, and little kitchen triumphs are what make sharing recipes so rewarding. Happy fudge-making!
This luscious Hot Chocolate Peppermint Fudge offers a dreamy blend of rich chocolate, refreshing peppermint, and a hint of sweetness that’s perfect for the holidays.

Ciao, beautiful souls! I'm Isabella Romano, and welcome to my kitchen where comfort meets creativity, and every recipe is designed to make your everyday cooking feel a little more special.