
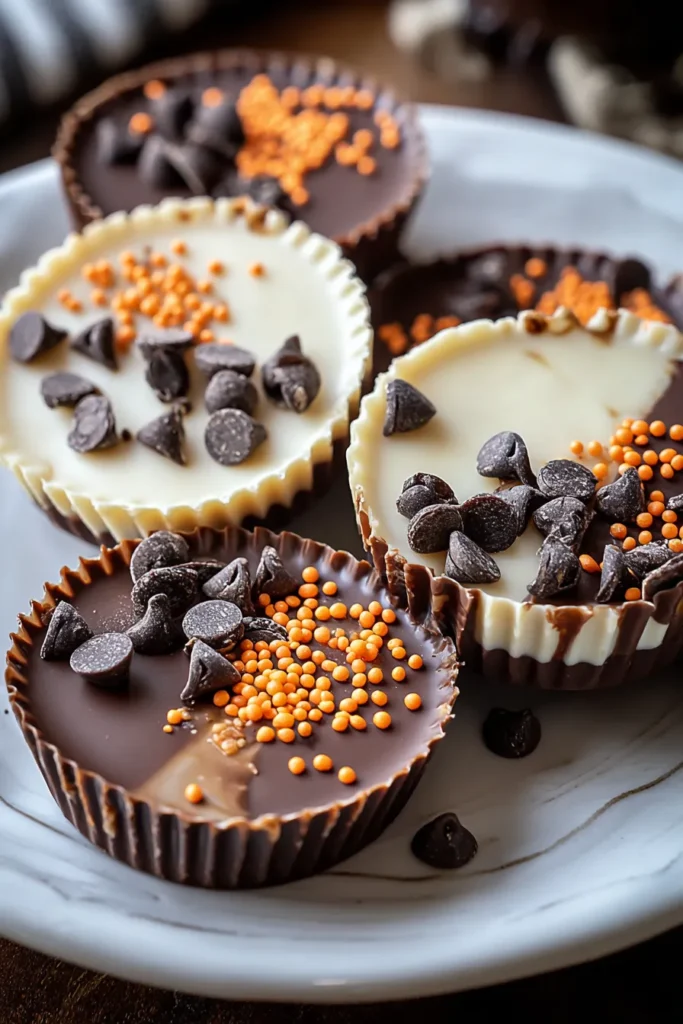
This Halloween season, it’s the perfect opportunity to whip up something delightfully sweet that captures all the spooky fun and festive colors of the holiday. Halloween Peanut Butter Cups bring together rich semi-sweet chocolate and creamy peanut butter in bite-sized treats that feel both classic and playful. With vibrant sprinkles and whimsical decorations, each cup is a tiny celebration of October’s favorite holiday. From the moment you unwrap the chocolate shell, you’ll encounter the satisfying snap of smooth chocolate followed by the indulgent creaminess of the peanut butter center. A warm, cocoa-scented kitchen invites everyone to gather around as you melt down the chocolate, and mixing that creamy peanut butter center fills the room with an irresistible sense of anticipation. Whether you’re planning a Halloween party, creating a special treat for the kids, or just craving a homemade dessert that stands out, these peanut butter cups are both easy and impressive. With beginner-friendly steps and simple pantry ingredients, you’ll have a trayful of spooky sweets ready in no time.
Baking these treats feels like sharing a slice of pure nostalgia. I still remember the first time I tucked a handful of these cups into a decorated tin, ready to hand out at my neighborhood block party. The way my friends’ eyes lit up at the sight of those festive orange and black sprinkles—it was magical. Over the years, I’ve experimented with adding a pinch of sea salt, using dark chocolate, and even dusting the tops with edible glitter for an extra haunted shimmer. Every variation has its own charm, but the base recipe always steals the show. These cups are not just a dessert; they are conversation starters, memory makers, and a sweet bridge between childhood excitement and grown-up taste buds. So grab your mini muffin tin, gather your ingredients, and let’s dive into a spooktacular kitchen adventure that will have everyone asking for more.
Before we get our hands dirty, let’s talk about the stars of this show. Each ingredient plays a crucial role in creating that perfect balance of chocolatey richness, creamy texture, and festive flair.
Provide the sturdy, slightly bittersweet shell that counters the sweetness of the peanut butter. Melts smoothly to form the cup base and offers a classic chocolate flavor.
Create a milky, sweet top layer that contrasts the darker base. Melts to a silky consistency, perfect for drizzling or fully covering the peanut butter filling.
Offers a luscious, nutty center that fuses beautifully with chocolate. Its smooth consistency ensures the filling is soft and indulgent.
Adds richness and helps achieve a silky texture in the peanut butter mixture. Melting it together with the peanut butter ensures a smooth blend.
Sweetens the peanut butter filling and helps thicken it slightly, ensuring that each cup holds its shape while remaining delightfully creamy.
Enhances all the flavors, tying the chocolate and peanut butter notes together with a subtle aromatic depth.
Provide the festive finishing touch. A colorful mix of shapes and textures brings that unmistakable Halloween spirit to every bite.
Let’s walk through the process of building these mini masterpieces, step by step. You’ll see just how easy it is to transform simple ingredients into show-stopping Halloween treats.
1. Line a clean mini muffin tin with twelve paper liners, making sure each liner sits snugly in its spot to support your chocolate cups.
2. In a microwave-safe bowl, add the semi-sweet chocolate chips and heat in 30-second intervals, stirring thoroughly after each burst. Continue until the chocolate is fully melted and smooth, with no lumps or grainy bits.
3. Using a small spoon, drop approximately 1 teaspoon of melted chocolate into each liner. Gently spread it up the sides of the liner to form an even chocolate cup. Place the tray in the refrigerator for about 20 minutes, or until the chocolate firms up completely.
4. In a separate bowl, combine the creamy peanut butter, melted butter, powdered sugar, and vanilla extract. Stir vigorously until you achieve a smooth and creamy filling, free of any gritty texture.
5. Add a dollop of the peanut butter mixture into each chilled chocolate cup, then use the back of a spoon to gently flatten the top, ensuring an even layer.
6. Melt the white chocolate chips in the same manner you did the semi-sweet chocolate—30-second bursts in the microwave, stirring until velvety smooth.
7. Spoon a small amount of the melted white chocolate over each peanut butter filling, completely covering it and sealing the edges.
8. Top each cup with Halloween sprinkles or edible decorations, pressing them in gently so they adhere to the white chocolate.
9. Return the tray to the refrigerator and chill for 1 hour, or until every layer is fully set and firm to the touch.
10. When ready, carefully peel off each paper liner and place the cups on a festive platter. Serve at room temperature for the best flavor.
Once these adorable cups are set and ready, it’s time to think about presentation and pairings. Serving them creatively can turn a simple dessert into the centerpiece of your Halloween spread.
After all that hard work, you’ll want to keep these treats fresh, tasty, and ready for spoiling friends and family. Proper storage will help them maintain their shape and flavor for days to come.
Storing homemade peanut butter cups properly ensures they remain firm, flavorful, and visually appealing. The key is to avoid temperature fluctuations and excess moisture. First, transfer the set cups to an airtight container to prevent them from absorbing any fridge odors. If you’re storing multiple layers, place a sheet of parchment paper between them to avoid sticking. For longer-term storage, wrap each cup individually in a small square of plastic wrap before arranging in the container and freeze. When you’re ready to indulge, simply thaw in the refrigerator for a few hours, then bring to room temperature for that ideal bite. If you plan to serve them over the next few days, keep the container on a middle shelf in the fridge where the temperature is most consistent. Avoid placing them near the door or vegetable drawer to prevent unwanted temperature shifts. With these tips, you can make a big batch ahead of time and still enjoy fresh treats throughout the week.
Spooktacular and easy to make, these Halloween Peanut Butter Cups bring together the perfect balance of rich chocolate, creamy peanut butter, and festive flair. We’ve walked through every single step—from melting chocolate in short bursts to decorating each cup with colorful sprinkles—so even beginner bakers will feel confident tackling this recipe. You’ve learned how to assemble the taproot of this treat, discovered creative serving ideas like pairing with spiced hot cocoa or setting up a DIY station, and figured out storage hacks to keep your cups fresh for days. Don’t forget the twists: a pinch of sea salt in the filling or using dark chocolate for a bolder flavor. Armed with these tips, you can double the batch for a party, make them ahead of time, or gift them in adorable cellophane bags.
Feel free to print this article and save it for later—you’ll find a handy FAQ section below to answer any lingering questions about ingredient swaps, texture tweaks, and more. I’m always excited to hear how your Halloween baking adventures turn out, so please share your comments, questions, or feedback. Whether you need help troubleshooting a melty chocolate issue or you’ve come up with a fun new decoration idea, let me know. Happy haunting in the kitchen, and enjoy every single delicious, spooky bite!
These Halloween Peanut Butter Cups are a sweet symphony of rich chocolate and creamy peanut butter, topped with festive sprinkles to bring the holiday spirit to life!

Ciao, beautiful souls! I'm Isabella Romano, and welcome to my kitchen where comfort meets creativity, and every recipe is designed to make your everyday cooking feel a little more special.