
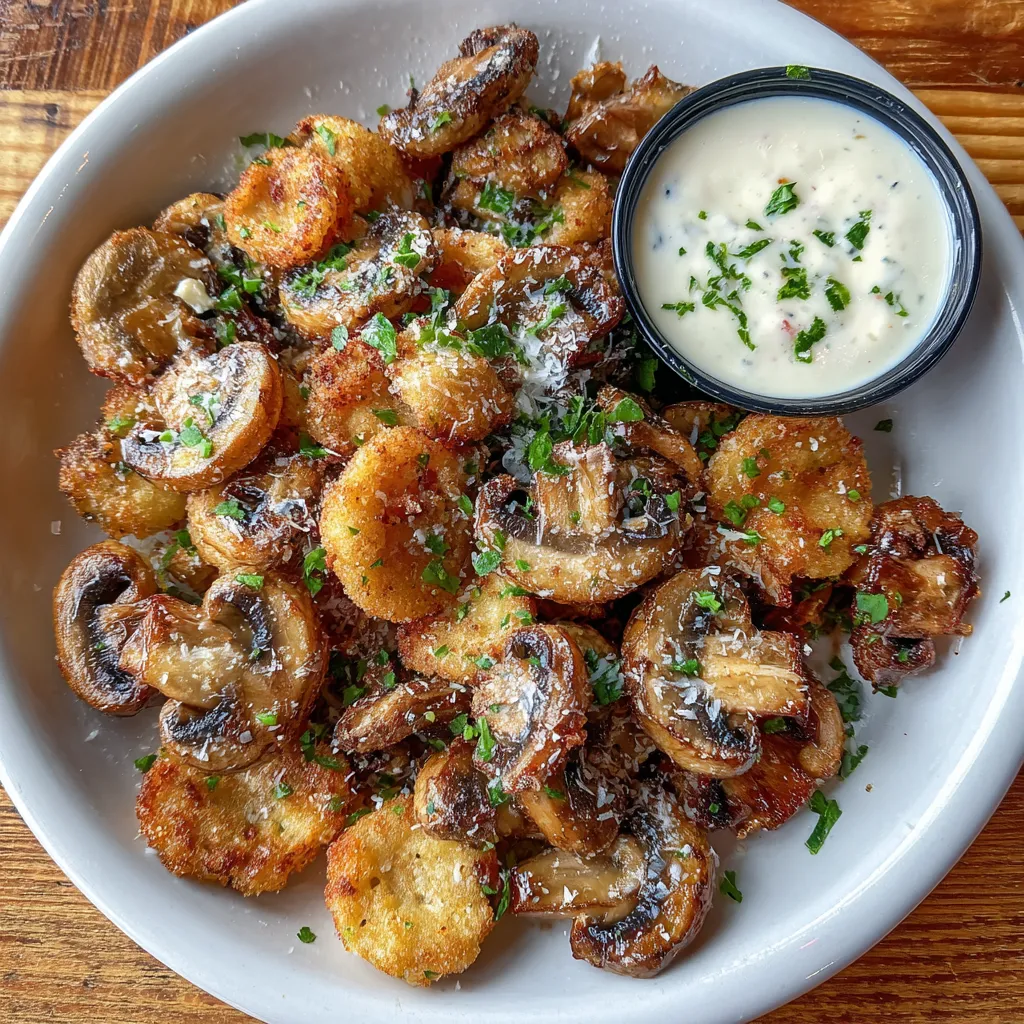
There’s nothing quite like digging into a plate of golden, crispy breaded mushroom slices dipped in cool, creamy ranch. Each bite crackles with a seasoned panko coating before giving way to a tender, earthy center. Whether you’re hosting a casual game night or craving a satisfying snack, these fried mushrooms bring irresistible crunch and flavor in every bite. Ready to turn humble fungi into the star appetizer of any gathering?
Gathering the right ingredients ensures each mushroom slice crisps up perfectly and comes alive with flavor. Here’s what you’ll need:
Transforming simple mushrooms into crunchy delights is easier than you might think. You’ll set up a three-step breading station, monitor oil temperature for perfect frying, and end up with golden slices that stay tender inside. Follow these steps for crispy, restaurant-quality mushrooms at home.
1. Begin by preparing the mushrooms. Gently wipe each one with a damp cloth to remove dirt, then slice into even, approximately 1/4-inch thick pieces for consistent cooking.
2. Set up a breading station with three shallow bowls: bowl one for flour, garlic powder, onion powder, paprika, salt, and pepper; bowl two for beaten eggs; and bowl three for breadcrumbs.
3. Coat each mushroom slice in the seasoned flour mixture, making sure it’s fully covered, then shake off any excess to prevent a gummy coating.
4. Dip the floured slice into the beaten egg, allowing extra egg to drip off so the coating isn’t too thick, ensuring a crisp finish.
5. Press the egg-coated mushroom into the breadcrumbs, gently pressing to help them adhere, and repeat until all slices are breaded and ready to fry.
6. Heat about 1/2 inch of vegetable oil in a large skillet over medium-high heat. Test the oil by dropping in a small bread cube: it should sizzle and rise immediately.
7. Fry the mushrooms in batches, avoiding overcrowding, for 3–4 minutes per side or until each slice is golden brown and crispy.
8. Use a slotted spoon to transfer the fried mushrooms to a paper towel–lined plate, letting excess oil drain for a lighter, crispier bite.
9. Serve the fried mushrooms warm alongside a cup of ranch dressing for dunking and enjoy the ultimate crunchy, savory snack.
These golden, crispy mushroom slices shine best when presented thoughtfully—whether as a solo snack, part of a spread, or piled atop a salad. Serving them at the right temperature and pairing them with complementary flavors ensures every bite feels special. Below are a few creative ways to plate and serve your fried mushrooms so they steal the show at any gathering or cozy night in.
Achieving restaurant-quality fried mushrooms at home is all about nailing the textures and flavors. From experimenting with seasonings to choosing the right dip, these small adjustments make a world of difference. Keep your breading dry, your oil at an even temperature, and feel free to tailor the spices and sauces to your taste. With these friendly tips in mind, you’ll consistently end up with crunchy, flavorful bites that disappear in seconds!
Whether you’ve made a feast or just cooked extra for tomorrow’s cravings, proper storage keeps your fried mushrooms as flavorful as on day one. Cooling, packing, and reheating the mushrooms correctly ensures they stay crispy and don’t turn soggy. Below are a few simple methods to store and revive your leftovers so they’re ready whenever you need a quick crunchy snack.
Got questions about perfecting your fried mushrooms? Here are quick answers to the most common queries:
Total time is about 50–60 minutes: 10 minutes to clean and slice mushrooms, 10 minutes to set up the breading station, 15 minutes to bread the mushrooms, and 15–20 minutes frying in batches.
Gently wipe each mushroom with a damp cloth or paper towel, avoiding rinsing under running water, which can make mushrooms absorb moisture and become soggy. Clean just before slicing to prevent browning.
Use medium-high heat and test with a small piece of bread: a single bread cube should sizzle and rise to the surface within a few seconds. Aim for oil temperature around 350–375°F (175–190°C). If the oil smokes heavily, reduce the heat slightly.
Press the breadcrumbs firmly onto each slice, shake off excess flour before the egg wash, fry in a single layer without overcrowding, and maintain a consistent oil temperature. Panko breadcrumbs yield a lighter, crunchier coating than traditional fine breadcrumbs.
Yes, substitute the all-purpose flour with a gluten-free all-purpose blend, swap regular breadcrumbs for gluten-free panko or crushed gluten-free crackers, and ensure the ranch dressing is certified gluten-free.
Store cooled mushrooms in an airtight container in the refrigerator for up to 2 days. Reheat on a baking sheet in a 350°F oven for 8–10 minutes or in an air fryer at 350°F for 3–5 minutes to restore crispiness. Avoid microwaving as it will make them soggy.
You can pre-slice and dry-clean the mushrooms up to a day in advance. Store them loosely covered in the refrigerator on a paper towel–lined tray. Breading is best done just before frying to prevent sogginess.
Buffalo sauce, spicy mayo made with sriracha and mayo, garlic aioli, honey mustard, barbecue sauce, or even a tangy yogurt dip can all complement the savory, crispy mushrooms and provide a different flavor profile.
These fried sliced mushrooms with ranch hit the jackpot because they combine that unbeatable crunch of panko breading with tender, flavorful centers and the cool creaminess of ranch. The balanced seasonings—garlic, onion, paprika—ensure every bite bursts with savory goodness, while the straightforward breading station method keeps things fun and stress-free in the kitchen. Bookmark or print this recipe so you can whip up these crowd-pleasing snacks anytime, from spontaneous movie nights to laid-back gatherings. Let me know how yours turned out—drop a comment below if you have questions, tweaks, or just want to share how quickly they vanished!
Crispy, golden mushroom slices crackle as you bite, revealing tender centers seasoned with garlic, paprika, and onion. Dip each warm, crunchy piece into creamy ranch for a perfect flavor contrast.

Ciao, beautiful souls! I'm Isabella Romano, and welcome to my kitchen where comfort meets creativity, and every recipe is designed to make your everyday cooking feel a little more special.