
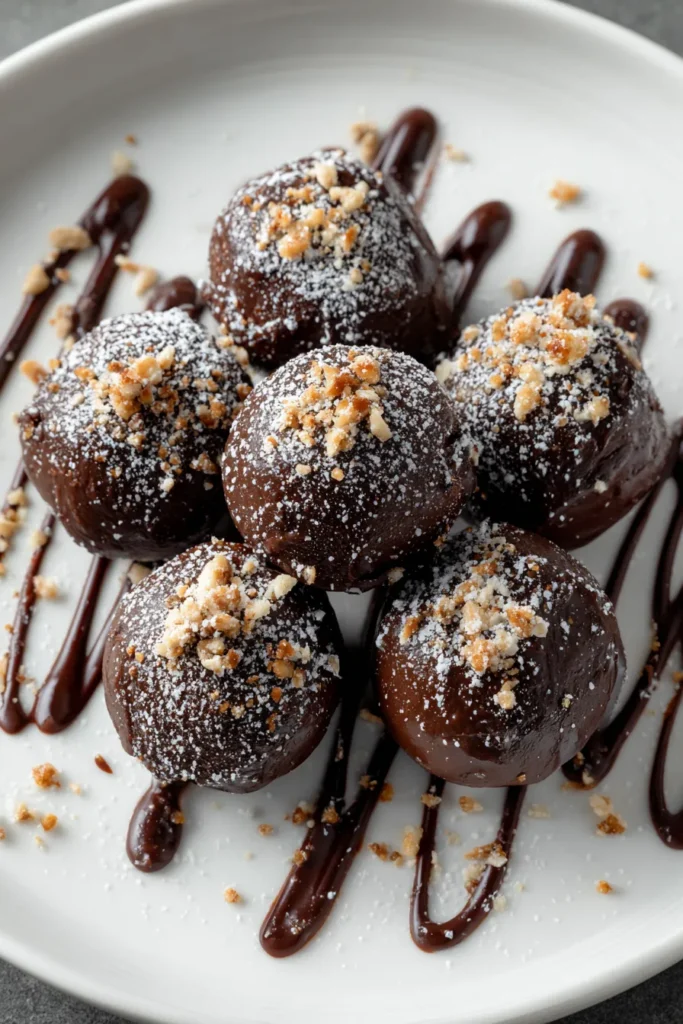
Every chocolate lover knows that sometimes you just need a bite-sized indulgence, and these decadent chocolate brownie truffles deliver that moment of bliss in every morsel. Rich and velvety chocolate truffles promise a burst of brownie goodness in every bite, blending deep cocoa notes with the fudgy, almost melt-in-your-mouth texture of your favorite brownies. These bite-sized spheres of joy are perfect whether you’re celebrating a special occasion, hosting a party, or simply craving a sweet pick-me-up on a quiet evening. There’s something incredibly satisfying about rolling creamy chocolate and crumbled brownie into a little ball and then dusting it in fine cocoa powder, creating a contrast of textures that’s equal parts luxurious and comforting.
The beauty of this recipe lies in its simplicity and beginner-friendly approach. With just 20 minutes of hands-on preparation, about 10 minutes of gentle melting and stirring, and a restful one-hour chill time, you can transform store-bought or homemade brownies into an elegant dessert that feels far more elaborate than it actually is. Each truffle carries roughly 450 calories, making it a rich treat best enjoyed in moderation—and trust me, it’s hard to stop at just one! Whether you’re an experienced home cook or stepping into the world of DIY desserts for the first time, this recipe will walk you through every step, ensuring you end up with perfectly uniform, deeply chocolatey truffles that will wow friends, family, and even yourself.
To make these irresistible brownie truffles, we keep things simple but high-impact. Each ingredient plays a crucial role in building flavor, texture, and that signature fudgy consistency. Here’s what you’ll need:
A cooled batch of your favorite brownies forms the base of these truffles. Whether they’re homemade or store-bought, their fudgy texture provides the chewiness and cake-like crumb that makes each bite so satisfying.
Chopped into small pieces, semi-sweet chocolate melts into a glossy, rich ganache when combined with cream. It enhances the chocolate profile without being overly sweet, balancing the brownie base.
This rich dairy component adds silkiness and helps bind the crumbled brownies and melted chocolate into a cohesive mixture. It’s the secret to that smooth, creamy center.
A small splash of vanilla extract brightens the deep chocolate notes, adding warmth and complexity to each truffle.
Used for dusting, unsweetened cocoa powder gives the truffles a beautiful matte finish and a slightly bitter edge, contrasting the sweet interior.
Crushed nuts, sprinkles, or coconut flakes add texture, color, and extra flavor. These little extras let you customize the truffles for holidays, parties, or gifts.
Let’s walk through the process of transforming simple ingredients into a stunning dessert. This method ensures each truffle is uniform, perfectly coated, and delightfully smooth.
1. Bake and Cool Brownies
Begin by baking a batch of your favorite brownies according to your chosen recipe. Whether homemade or store-bought, let them cool completely—this prevents excess moisture and ensures the truffles set properly.
2. Crumble Brownies
Crumble the cooled brownies into a large mixing bowl. Use your hands or a fork to break down any large chunks, aiming for a fine, even texture that will blend seamlessly with the ganache.
3. Melt Chocolate and Cream
In a small saucepan, combine the chopped semi-sweet chocolate and heavy cream. Place over medium-low heat and stir continuously until the chocolate is completely melted and the mixture is smooth and glossy.
4. Add Vanilla
Remove the saucepan from heat and stir in the vanilla extract. This step ensures the aroma and flavor of vanilla infuse evenly throughout the ganache.
5. Combine with Brownies
Pour the warm chocolate mixture over the crumbled brownies. Using a spatula, mix until well combined—the mixture should be sticky and easy to scoop.
6. Shape Truffles
Scoop small portions (about 1 tablespoon each) and roll into balls using your hands. Aim for uniform size so they set and coat evenly.
7. Dust with Cocoa
Place the cocoa powder in a shallow dish. Roll each ball in the powder until fully coated, tapping off any excess for a clean finish.
8. Add Optional Toppings
If desired, roll truffles in crushed nuts, sprinkles, or coconut flakes for extra texture and visual appeal.
9. Arrange on Tray
Line a tray with parchment paper and arrange the coated truffles in neat rows, leaving a little space between each.
10. Chill to Set
Refrigerate for at least 1 hour or until the truffles are firm to the touch.
11. Serve and Enjoy
Serve chilled or at room temperature and savor the rich, chocolatey goodness!
When it comes to serving these brownie truffles, presentation and pairing can elevate them from simple treats to show-stopping desserts. Whether you’re hosting a cozy gathering or assembling a festive platter, these suggestions will help you showcase the truffles in style while enhancing their flavor profile.
Serve your truffles alongside a bold espresso or a rich hot chocolate. The contrast between the creamy truffle and the warm, bitter-sweet drink creates a harmonious balance that delights the palate with each sip and bite.
Arrange truffles on a wooden board alongside fresh berries, mint sprigs, and a small bowl of whipped cream or caramel sauce. The pop of color and variety of textures will make your dessert display visually stunning and irresistible.
Place truffles in a decorative box or tin, nestling them in parchment or tissue paper. Tie with a ribbon for a charming gift that friends, family, or coworkers will adore and remember.
Offer one or two truffles as a bite-sized finale to a multi-course meal. Their rich, fudgy interior is a wonderful counterpoint to lighter mains and leaves guests feeling satisfied rather than overly full.
Proper storage is key to maintaining the perfect texture and flavor of these brownie truffles. Whether you’re making a big batch for an event or keeping extras for yourself, follow these tips to ensure they stay as fresh and luscious as the moment you scooped them.
Store truffles in an airtight container in the refrigerator. This will keep them firm and prevent the cocoa dusting or toppings from absorbing moisture. They’ll stay fresh for up to one week when cooled properly.
For longer storage, freeze truffles on a parchment-lined tray until solid, then transfer them to a sealed freezer bag. They can be frozen for up to one month. Thaw in the refrigerator for a few hours before serving.
If you plan to enjoy truffles within a day or two, you can keep them at room temperature in a cool, dry spot, away from direct sunlight. Place them in a shallow box lined with parchment and seal with a loose lid.
When stacking truffles in a container, place a sheet of parchment or wax paper between layers. This prevents sticking and preserves the neat appearance of each coated ball.
What began as simple brownies has transformed into bite-sized spheres of pure indulgence—Decadent Chocolate Brownie Truffles that blend the fudgy comfort of brownies with the silky richness of chocolate ganache. We’ve taken you through every step, from gathering six core ingredients to rolling, dusting, and chilling these little gems. Whether you’re a beginner seeking an easy dessert project or a seasoned baker looking for a crowd-pleasing treat, this recipe delivers on flavor, texture, and visual appeal. The subtitle says it all: rich and velvety chocolate truffles that promise a burst of brownie goodness in every bite. And with preparation details like only 20 minutes of active work, 10 minutes of gentle cooking, and a one-hour rest time, you’ll have an elegant dessert ready in under two hours. Each truffle clocks in at about 450 calories, so be ready to savor every decadent mouthful.
You can print this article and save it for later use, whether you’re planning a party, gift-giving, or simply craving a homemade indulgence on a quiet night in. Feel free to revisit the steps, tweak the optional toppings, and experiment with different brownie flavors or chocolate percentages for a unique twist. Below, you’ll find a FAQ section that addresses common questions and troubleshooting tips—so you can confidently dive into creating these dreamy truffles. If you give this recipe a try, I would love to hear your reflections: did you swap in dark chocolate for extra depth? How did your toppings turn out? Drop your comments, questions, or feedback—let’s keep the conversation going and help each other make the ultimate brownie truffle experience.
These decadent brownie truffles blend rich chocolate flavors with the fudgy texture of brownies, creating a delightful treat perfect for any occasion.

Ciao, beautiful souls! I'm Isabella Romano, and welcome to my kitchen where comfort meets creativity, and every recipe is designed to make your everyday cooking feel a little more special.